Category Archives: Arduino

NeoPixel Purse

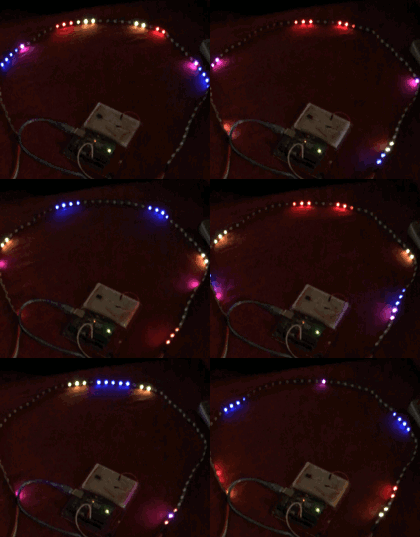
I finished the code for the purse I was working on. I included a push button on an Arduino Nano to cycle through the colors. There are 16 different choices. Eight of the choices are animations.

NeoPixel Purse

I believe I saw this design on Adafruit.com. I could not find it again on their site, nor could I find it by searching on Google.

I invented some code to go with this purse so Linda would be able to choose what she wanted it to look like at the time.

#include <Adafruit_NeoPixel.h>

#define PIN 9
#define BUTTON_PIN 2
#define number_of_pixels 34
// Parameter 1 = number of pixels in strip
// Parameter 2 = pin number (most are valid)
// Parameter 3 = pixel type flags, add together as needed:
Adafruit_NeoPixel strip = Adafruit_NeoPixel(number_of_pixels, PIN, NEO_GRB + NEO_KHZ800);

bool oldState = HIGH;
int showType = 0;
long time_counter = 0;
long increment = 25000;
int chase_position = 0;
int old_chase_position = 0;

void setup() {
  pinMode(BUTTON_PIN, INPUT_PULLUP);
  strip.begin();
  strip.setBrightness(15); // LOW brightness
  for (uint16_t i = 0; i < number_of_pixels; i++) {
       strip.setPixelColor(i, strip.Color(255,0,0));
      }
  strip.show();
}

void loop() {
    // Get current button state.
  bool newState = digitalRead(BUTTON_PIN);

  // Check if state changed from high to low (button press).
  if (newState == LOW && oldState == HIGH) {
    // Short delay to debounce button.
    delay(20);
    // Check if button is still low after debounce.
    newState = digitalRead(BUTTON_PIN);
    if (newState == LOW) {
      showType++;
      if (showType > 15)
        showType=0;
      startShow(showType);
    }
  }

  // Set the last button state to the old state.
  oldState = newState;

  if(time_counter == increment) {
    time_counter = 0;
    check_running(showType);
  }
  time_counter += 1;
}

// red purple blue white pink magenta green
// all theater chase
// rainbow cycle all at a time.
// rainbow chase like it already has but continuous

void startShow(int i) {
  switch(i){
    case 0: colorWipe(strip.Color(255, 0, 0));    // Red
            break;
    case 1: colorWipe(strip.Color(128, 0, 128));  // Purple
            break;
    case 2: colorWipe(strip.Color(0, 0, 255));  // Blue
            break;
    case 3: colorWipe(strip.Color(128, 128, 128));  // White
            break;
    case 4: colorWipe(strip.Color(255, 80, 80));  // Pink
            break;
    case 5: colorWipe(strip.Color(255, 0, 255));  // Magenta
            break;
    case 6: colorWipe(strip.Color(0, 128, 0));  // Green
            break;
    case 7: theaterChase2(strip.Color(255, 0, 0));    // Red
            break;
    case 8: theaterChase2(strip.Color(128, 0, 128));  // Purple
            break;
    case 9: theaterChase2(strip.Color(0, 0, 255));  // Blue
            break;
    case 10: theaterChase2(strip.Color(128, 128, 128)); // White
            break;
    case 11: theaterChase2(strip.Color(255, 128, 128));  // Pink
            break;
    case 12: theaterChase2(strip.Color(255, 0, 255));  // Magenta
            break;
    case 13: theaterChase2(strip.Color(0, 128, 0));  // Green
            break;
    case 14: rainbow1();
            break;
    case 15: rainbowCycle(1);
            break;
  }
}

void check_running(int i) {
  switch(i){
    case 0: break;
    case 1: break;
    case 2: break;
    case 3: break;
    case 4: break;
    case 5: break;
    case 6: break;
    case 7: theaterChase2(strip.Color(255, 0, 0));    // Red
            break;
    case 8: theaterChase2(strip.Color(128, 0, 128));  // Purple
            break;
    case 9: theaterChase2(strip.Color(0, 0, 255));  // Blue
            break;
    case 10: theaterChase2(strip.Color(128, 128, 128)); // White
            break;
    case 11: theaterChase2(strip.Color(255, 80, 80));  // Pink
            break;
    case 12: theaterChase2(strip.Color(255, 0, 255));  // Magenta
            break;
    case 13: theaterChase2(strip.Color(0, 128, 0));  // Green
            break;
    case 14: break;
    case 15: rainbowCycle(1);
            break;
  }
}

// Fill the LEDs with a color
void colorWipe(uint32_t c) {
  for(uint16_t i=0; i<strip.numPixels(); i++) {
    strip.setPixelColor(i, c);
    strip.show();
  }
}

void rainbow1() {
  for(uint16_t i=0; i< strip.numPixels(); i++) {
      strip.setPixelColor(i, Wheel((i * 256 / strip.numPixels()) & 255));
  }
    strip.show();
}

// Slightly different, this makes the rainbow equally distributed throughout
void rainbowCycle(uint8_t wait) {
  uint16_t i, j;
  j = 0;
  for(j=0; j<256*5; j++) { // 5 cycles of all colors on wheel
    for(i=0; i< strip.numPixels(); i++) {
      strip.setPixelColor(i, Wheel(((i * 256 / strip.numPixels()) + j) & 255));
    }
    strip.show();
    delay(wait);
  }
}

// Theater-style crawling lights -edited-
void theaterChase2(uint32_t c) {
  for (int i=0; i < strip.numPixels(); i=i+3) {
    strip.setPixelColor(i+old_chase_position, 0);
  }
  for (int i=0; i < strip.numPixels(); i=i+3) {
    strip.setPixelColor(i+chase_position, c);
  }
  strip.show();
  old_chase_position = chase_position;
  chase_position +=1;
  if (chase_position > 2) {
    chase_position = 0;
  }
}

// Input a value 0 to 255 to get a color value.
// The colours are a transition r - g - b - back to r.
uint32_t Wheel(byte WheelPos) {
  WheelPos = 255 - WheelPos;
  if(WheelPos < 85) {
    return strip.Color(255 - WheelPos * 3, 0, WheelPos * 3);
  }
  if(WheelPos < 170) {
    WheelPos -= 85;
    return strip.Color(0, WheelPos * 3, 255 - WheelPos * 3);
  }
  WheelPos -= 170;
  return strip.Color(WheelPos * 3, 255 - WheelPos * 3, 0);
}

I got the base code from the Arduino web site and changed it to do what I wanted. I didn’t like that the original code would cycle through animations and not allow you to select the next one until it was finished. I change that in the void loop() section by including a counter with an increment. When the counter meets the increment reset it to zero and go do the animation one more step. Mainly this is for the theater style crawling lights. If you want the lights to crawl faster make this number smaller. (I don’t mean in font size.)

Pixel Strip Boom

LED Strip Boom

Here’s another LED Strip animation.

I wanted to have the LEDs appear to come from the center of the strip in sets of different colors. The color sets also needed to move from the center at different velocities. I got the code running and then lost it in my list of sketches. I found it again today.

I chose Purple, Red, Yellow and Blue as the colors for this animation. There are other ways to get this sketch to run, but I used the type that checks the clock and compares a previously saved time to see if enough time has passed to move that particular color.

Here’s the full code. Then I’ll give an explanation.

<code>#include <adafruit_neopixel.h>
 
#define PIN 9
#define numberOfPixels 60
int out_interval = 20;
int boom_interval = 10;
int red_interval = 8;
int purple_interval = 75;
int out_count = 0;
int boom_count = 0;
int red_count = 0;
int purple_count = 0;
long outPreviousMillis = 0;
long boomPreviousMillis = 0;
long redPreviousMillis = 0;
long purplePreviousMillis = 0;
unsigned long currentMillis;
Adafruit_NeoPixel strip = Adafruit_NeoPixel(numberOfPixels, PIN, NEO_GRB + NEO_KHZ800);
 
void setup() {
  strip.begin();
  strip.setBrightness(5); // LOW brightness
  allOff();
  strip.show(); // Initialize all pixels to 'off'
}
 
 
void loop() {
  currentMillis = millis();
    tracerout();
    boom();
    redBoom();
    purpleBoom();
    strip.show();
}
 
void boom() {
  if(currentMillis - boomPreviousMillis > boom_interval) {
    boomPreviousMillis = currentMillis;
  if(boom_count>numberOfPixels/2+1) {
    boom_count=0;
  }else{
    boom_count++;
  }
  }
  strip.setPixelColor(numberOfPixels/2+boom_count-1, strip.Color(0,0,0));
  strip.setPixelColor(numberOfPixels/2-boom_count+1, strip.Color(0,0,0));
  strip.setPixelColor(numberOfPixels/2+boom_count, strip.Color(255,255,0));
  strip.setPixelColor(numberOfPixels/2-boom_count, strip.Color(255,255,0));
 
}
 
void redBoom() {
  if(currentMillis - redPreviousMillis > red_interval) {
    redPreviousMillis = currentMillis;
  if(red_count>numberOfPixels/2+1) {
    red_count=0;
  }else{
    red_count++;
  }
  }
  strip.setPixelColor(numberOfPixels/2+red_count-1, strip.Color(0,0,0));
  strip.setPixelColor(numberOfPixels/2-red_count+1, strip.Color(0,0,0));
  strip.setPixelColor(numberOfPixels/2+red_count, strip.Color(255,0,0));
  strip.setPixelColor(numberOfPixels/2-red_count, strip.Color(255,0,0));
 
}
 
void purpleBoom() {
  if(currentMillis - purplePreviousMillis > purple_interval) {
    purplePreviousMillis = currentMillis;
  if(purple_count>numberOfPixels/2+1) {
    purple_count=0;
  }else{
    purple_count++;
  }
  }
  strip.setPixelColor(numberOfPixels/2+purple_count-1, strip.Color(0,0,0));
  strip.setPixelColor(numberOfPixels/2-purple_count+1, strip.Color(0,0,0));
  strip.setPixelColor(numberOfPixels/2+purple_count, strip.Color(255,0,255));
  strip.setPixelColor(numberOfPixels/2-purple_count, strip.Color(255,0,255));
 
}
 
void allOff() {
  for(int i=0; i<numberofpixels; i++)="" {="" strip.setpixelcolor(i,="" strip.color(0,0,0));="" }="" void="" tracerout()="" if(currentmillis="" -="" outpreviousmillis=""> out_interval) {
    outPreviousMillis = currentMillis;
  if(out_count>numberOfPixels/2+3) {
    out_count=0;
  }else{
    out_count++;
  }
  }
    strip.setPixelColor(numberOfPixels/2+out_count, strip.Color(0,0,255));
    strip.setPixelColor(numberOfPixels/2-out_count, strip.Color(0,0,255));
    if(out_count>2) {
      strip.setPixelColor(numberOfPixels/2-out_count+1, strip.Color(0,0,96));
      strip.setPixelColor(numberOfPixels/2-out_count+2, strip.Color(0,0,50));
      strip.setPixelColor(numberOfPixels/2-out_count+3, strip.Color(0,0,0));
      strip.setPixelColor(numberOfPixels/2+out_count-1, strip.Color(0,0,96));
      strip.setPixelColor(numberOfPixels/2+out_count-2, strip.Color(0,0,50));
      strip.setPixelColor(numberOfPixels/2+out_count-3, strip.Color(0,0,0));
    }
    else if(out_count<2) {
      strip.setPixelColor(numberOfPixels/2, strip.Color(0,0,96));
    }
    else
    {
      strip.setPixelColor(numberOfPixels/2, strip.Color(0,0,50));
      strip.setPixelColor(numberOfPixels/2+1, strip.Color(0,0,96));
      strip.setPixelColor(numberOfPixels/2-1, strip.Color(0,0,96));
    }
}
</numberofpixels;></adafruit_neopixel.h></code>


Per my usual way of doing things with RGB LED Strips, I am using Adafruit’s Adafruit_NeoPixel.h library and an Arduino UNO. I have set the brightness to 5 (very low) and am using pin 9. I am using an RGB LED Strip with 60 pixels.

I started coding for only one color to see if I could get the animation to spread our of the center of the strip toward both ends. The color is blue and there are three brightnesses of blue. This is called with tracerout();. The variables for the blue colors are prefixed with ‘out’. They are out_interval, out_count and outPreviousMillis.

Inside tracerout(), first the clock is checked. If the current time, in milliseconds, minus the previous time that was saved is a smaller number than how often I want the code to run (out_interval) then don’t run the code inside this function. I have out_interval set to 20 meaning unless twenty milliseconds have passed don’t run this part of the sketch which makes the blue lights appear to move.

What runs inside the tracerout() function is to check if the blue pixels have gone off the ends of the strip. If so, start them back at the center. If not, increase the counter that moves the blue lights toward the ends of the strip. Then display the blue lights.

There are three brightnesses of Blue and a blank, or zero, brightness of blue. They look like bright blue, medium blue, dim blue and off. The off erases a previous lighted pixel so you don’t have to blank the strip and then draw the new positions of blues.

There are three more similar functions to handle different colors at different speeds. boom() handles the Yellow color at a speed of 10, or twice the speed of Blue. redBoom() handles the Red color at a speed of 8. purpleBoom() handles Purple color at the slowest speed of 75.

They all check on the current time and compare it to the previous recorded time for their color. If enough time has passed then the position of the colors is updated with the new color. When a color position has changed turn off the pixel in the former position and light up the next pixel. This gives the illusion of motion.

My kids, and my wife, say to keep the brightness low. When it is higher it is not easy to look at.

Sparkle LED Strip

Sparkle LED Strip
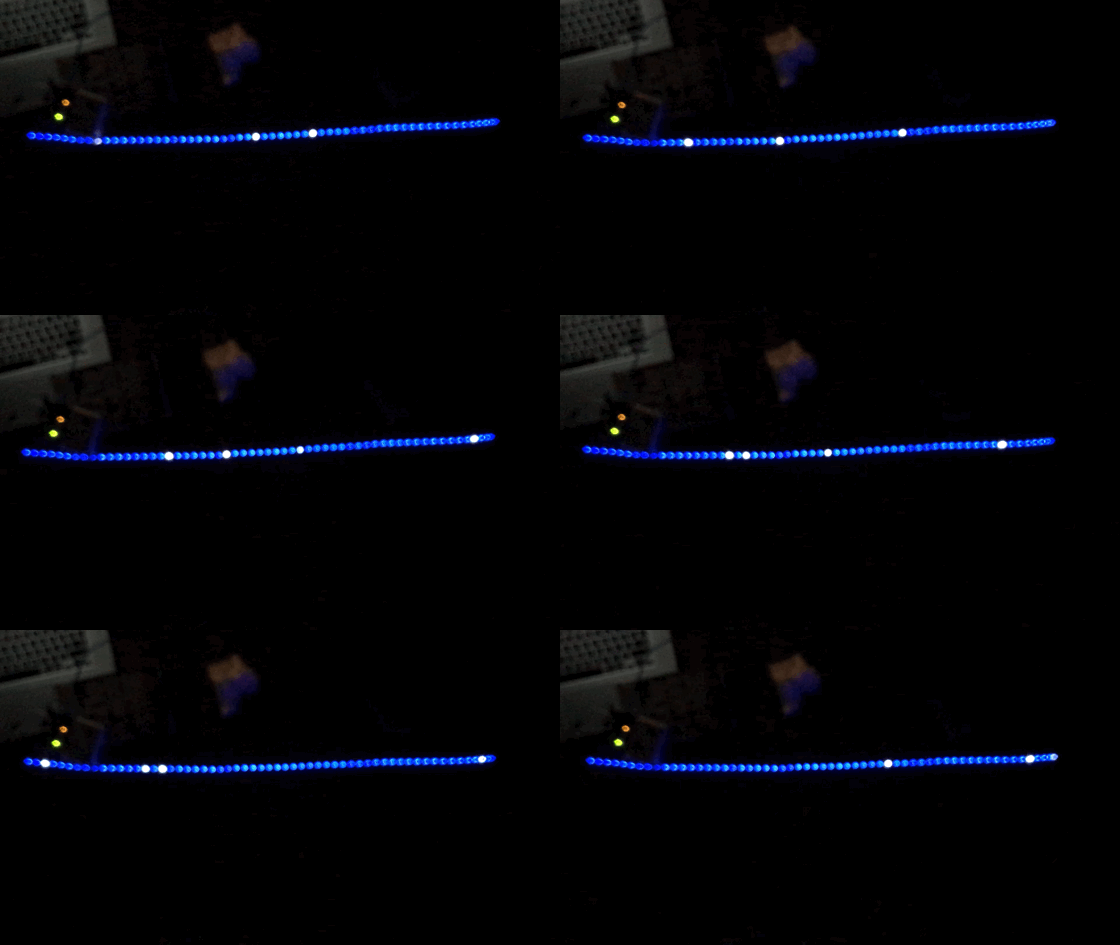
Here is a nice short sketch for an LED Strip animation with a sparkle added to it. This is the code: However the animated GIF does not have the random delay that is at the end of the sketch.

#include <Adafruit_NeoPixel.h>
 
#define PIN 9
#define numberOfPixels 60
int myRandom = 0;
Adafruit_NeoPixel strip = Adafruit_NeoPixel(numberOfPixels, PIN, NEO_GRB + NEO_KHZ800);
 
void setup() {
  strip.begin();
  strip.setBrightness(5); // LOW brightness
  allBlue();
  strip.show(); // Initialize all pixels to 'off'
}
 
void loop() {
  // put your main code here, to run repeatedly:
myRandom= random(numberOfPixels);
strip.setPixelColor(myRandom, strip.Color(255,255,255));
strip.show();
delay(5);
strip.setPixelColor(myRandom, strip.Color(0,0,50));
strip.show();
delay(random(25,75));
}
 
void allBlue() {
  for(uint16_t i=0; i<strip.numPixels(); i++) {
      strip.setPixelColor(i, strip.Color(0, 0, 50));
      strip.show();
  }
}


It is not very long at all. I like short code examples that give us something to look at.

It uses pin number 9 on an Arduino and Adafruit’s Adafruit_NeoPixel library.

#include <Adafruit_NeoPixel.h>
 
#define PIN 9
#define numberOfPixels 60

There is a random number and the brightness is very low. It is set to 5. You can increase the brightness as you wish. Brightness goes all the way up to 255. I find 255 way too bright. In fact, a brightness of 100 is still quite bright.

int myRandom = 0;
strip.setBrightness(5); // LOW brightness

In setup() the pixels are all set to a dark blue: strip.Color(0,0,50). This is called with allBlue();. While the code runs the default background is set to this dark blue. You can change it to any color you like.

void allBlue() {
  for(uint16_t i=0; i<strip.numPixels(); i++) {
      strip.setPixelColor(i, strip.Color(0, 0, 50));
      strip.show();
  }
}

myRandom is a random number representing each of the pixels on the strip of pixels. Since there are 60 pixels the random number is 0 to 59.

myRandom= random(numberOfPixels);

Once the myRandom number is chosen the pixel associated with that number is set to white for a tiny bit of time. You can see this time in the delay(5); command. After that, the pixel is set back to the blue color. Then there is a random time until the code repeats. Upon repeating the next random pixel is chosen to turn white for a short amount of time. And on it goes.

The random time that is chosen before the code repeats is set by the following line of code. It is setting a delay length of time from 25 through 74.

delay(random(25,75));

RGB LED Strips

I love the individually programmable NeoPixel strips and the animations that you can come up with when using an Arduino or other microcontroller. Adafruit taught me the basics and I took off from there.

My favorite animation from Adafruit is the “rainbowCycle” animation. It is included in the Adafruit_NeoPixel.h library examples inside the strandtest sketch. I took that example out of the sketch by deleting everything I didn’t need and renaming the sketch.
I didn’t like the direction that the animation flows from the far end of the strip to the end near the Arduino, so I figured a way to alter that.

Here is the edited version of the sketch.

#include <Adafruit_NeoPixel.h>
 
#define PIN 9
#define numberOfPixels 60
Adafruit_NeoPixel strip = Adafruit_NeoPixel(numberOfPixels, PIN, NEO_GRB + NEO_KHZ800);
 
void setup() {
  strip.begin();
  strip.setBrightness(5); // LOW brightness
  allOff();
  strip.show(); // Initialize all pixels to 'off'
}
 
void loop() {
rainbowCycle(0);
}
 
void allOff() {
  for(uint16_t i=0; i<strip.numPixels(); i++) {
      strip.setPixelColor(i, strip.Color(0, 0, 0));
      strip.show();
  }
}
 
// Slightly different, this makes the rainbow equally distributed throughout
// I divided the number of pixels by three and got 20. I set up that
// there are three equally distributed rainbows.
void rainbowCycle(uint8_t wait) {
  uint16_t i, j;
 
  for(j=0; j<256*5; j++) { // 5 cycles of all colors on wheel
    for(i=0; i< 20; i++) {
      strip.setPixelColor(19-i, Wheel(((i * 256 / 20) + j) & 255));
      strip.setPixelColor(19-i+20, Wheel(((i * 256 / 20) + j) & 255));
      strip.setPixelColor(19-i+40, Wheel(((i * 256 / 20) + j) & 255));
    }
    strip.show();
    delay(wait);
  }
}
 
// Input a value 0 to 255 to get a color value.
// The colours are a transition r - g - b - back to r.
uint32_t Wheel(byte WheelPos) {
  if(WheelPos < 85) {
   return strip.Color(WheelPos * 3, 255 - WheelPos * 3, 0);
  } else if(WheelPos < 170) {
   WheelPos -= 85;
   return strip.Color(255 - WheelPos * 3, 0, WheelPos * 3);
  } else {
   WheelPos -= 170;
   return strip.Color(0, WheelPos * 3, 255 - WheelPos * 3);
  }
}


The original section in the sketch looks like this:

void rainbowCycle(uint8_t wait) {
uint16_t i, j;
 
for(j=0; j<256*5; j++) { // 5 cycles of all colors on wheel
for(i=0; i< strip.numPixels(); i++) {
strip.setPixelColor(i, Wheel(((i * 256 / strip.numPixels()) + j) & 255));
}
strip.show();
delay(wait);
}
}


The original code has the rainbow colors spread evenly over the length of the LED strip and cycles the colors from the far end toward the Arduino.

The strip has 60 pixels and I wanted to have the animation appear to flow from the Arduino toward the far end. I also wanted the rainbow to be spread evenly three times over the length of the LED strip.

All of the changes I needed to make are in this section of code:

for(i=0; i< strip.numPixels(); i++) {
strip.setPixelColor(i, Wheel(((i * 256 / strip.numPixels()) + j) & 255));
}


First of all, to make the animation run in the opposite direction I just put “59-” in front of the “i” where it says “strip.setPixelColor(i, Wheel…”. It looks like:

for(i=0; i< strip.numPixels(); i++) {
strip.setPixelColor(59-i, Wheel(((i * 256 / strip.numPixels()) + j) & 255));
}

Yes, I could have had the for loop count down, but adding three characters was much easier. Also, “for(i=strip.numPixels()-1; i > -1; i–)” doesn’t seem to work and trouble shooting it would take longer than just adding three characters.

Instead of 59 I could have used strip.numPixels()-1. I was just making it easier for me with the strip I have.

To get three evenly distributed rainbows across the 60 NeoPixels I had to divide the total number (60) by three. So, I have three sets of twenty.

The three sets are separated out by i, i+20 and i+40. The count goes from 0 to 19, which is twenty numbers. To make the animation run backwards I had to put “19-” in front of the “i”. The section of code looks like:

for(i=0; i< 20; i++) {
strip.setPixelColor(19-i, Wheel(((i * 256 / 20) + j) & 255));
strip.setPixelColor(19-i+20, Wheel(((i * 256 / 20) + j) & 255));
strip.setPixelColor(19-i+40, Wheel(((i * 256 / 20) + j) & 255));
}

In the void loop() I called rainbowCycle(0);. The zero means no delay. I wanted it to run as quickly as possible on the Arduino UNO.

Here, again, is the final sketch.

#include <Adafruit_NeoPixel.h>
 
#define PIN 9
#define numberOfPixels 60
Adafruit_NeoPixel strip = Adafruit_NeoPixel(numberOfPixels, PIN, NEO_GRB + NEO_KHZ800);
 
void setup() {
  strip.begin();
  strip.setBrightness(5); // LOW brightness
  allOff();
  strip.show(); // Initialize all pixels to 'off'
}
 
void loop() {
rainbowCycle(0);
}
 
void allOff() {
  for(uint16_t i=0; i<strip.numPixels(); i++) {
      strip.setPixelColor(i, strip.Color(0, 0, 0));
      strip.show();
  }
}
 
// Slightly different, this makes the rainbow equally distributed throughout
// I divided the number of pixels by three and got 20. I set up that
// there are three equally distributed rainbows.
void rainbowCycle(uint8_t wait) {
  uint16_t i, j;
 
  for(j=0; j<256*5; j++) { // 5 cycles of all colors on wheel
    for(i=0; i< 20; i++) {
      strip.setPixelColor(19-i, Wheel(((i * 256 / 20) + j) & 255));
      strip.setPixelColor(19-i+20, Wheel(((i * 256 / 20) + j) & 255));
      strip.setPixelColor(19-i+40, Wheel(((i * 256 / 20) + j) & 255));
    }
    strip.show();
    delay(wait);
  }
}
 
// Input a value 0 to 255 to get a color value.
// The colours are a transition r - g - b - back to r.
uint32_t Wheel(byte WheelPos) {
  if(WheelPos < 85) {
   return strip.Color(WheelPos * 3, 255 - WheelPos * 3, 0);
  } else if(WheelPos < 170) {
   WheelPos -= 85;
   return strip.Color(255 - WheelPos * 3, 0, WheelPos * 3);
  } else {
   WheelPos -= 170;
   return strip.Color(0, WheelPos * 3, 255 - WheelPos * 3);
  }
}

More than fun with ESP8266 modules

Getting a gift of ESP8266 modules is more fun than frustrating.  A few days ago my wife gave me a red box with three ESP8266 modules inside.  These ones came are SparkFun ESP8266 modules .   They are so tiny and only have 8 pins.

First things first

I had to learn how to program them before I could monkey with them.  Connecting an FTDI module to the ESP8266 was pretty easy, but I needed to use a little breadboard to help me along the way.

< < -XX--XX--XX- > >

Well, I started this post quite a while back. I don’t even remember all of what I did at the time. I found those little ESP8266 devices in a box while I was cleaning stuff up, or straightening up my maker area. They are still put together and have batteries taped to them, but not hooked up. I think they have lost their programming because when I hook up the batteries the devices don’t talk with each other. Now I have to learn the programming all over again.

Speaking of learning to program, I have been messing around with some cheap Chinese Arduino UNO boards. My Mac will not recognize them without setting the Mac to not check the driver as legitimate. I don’t want to monkey with the OS that much. The cheap Arduinos do not use FTDI for programming. They use a CH340G or a CH341G chip. I can download the driver and ask my Mac to not check the driver signing. But that sets it up as don’t check any driver signing. I don’t thing I want to have it not check even legitimate drivers. So, I am going to use a Windows laptop, or a Raspberry Pi to program those cheap Arduinos.

Hmmm, I am reading that Adrian Mihalko has patched the driver for Sierra and that it is signed. I will try it out. Well, The read-me says that If-and-only-if the device is still not recognized to disable the System Integrity Protection. Oh, Yeah, just what I don’t want to do.
++++++
I installed the drivers and rebooted. They work very well. Now I don’t have to use the Italian made Uno that I bought first, from RadioShack. It was about $35, but I thought I would like to try it. Tried it. Got addicted. Never looked back.

Now I am going to have to get back to the ESP8266 modules and learn to program them again.

G

Oh, on my work phone I changed the “signature” for when sending an email. It is a iPhone 4s. I know. They don’t have the money to replace it. The previous one started having battery issues. Everyone else is getting an iPhone 6s+ or so. They replaced the 4s with a used 4s that someone else had given up. Hey, the battery lasts longer and it has a OtterBox case. It is tough being the redheaded step-child.
I had offered to purchase a battery and install it, if they would reimburse me the cost of the battery. They didn’t like that idea. Six months later they found another 4s. It lasts almost all day. I can easily deal with that.
Oh Yeah! I kept reading other people’s email signatures and theirs would say, “Sent from my iPhone 6s+”, or “Sent from my iPhone 7”, or “Sent from my Samsung Galaxy 7”. So, now my iPhone 4s signature says, “Sent via ESP8266 Borg Cube”. What else is there? Tetrahedron?

RGB LEDs with Arduino

One of the things I love about putting things together is adding light to them. RGB LEDs are some of my favorite little lights. You can have just about any color.
When I first started reading about RGB LEDs I wanted to try one. I went to the local (40 miles away) electronics store. They have single RGB LEDs in a little bag. It was over $5 for one LED. I thought this can get expensive.
When I brought the LED home and put it into a breadboard I couldn’t get it to light. I followed the instructions again after ripping out the jumper wires from the breadboard and the Arduino. Start over, is what I do when something doesn’t work out correctly. Some simple testing revealed that the long pin on the RGB LED I bought was not for ground. The one I bought is a “common anode” RGB LED. The instructions I read covered “common cathode” RGB LEDs. The difference between the two is like night and day.

Testing the RGB LED

You can easily test the RGB LED to see if it has a common cathode, or a common anode, by putting it into a breadboard and using a battery and a resistor. Using a 220-ohm resistor connect one end of the resistor to one of the color legs and the other end of the resistor to the other side of the trough on the breadboard. With the battery leads connect the ground (-) of the battery to the long leg of the LED and the positive lead of the battery (+) to the far end of the resistor. If the LED lights up this is a “common cathode” RGB LED. If the LED does not light up, and the battery is not dead, It is probably a “common anode” RGB LED. Switch the two battery leads to find out. Positive (+) lead goes to the longest leg of the LED and the ground goes to the far end of the resistor. If in this position the LED lights up you have a “common anode” RGB LED. This is important to know because it will affect your Arduino sketch a lot.
Once you get the LED to light up note the color that displays for that leg. Move the resistor to a different shorter leg on the RGB LED and test it with the battery. Note the color for that leg and do the same for the final leg of the RGB LED.

Setting up the RGB LED

Put the LED’s pins into a breadboard.
With a “common cathode” LED the long leg goes to ground. Using a jumper wire connect the longest leg of the LED to ground (GND) on the Arduino. With a “common anode” LED the long leg goes to 5v. You can choose the 3.3v, too.
The other three legs are for the actual color LEDs that are inside the little plastic lens. One is for red, one is for blue, one is for green. Using a 220-ohm resistor connect the first LED leg to the other side of the center trough of the breadboard. Then using a jumper wire connect the other end of the resistor to one of the pins on the Arduino. On the Arduino Uno I choose pin 9. Now do the same for the other two legs of the LED, but connect the second one through a resistor to pin 10 and the third to pin 11. I choose these pins because they are right next to each other on the Uno.
Now you can add some code in the Arduino IDE to turn on the colors of the LED.

// set a color leg of the RGB LED to
// a pin on the Arduino
int redPin = 9;
int bluePin = 10;
int greenPin = 11;


void setup() {
// initialize the digitals pin as outputs
pinMode(redPin, OUTPUT);
pinMode(bluePin, OUTPUT);
pinMode(greenPin, OUTPUT);
// Turn on the red light in the RGB LED.
// IMPORTANT! Only for common cathode RGB LEDs.
digitalWrite(redPin, HIGH);
}


void loop() {
// This is the part of the code that
// runs over and over


}

That is pretty easy and we only turned on the red light in the RGB LED. If this were a common anode RGB LED the light would remain off. For a common anode RGB LED you would use digitalWrite(redPin, LOW); to turn on the red light.
If you wanted to turn on both the red and blue in the RGB LED at the same time and then turn them off a second later. Then you could wait another second and turn them on again, you could do this in the loop() section.
This different code would look like:

// set a color leg of the RGB LED to
// a pin on the Arduino
int redPin = 9;
int bluePin = 10;
int greenPin = 11;


void setup() {
// initialize the digitals pin as outputs
pinMode(redPin, OUTPUT);
pinMode(bluePin, OUTPUT);
pinMode(greenPin, OUTPUT);
}


void loop() {
// This part of the code that runs over and over
digitalWrite(redPin, HIGH);
digitalWrite(bluePin, HIGH);
delay(1000);
digitalWrite(redPin, LOW);
digitalWrite(bluePin, LOW);
delay(1000);
}

In this different set of code the loop() section causes the LED to blink. On a common cathode RGB LED writing HIGH to the red and blue pins turns the light ON. On a common anode RGB LED writing HIGH would turn OFF the light. In this small loop the lights cycle ON-OFF-ON-OFF-ON-OFF, etc., for a common cathode RGB LED. The pattern would be OFF-ON-OFF-ON-OFF-ON, etc., for a common anode LED. Not much of a difference, is it?
For this type of Arduino Sketch it doesn’t really matter. It only mattered where you hooked up the long leg of the RGB LED.

Now for what drove me bonkers for a few days

You can change the brightness of the color of the LED, but there is a big difference between the common cathode and the common anode RGB LEDs. If you wanted to cycle the brightness from off to fully bright for the red color on a common cathode RGB LED you would use analogWrite(redPin, brightnessNumber);. In the loop() section of the sketch you can have the brightnessNumber increase from 0 to 255 and once it reaches 256 reset it back to 0. The loop() section will keep doing this for you with the correct code. I’ll just include the loop() section in this next example, and please include the line:

int brightnessNumber = 0;

at the top of the sketch where the other variables are (such as redPin) to create the variable and set it to 0.


void loop() {
analogWrite(redPin, brightnessNumber);
//increase brightnessNumber by 1
brightnessNumber += 1;
if (brightnessNumber > 255) {
brightnessNumber = 0;
}
delay(50)
}

This will work just fine on a common cathode RGB LED. On a common anode RGB LED the effect will be to start from full bright and dim downward to off.
On a common cathode RGB LED the number 255 for analogWrite means fully bright. On a common anode RGB LED the same number means fully off. Your code to get the same effect would have to be changed as below.

int brightnessNumber = 255;

at the top of the sketch to create the variable and set it to 255.


void loop() {
analogWrite(redPin, brightnessNumber);
//decrease brightnessNumber by 1
brightnessNumber -= 1;
if (brightnessNumber < 0) {
brightnessNumber = 255;
}
delay(50)
}

Did you notice that you have to start with brightnessNumber at 255 and subtract it by 1 to increase the brightness of the light. When the brightnessNumber gets to -1 it is less than zero and needs to be changed to 255 to restart the cycle.

If you don’t have the correct coding for the RGB LED that you have, you won’t get your desired effect.

Now watch after all this I got the common cathode confused with the common anode.

LMT86 and Arduino

Temperature with an Arduino Uno and an
LMT86 Analog Temperature Sensor – by Greg Bushta

The Datasheet from TI for the LMT86 has a chart with the corresponding temperatures in °C and a mV. I noticed that the number read from the center pin is 1/5 that of what is in the chart. I am powering the LMT86 with 5v from the Arduino Uno. I noticed that there is about 11mV different from one °C to the next degree. However, when the number read on the pin goes down the corresponding temperature rises. I looked at the number corresponding to 0°C, 2100, and the number for 100°C, 997. These represent freezing and boiling of water. I subtracted 997 from 2100 and divided the result by 100 to get the approximate difference per degree C that the mV number would be. The result was 11.03. So, I figured that for every rise in degree C starting at 0° I could subtract 11.03. I thought why am I multiplying the number read on the pin by 5 and then doing my calculations with 11.03. Why not divide 11.03 by 5 and work with the number read from the pin. 2100 divided by 5 would give me the number read from the pin at zero degrees, or 420 as my starting point. So, I take the reading from the pin and subtract it from 420 then divide the answer by 2.206 to get my degrees in C. From there I convert °C to °F with °F = (°C * 9/5) + 32.

I think It is fairly accurate since it is reading 380 and feels just a little on the chilly side in the room. After all it is mid-January and 2:45 in the morning. It is raining outside. There is a fire going in the other room. I am off to sleep.
– Greg

(the next morning)

I tested the calculation with a piece of ice wrapped in plastic to keep the sensor from getting wet. The reading with the ice held upon the sensor was 426. That calcs to 27°F. So, that is not quite correct. Close but not quite right. I wonder if the correct starting number for 0°C should be 426.

Wouldn’t that be the correct way to do the measuring? Or, perhaps the scientific way? Get a starting number for zero degrees C and another number for a known temperature, perhaps boiling water. Then I could do the correct calculations. I would need to get the range and figure the steps per degree again. But my calculations would be much more accurate.

At boiling I got 212 on the read pin.
On ice I got 426 on the read pin.
Lets do the calculations with those numbers.

426 – 212 = 214
214 / 100 = 2.14
Boiling is 212. Freezing is 426. The difference is 214. From ice to boiling is 100 degrees, or steps. So, each step or degree is 2.14 on the pin read.

The LMT86 Sensor is hooked up
on the Arduino Uno with
+ pin on LMT86 is hooked to 5v
GND pin goes to Arduino GND
Data (center) pin goes to A0


int LMT86Pin = A0;
int TempRead = 0;
float voltage = 0;
float Temperature = 0;

void setup() {
// put your setup code here, to run once:
Serial.begin(9600);
Serial.println(“LMT86 test!”);
Serial.println(“Testing the Temperature Sensor”);
}

void loop() {
// put your main code here, to run repeatedly:
TempRead = analogRead(LMT86Pin);
Serial.print(“TempRead = “); Serial.println(TempRead);
Temperature = (426 – TempRead) / 2.14; // was 420 and 2.206
Serial.print(“The temperature is “);
Serial.print(int(Temperature));
Serial.println(“°C”);
Temperature = (Temperature * 9.0 / 5.0) + 32;
Serial.print(“The temperature is “);
Serial.print(int(Temperature));
Serial.println(“°F”);
delay(5000);
}

Swearing ATTiny85

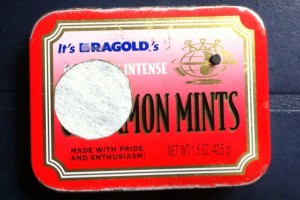
Following this page, http://hackaday.com/2015/10/21/teach-an-attiny-85-to-swear/ .  I put this together and stuffed it all into a mint tin.  I didn’t know how to post pictures into a hackaday.com comment, so I added this page.

IMG_6367

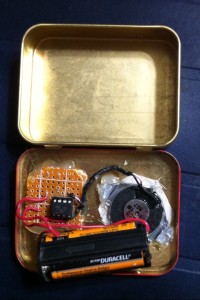
I added a push button so it would not swear constantly.  I got the speaker from a broken laptop.  The three AAA battery holder was from a friend’s ruined LED flashlight.

IMG_6368

I had to learn to use an Arduino Uno to program the ATTiny.  It was fairly easy.

Keeping Focused is proving to be difficult

I am in the middle of an Arduino, clock, humidity, and temperature project.  I also want to breadboard an ILI9341 display and an Arduino.  I should be finishing the clock before starting the other display.

Let me tell you about the clock.  Well, after I go clean and repair the heater.

I got the heater repaired.  There was a burned out wire connection bus.  I put a crimp splice onto it.  I think it goes to the heating element, or the fan.  You should see all of the LEDs and resistors to provide the fake flame effect.  Nice.  I’ll get to scavenge those later.  Now I have to hit the treadmill for a half hour.  BRB.

Now that I have that out of the way.  An hour of exercise today.  Half hour on the treadmill.  Earlier I used the Bowflex.

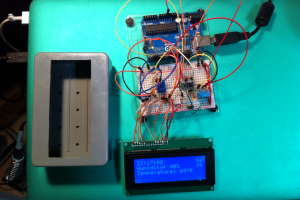
clock and soap box

I bought a 20×4 LCD to use with the Arduino Uno.  I already had bought a DHT11 from Adafruit quite a while back.  In the same purchase I also bought a potentiometer.  Wow, that was just the one I needed to use to adjust the contrast of the LCD.

I soldered wires to the connection points of the LCD circuit board, stripped the ends and stuck them in the half-size breadboard.  After adding quite a few jumper wires, the potentiometer and a resistor, I had the LCD up and running.  I ran a few sketches to see how the display worked,   One was the ‘Hello World’ sketch.  Then I was off and running.  I wanted to change the count up numbers, seconds since getting power, into a real clock.  That took a little bit of formatting the lcd.print statements.

After getting the clock numbers set up I decided to add the DHT11 to display humidity and temperature.  I added the DHT, a resistor, and some jumper wires.  The data from the DHT comes with decimal points.  I didn’t care about 41.00% humidity.  All I wanted was the integer for the humidity and degrees.  (int) helped with that.  It was that easy.

Next I decided to learn how to add custom characters to the LCD.  I wanted to have the degree symbol, °.  I read a couple of web pages and figured it out without too much hassle.  However, I could not get memory slot 0 to display.  So I stuffed the ° into 5.

I thought, “what about buttons to adjust the time?”  First I added a button for the minutes.  It also needed a resistor.  Pressing the button increments the minutes that are displayed.  After 59 minutes the next button press goes to 0.  Also, holding down the button only increments the minutes one time.  Then I added a button for the hours digits.  If the number is less than 10 a leading 0 is printed before the time digit.

Just for kicks I decided to see what a graphic in four characters would look like displayed in the top right corner.  I tried to make the Skull and Cross Wrenches logo of Hackaday.

I’ve decided to mount this all into a plastic soap box.  I’ve had the Clinique For Men’s soap box for years.  Maybe thirty?  I took some measurements of the LCD.  Drew them on a piece of paper.  Taped the paper to the lid of the soap box and drew around it with a pencil.  I mounted a cutting disk for a Dremel tool into a battery operated drill.  I figured the drill would rotate slower.  If it spun too fast the plastic lid would just heat and make a melty mess.  With the hold for the LCD roughed out I used the file on my Swiss Army Knife to file and shape the hole.

The next part of this project is going to be soldering all of the parts onto a predrilled circuit board and add a bareduino.  I’ll have to scav the main chip from my other breadboard.  Then I’ll order some more ATMEGA328p chips.  I am waiting for some sockets from Futurlec to arrive.  I’d hate to burn out the chip when soldering the legs onto the circuit board.  If I am running out of time I can get one from Radio Shack.  There is still one in Ukiah.

I’ll run this up the flagpole and see if anyone salutes.  The next post should be about being finished with putting all of this into the soap box.