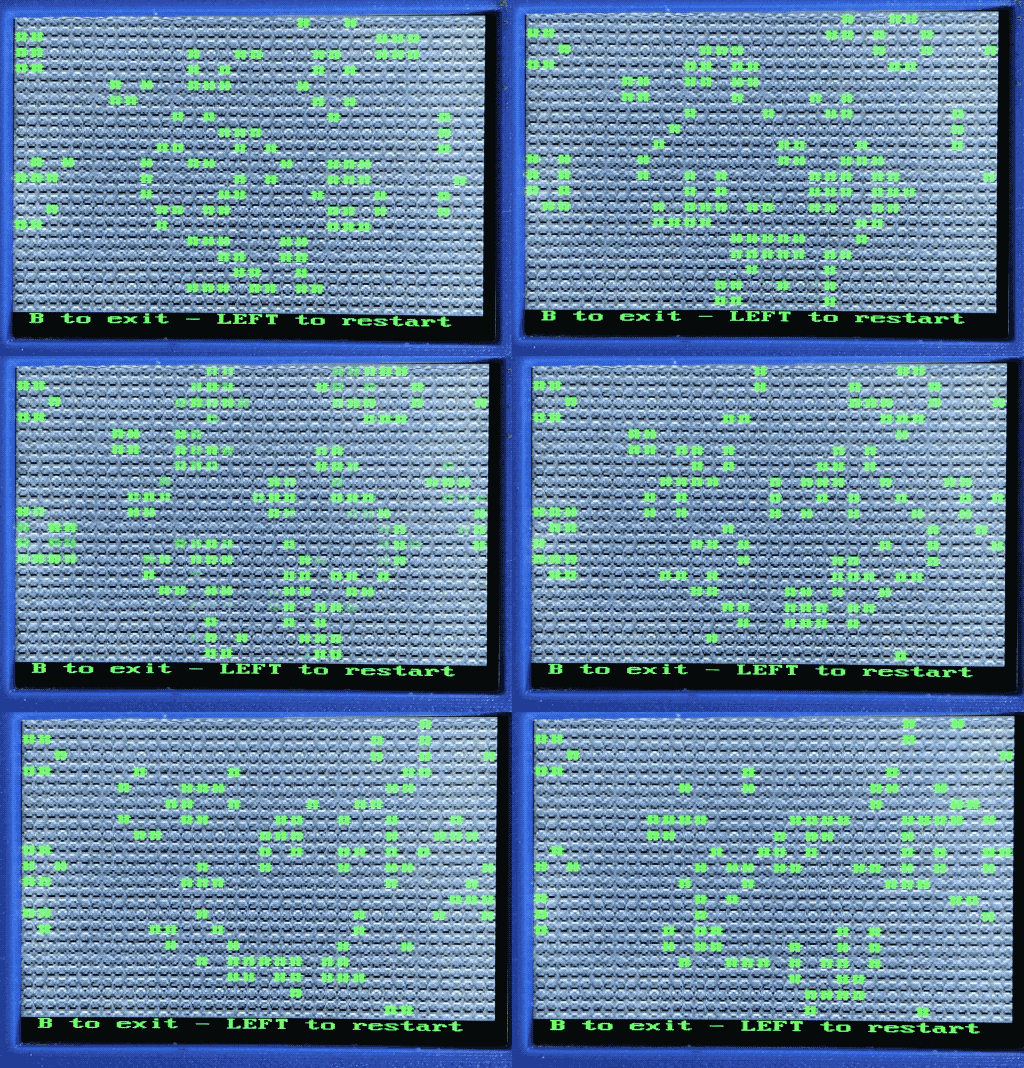
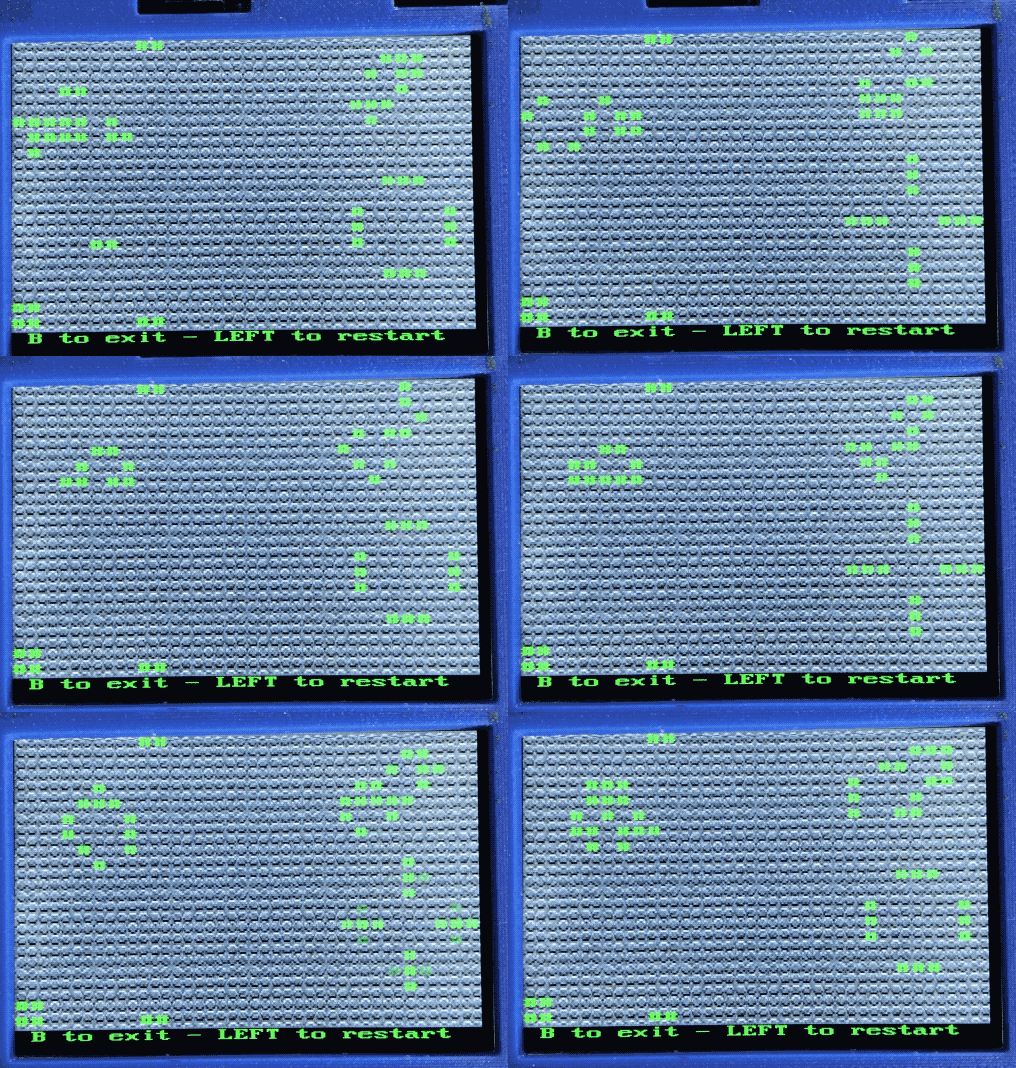
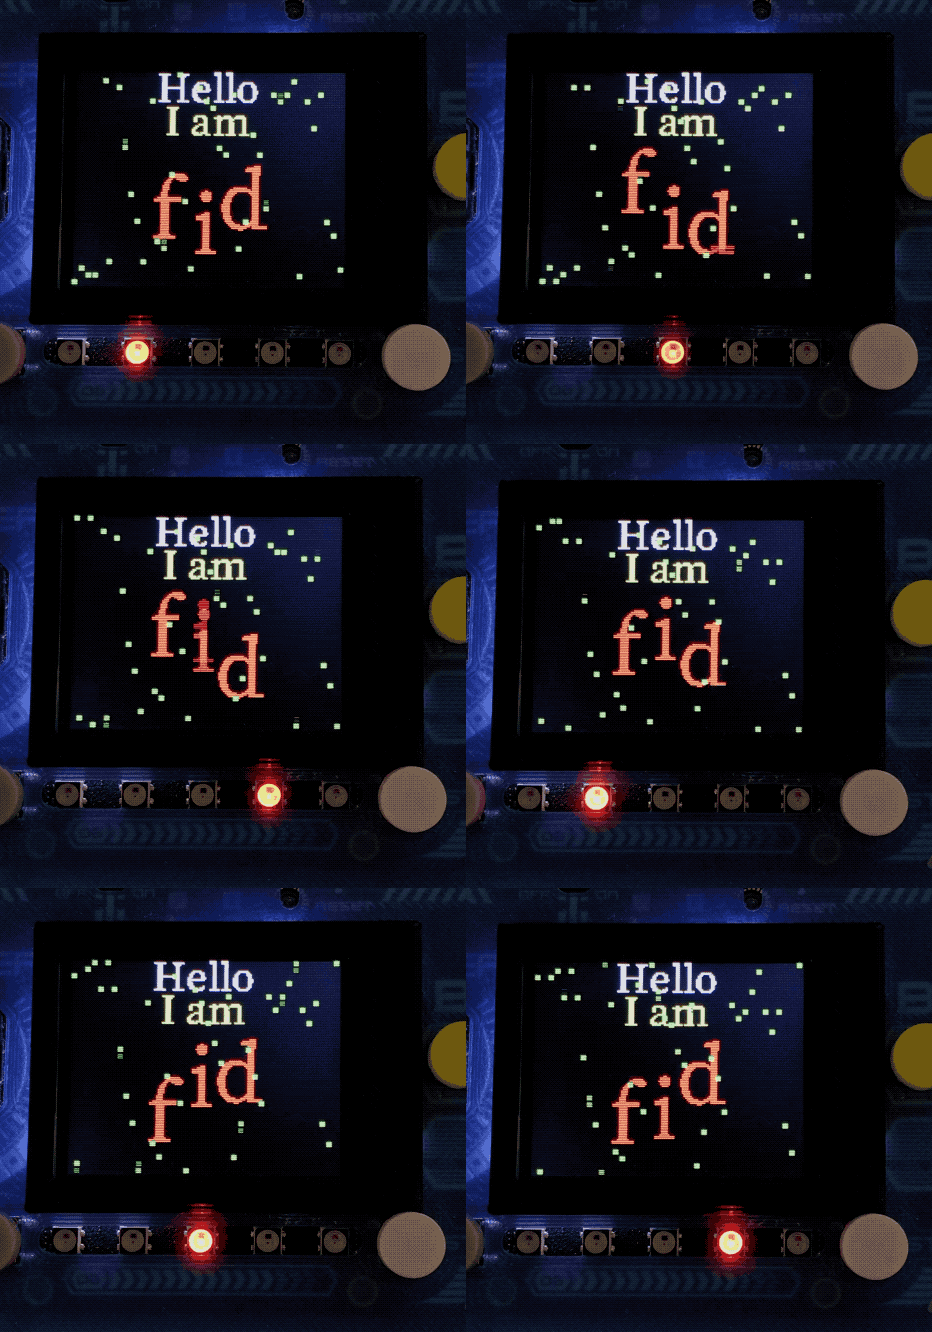
Quite a while back, October 2019, I was trying to see what I could make the Adafruit PyGamer badge do. I kept adding things to the code until I caused it to crash. It would crash in about 10 seconds sometimes. Others it would take a few hours. I was putting it through the paces.
While I was at Hackaday Supercon I showed the badge to some acquaintances. Later that day they said Scott Shawcroft, the maintainer of CircuitPython, wanted to check out the code. Scott stopped by the tables where we were soldering and coding. We were introduced and Scott asked to check out the PyGamer. He watched it crash in about five minutes and asked to check out the code on my laptop.
Back then, when the program would crash on the PyGamer, I would have to reinstall CircuitPython on to the device. Scott thought there might be a leak overwriting into CircuitPython. I zipped the files on the PyGamer and emailed them to Scott as we talked.
The attendees of Supercon received a new device from Adafruit while at the con. It was the EdgeBadge. I put my program onto the new device and it ran with no changes. It also crashed in a few minutes. After about an hour messing with the code on my new toy, the EdgeBadge died. I was wondering if the code was too much for the device.
Here is a copy of the code that would cause the PyGamer to crash with the older version of CircuitPython. I am trying to find a suitable plugin for listing long sections of code. Something to display long sets of code in a scrollable box.
# Write your code here :-)
# GreenRain.py
import board
import neopixel
import digitalio
import displayio
import gamepadshift
import time
import terminalio
import array
import math
import random
import audioio
from adafruit_display_text import label
from adafruit_bitmap_font import bitmap_font
from adafruit_display_shapes.rect import Rect

display = board.DISPLAY

FREQUENCY = 2093  # 440 Hz middle 'A'
SAMPLERATE = 2 * FREQUENCY  # 8000 samples/second, recommended!

# Generate one period of sine wav.
length = SAMPLERATE // FREQUENCY
sine_wave = array.array("H", [0] * length)
for i in range(length):
    sine_wave[i] = int(math.sin(math.pi * 2 * i / 18) * (2 ** 15) + 2 ** 15)

# enable the speaker
speaker_enable = digitalio.DigitalInOut(board.SPEAKER_ENABLE)
speaker_enable.direction = digitalio.Direction.OUTPUT
speaker_enable.value = True

audio = audioio.AudioOut(board.A0)
sine_wave_sample = audioio.RawSample(sine_wave)

led = neopixel.NeoPixel(board.NEOPIXEL, 5)
i = 0
led_speed = 200
red = (50, 0, 0)
blue = (0, 0, 50)
yellow = (50, 50, 0)
green = (0, 50, 0)
white = (50, 50, 50)
purple = (50, 0, 50)
pushed = 0
the_color = [red, blue, yellow, green, white, purple]
fid_color = [0xFF0000, 0x0000FF, 0xFFFF00, 0x00FF00, 0xFFFFFF, 0xFF00FF, 0x000000]
myX = 0
myY = 0
ledCheck = 0
ledOn = 0
soundTimer = 0

font = terminalio.FONT
# font = bitmap_font.load_font("fonts/Checkbook-25.bdf")
font2 = bitmap_font.load_font("SourceSerifPro_25.bdf")
font3 = bitmap_font.load_font("SourceSerifPro_12.bdf")
font4 = bitmap_font.load_font("SourceSerifPro_52.bdf")
text_area = label.Label(font2, text="Hello", color=0xFFFFFF)
text_area.x = 48
text_area.y = 10
text_area2 = label.Label(font3, text="My Name Is", color=0xFFFFFF)
text_area2.x = 45
text_area2.y = 30
text_area3 = label.Label(font4, text="fid", color=0xFF0000)
text_area3.x = 45
text_area3.y = 80
j = 0
k = 0
my_color = the_color[j]
speedCheck = 10

pad = gamepadshift.GamePadShift(digitalio.DigitalInOut(board.BUTTON_CLOCK),
                   digitalio.DigitalInOut(board.BUTTON_OUT),
				   digitalio.DigitalInOut(board.BUTTON_LATCH))

                   # Open the file
with open("/purple.bmp", "rb") as bitmap_file:

    # Setup the file as the bitmap data source
    bitmap = displayio.OnDiskBitmap(bitmap_file)

    # Create a TileGrid to hold the bitmap
    tile_grid = displayio.TileGrid(bitmap, pixel_shader=displayio.ColorConverter())

    rect_back = Rect(0, 0, 160, 128, fill=0x000000)
    rect_red = Rect(35, 0, 85, 40, fill=0xff0000)
    rect_white = Rect(17, 50, 120, 55, fill=0xAAAAAA)
    rect0 = Rect(0, 0, 3, 3, fill=0x00FF00)
    rect1 = Rect(4, 0, 3, 3, fill=0x00FF00)
    rect2 = Rect(8, 0, 3, 3, fill=0x00FF00)
    rect3 = Rect(12, 0, 3, 3, fill=0x00FF00)
    rect4 = Rect(16, 0, 3, 3, fill=0x00FF00)
    rect5 = Rect(20, 0, 3, 3, fill=0x00FF00)
    rect6 = Rect(24, 0, 3, 3, fill=0x00FF00)
    rect7 = Rect(28, 0, 3, 3, fill=0x00FF00)
    rect8 = Rect(32, 0, 3, 3, fill=0x00FF00)
    rect9 = Rect(36, 0, 3, 3, fill=0x00FF00)
    rect10 = Rect(40, 0, 3, 3, fill=0x00FF00)
    rect11 = Rect(44, 0, 3, 3, fill=0x00FF00)
    rect12 = Rect(48, 0, 3, 3, fill=0x00FF00)
    rect13 = Rect(52, 0, 3, 3, fill=0x00FF00)
    rect14 = Rect(56, 0, 3, 3, fill=0x00FF00)
    rect15 = Rect(60, 0, 3, 3, fill=0x00FF00)
    rect16 = Rect(64, 0, 3, 3, fill=0x00FF00)
    rect17 = Rect(68, 0, 3, 3, fill=0x00FF00)
    rect18 = Rect(72, 0, 3, 3, fill=0x00FF00)
    rect19 = Rect(76, 0, 3, 3, fill=0x00FF00)
    rect20 = Rect(80, 0, 3, 3, fill=0x00FF00)
    rect21 = Rect(84, 0, 3, 3, fill=0x00FF00)
    rect22 = Rect(88, 0, 3, 3, fill=0x00FF00)
    rect23 = Rect(92, 0, 3, 3, fill=0x00FF00)
    rect24 = Rect(96, 0, 3, 3, fill=0x00FF00)
    rect25 = Rect(100, 0, 3, 3, fill=0x00FF00)
    rect26 = Rect(104, 0, 3, 3, fill=0x00FF00)
    rect27 = Rect(108, 0, 3, 3, fill=0x00FF00)
    rect28 = Rect(112, 0, 3, 3, fill=0x00FF00)
    rect29 = Rect(116, 0, 3, 3, fill=0x00FF00)
    rect30 = Rect(120, 0, 3, 3, fill=0x00FF00)
    rect31 = Rect(124, 0, 3, 3, fill=0x00FF00)
    rect32 = Rect(128, 0, 3, 3, fill=0x00FF00)
    rect33 = Rect(132, 0, 3, 3, fill=0x00FF00)
    rect34 = Rect(136, 0, 3, 3, fill=0x00FF00)
    rect35 = Rect(140, 0, 3, 3, fill=0x00FF00)
    rect36 = Rect(144, 0, 3, 3, fill=0x00FF00)
    rect37 = Rect(148, 0, 3, 3, fill=0x00FF00)
    rect38 = Rect(152, 0, 3, 3, fill=0x00FF00)
    rect39 = Rect(156, 0, 3, 3, fill=0x00FF00)
    slow0 = (random.randint(0, 10) * 20) + speedCheck
    slow1 = (random.randint(0, 10) * 20) + speedCheck
    slow2 = (random.randint(0, 10) * 20) + speedCheck
    slow3 = (random.randint(0, 10) * 20) + speedCheck
    slow4 = (random.randint(0, 10) * 20) + speedCheck
    slow5 = (random.randint(0, 10) * 20) + speedCheck
    slow6 = (random.randint(0, 10) * 20) + speedCheck
    slow7 = (random.randint(0, 10) * 20) + speedCheck
    slow8 = (random.randint(0, 10) * 20) + speedCheck
    slow9 = (random.randint(0, 10) * 20) + speedCheck
    slow10 = (random.randint(0, 10) * 20) + speedCheck
    slow11 = (random.randint(0, 10) * 20) + speedCheck
    slow12 = (random.randint(0, 10) * 20) + speedCheck
    slow13 = (random.randint(0, 10) * 20) + speedCheck
    slow14 = (random.randint(0, 10) * 20) + speedCheck
    slow15 = (random.randint(0, 10) * 20) + speedCheck
    slow16 = (random.randint(0, 10) * 20) + speedCheck
    slow17 = (random.randint(0, 10) * 20) + speedCheck
    slow18 = (random.randint(0, 10) * 20) + speedCheck
    slow19 = (random.randint(0, 10) * 20) + speedCheck
    slow20 = (random.randint(0, 10) * 20) + speedCheck
    slow21 = (random.randint(0, 10) * 20) + speedCheck
    slow22 = (random.randint(0, 10) * 20) + speedCheck
    slow23 = (random.randint(0, 10) * 20) + speedCheck
    slow24 = (random.randint(0, 10) * 20) + speedCheck
    slow25 = (random.randint(0, 10) * 20) + speedCheck
    slow26 = (random.randint(0, 10) * 20) + speedCheck
    slow27 = (random.randint(0, 10) * 20) + speedCheck
    slow28 = (random.randint(0, 10) * 20) + speedCheck
    slow29 = (random.randint(0, 10) * 20) + speedCheck
    slow30 = (random.randint(0, 10) * 20) + speedCheck
    slow31 = (random.randint(0, 10) * 20) + speedCheck
    slow32 = (random.randint(0, 10) * 20) + speedCheck
    slow33 = (random.randint(0, 10) * 20) + speedCheck
    slow34 = (random.randint(0, 10) * 20) + speedCheck
    slow35 = (random.randint(0, 10) * 20) + speedCheck
    slow36 = (random.randint(0, 10) * 20) + speedCheck
    slow37 = (random.randint(0, 10) * 20) + speedCheck
    slow38 = (random.randint(0, 10) * 20) + speedCheck
    slow39 = (random.randint(0, 10) * 20) + speedCheck
    speed0 = 0
    speed1 = 0
    speed2 = 0
    speed3 = 0
    speed4 = 0
    speed5 = 0
    speed6 = 0
    speed7 = 0
    speed8 = 0
    speed9 = 0
    speed10 = 0
    speed11 = 0
    speed12 = 0
    speed13 = 0
    speed14 = 0
    speed15 = 0
    speed16 = 0
    speed17 = 0
    speed18 = 0
    speed19 = 0
    speed20 = 0
    speed21 = 0
    speed22 = 0
    speed23 = 0
    speed24 = 0
    speed25 = 0
    speed26 = 0
    speed27 = 0
    speed28 = 0
    speed29 = 0
    speed30 = 0
    speed31 = 0
    speed32 = 0
    speed33 = 0
    speed34 = 0
    speed35 = 0
    speed36 = 0
    speed37 = 0
    speed38 = 0
    speed39 = 0

    # Create a Group to hold the TileGrid
    group = displayio.Group(max_size=50)

    # Add the TileGrid to the Group
    group.append(rect_back)
    # group.append(rect_red)
    # group.append(rect_white)
    group.append(text_area)
    group.append(text_area2)
    group.append(text_area3)
    group.append(rect0)
    group.append(rect1)
    group.append(rect2)
    group.append(rect3)
    group.append(rect4)
    group.append(rect5)
    group.append(rect6)
    group.append(rect7)
    group.append(rect8)
    group.append(rect9)
    group.append(rect10)
    group.append(rect11)
    group.append(rect12)
    group.append(rect13)
    group.append(rect14)
    group.append(rect15)
    group.append(rect16)
    group.append(rect17)
    group.append(rect18)
    group.append(rect19)
    group.append(rect20)
    group.append(rect21)
    group.append(rect22)
    group.append(rect23)
    group.append(rect24)
    group.append(rect25)
    group.append(rect26)
    group.append(rect27)
    group.append(rect28)
    group.append(rect29)
    group.append(rect30)
    group.append(rect31)
    group.append(rect32)
    group.append(rect33)
    group.append(rect34)
    group.append(rect35)
    group.append(rect36)
    group.append(rect37)
    group.append(rect38)
    group.append(rect39)

    # Add the Group to the Display
    display.show(group)

    while True:
        if ledCheck > led_speed:
            if ledOn == 0:
                led[i] = (my_color)
                ledOn = 1
            else:
                led[i] = (0, 0, 0)
                ledOn = 0
                i += 1
                if i == 5:
                    i = 0
            ledCheck = 0
        ledCheck += 1

        if pushed ==1:
            soundTimer += 1
            if soundTimer == 300:
                audio.stop()
            pressed = pad.get_pressed()
            if pressed == 0:
                pushed = 0
                audio.stop()

        if pushed == 0:
            pressed = pad.get_pressed()
            if pressed == 0x01:
                led_speed += .05
            if pressed == 0x02:
                led_speed -= .05
            if led_speed > 500:
                led_speed = 500
            if led_speed < 10:
                led_speed = 10
            if pressed == 0x04:
                j += 1
                if j > len(the_color) - 1:
                    j = 0
                my_color = the_color[j]
                pushed = 1
                soundTimer = 0
                audio.play(sine_wave_sample, loop=True)
            if pressed == 0x08:
                pushed = 1
                k += 1
                if k > len(fid_color) - 1:
                    k = 0
                text_area3.color = fid_color[k]
        speed0 += 1
        speed1 += 1
        speed2 += 1
        speed3 += 1
        speed4 += 1
        speed5 += 1
        speed6 += 1
        speed7 += 1
        speed8 += 1
        speed9 += 1
        speed10 += 1
        speed11 += 1
        speed12 += 1
        speed13 += 1
        speed14 += 1
        speed15 += 1
        speed16 += 1
        speed17 += 1
        speed18 += 1
        speed19 += 1
        speed20 += 1
        speed21 += 1
        speed22 += 1
        speed23 += 1
        speed24 += 1
        speed25 += 1
        speed26 += 1
        speed27 += 1
        speed28 += 1
        speed29 += 1
        speed30 += 1
        speed31 += 1
        speed32 += 1
        speed33 += 1
        speed34 += 1
        speed35 += 1
        speed36 += 1
        speed37 += 1
        speed38 += 1
        speed39 += 1

        if speed0 > slow0:
            speed0 = 0
            slow0 = (random.randint(0, 10) * 20) + speedCheck
            rect0.y += 4
            if rect0.y > 126:
                rect0.y = 0
        if speed1 > slow1:
            speed1 = 0
            slow1 = (random.randint(0, 10) * 20) + speedCheck
            rect1.y += 4
            if rect1.y > 126:
                rect1.y = 0
        if speed2 > slow2:
            speed2 = 0
            slow2 = (random.randint(0, 10) * 20) + speedCheck
            rect2.y += 4
            if rect2.y > 126:
                rect2.y = 0
        if speed3 > slow3:
            speed3 = 0
            slow3 = (random.randint(0, 10) * 20) + speedCheck
            rect3.y += 4
            if rect3.y > 126:
                rect3.y = 0
        if speed4 > slow4:
            speed4 = 0
            slow4 = (random.randint(0, 10) * 20) + speedCheck
            rect4.y += 4
            if rect4.y > 126:
                rect4.y = 0
        if speed5 > slow5:
            speed5 = 0
            slow5 = (random.randint(0, 10) * 20) + speedCheck
            rect5.y += 4
            if rect5.y > 126:
                rect5.y = 0
        if speed6 > slow6:
            speed6 = 0
            slow6 = (random.randint(0, 10) * 20) + speedCheck
            rect6.y += 4
            if rect6.y > 126:
                rect6.y = 0
        if speed7 > slow7:
            speed7 = 0
            slow7 = (random.randint(0, 10) * 20) + speedCheck
            rect7.y += 4
            if rect7.y > 126:
                rect7.y = 0
        if speed8 > slow8:
            speed8 = 0
            slow8 = (random.randint(0, 10) * 20) + speedCheck
            rect8.y += 4
            if rect8.y > 126:
                rect8.y = 0
        if speed9 > slow9:
            speed9 = 0
            slow9 = (random.randint(0, 10) * 20) + speedCheck
            rect9.y += 4
            if rect9.y > 126:
                rect9.y = 0
        if speed10 > slow10:
            speed10 = 0
            slow10 = (random.randint(0, 10) * 20) + speedCheck
            rect10.y += 4
            if rect10.y > 126:
                rect10.y = 0
        if speed11 > slow11:
            speed11 = 0
            slow11 = (random.randint(0, 10) * 20) + speedCheck
            rect11.y += 4
            if rect11.y > 126:
                rect11.y = 0
        if speed12 > slow12:
            speed12 = 0
            slow12 = (random.randint(0, 10) * 20) + speedCheck
            rect12.y += 4
            if rect12.y > 126:
                rect12.y = 0
        if speed13 > slow13:
            speed13 = 0
            slow13 = (random.randint(0, 10) * 20) + speedCheck
            rect13.y += 4
            if rect13.y > 126:
                rect13.y = 0
        if speed14 > slow14:
            speed14 = 0
            slow14 = (random.randint(0, 10) * 20) + speedCheck
            rect14.y += 4
            if rect14.y > 126:
                rect14.y = 0
        if speed15 > slow15:
            speed15 = 0
            slow15 = (random.randint(0, 10) * 20) + speedCheck
            rect15.y += 4
            if rect15.y > 126:
                rect15.y = 0
        if speed16 > slow16:
            speed16 = 0
            slow16 = (random.randint(0, 10) * 20) + speedCheck
            rect16.y += 4
            if rect16.y > 126:
                rect16.y = 0
        if speed17 > slow17:
            speed17 = 0
            slow17 = (random.randint(0, 10) * 20) + speedCheck
            rect17.y += 4
            if rect17.y > 126:
                rect17.y = 0
        if speed18 > slow18:
            speed18 = 0
            slow18 = (random.randint(0, 10) * 20) + speedCheck
            rect18.y += 4
            if rect18.y > 126:
                rect18.y = 0
        if speed19 > slow19:
            speed19 = 0
            slow19 = (random.randint(0, 10) * 20) + speedCheck
            rect19.y += 4
            if rect19.y > 126:
                rect19.y = 0
        if speed20 > slow20:
            speed20 = 0
            slow20 = (random.randint(0, 10) * 20) + speedCheck
            rect20.y += 4
            if rect20.y > 126:
                rect20.y = 0
        if speed21 > slow21:
            speed21 = 0
            slow21 = (random.randint(0, 10) * 20) + speedCheck
            rect21.y += 4
            if rect21.y > 126:
                rect21.y = 0
        if speed22 > slow22:
            speed22 = 0
            slow22 = (random.randint(0, 10) * 20) + speedCheck
            rect22.y += 4
            if rect22.y > 126:
                rect22.y = 0
        if speed23 > slow23:
            speed23 = 0
            slow23 = (random.randint(0, 10) * 20) + speedCheck
            rect23.y += 4
            if rect23.y > 126:
                rect23.y = 0
        if speed24 > slow24:
            speed24 = 0
            slow24 = (random.randint(0, 10) * 20) + speedCheck
            rect24.y += 4
            if rect24.y > 126:
                rect24.y = 0
        if speed25 > slow25:
            speed25 = 0
            slow25 = (random.randint(0, 10) * 20) + speedCheck
            rect25.y += 4
            if rect25.y > 126:
                rect25.y = 0
        if speed26 > slow26:
            speed26 = 0
            slow26 = (random.randint(0, 10) * 20) + speedCheck
            rect26.y += 4
            if rect26.y > 126:
                rect26.y = 0
        if speed27 > slow27:
            speed27 = 0
            slow27 = (random.randint(0, 10) * 20) + speedCheck
            rect27.y += 4
            if rect27.y > 126:
                rect27.y = 0
        if speed28 > slow28:
            speed28 = 0
            slow28 = (random.randint(0, 10) * 20) + speedCheck
            rect28.y += 4
            if rect28.y > 126:
                rect28.y = 0
        if speed29 > slow29:
            speed29 = 0
            slow29 = (random.randint(0, 10) * 20) + speedCheck
            rect29.y += 4
            if rect29.y > 126:
                rect29.y = 0
        if speed30 > slow30:
            speed30 = 0
            slow30 = (random.randint(0, 10) * 20) + speedCheck
            rect30.y += 4
            if rect30.y > 126:
                rect30.y = 0
        if speed31 > slow31:
            speed31 = 0
            slow31 = (random.randint(0, 10) * 20) + speedCheck
            rect31.y += 4
            if rect31.y > 126:
                rect31.y = 0
        if speed32 > slow32:
            speed32 = 0
            slow32 = (random.randint(0, 10) * 20) + speedCheck
            rect32.y += 4
            if rect32.y > 126:
                rect32.y = 0
        if speed33 > slow33:
            speed33 = 0
            slow33 = (random.randint(0, 10) * 20) + speedCheck
            rect33.y += 4
            if rect33.y > 126:
                rect33.y = 0
        if speed34 > slow34:
            speed34 = 0
            slow34 = (random.randint(0, 10) * 20) + speedCheck
            rect34.y += 4
            if rect34.y > 126:
                rect34.y = 0
        if speed35 > slow35:
            speed35 = 0
            slow35 = (random.randint(0, 10) * 20) + speedCheck
            rect35.y += 4
            if rect35.y > 126:
                rect35.y = 0
        if speed36 > slow36:
            speed36 = 0
            slow36 = (random.randint(0, 10) * 20) + speedCheck
            rect36.y += 4
            if rect36.y > 126:
                rect36.y = 0
        if speed37 > slow37:
            speed37 = 0
            slow37 = (random.randint(0, 10) * 20) + speedCheck
            rect37.y += 4
            if rect37.y > 126:
                rect37.y = 0
        if speed38 > slow38:
            speed38 = 0
            slow38 = (random.randint(0, 10) * 20) + speedCheck
            rect38.y += 4
            if rect38.y > 126:
                rect38.y = 0
        if speed39 > slow39:
            speed39 = 0
            slow39 = (random.randint(0, 10) * 20) + speedCheck
            rect39.y += 4
            if rect39.y > 126:
                rect39.y = 0
I messed with the repetitive code trying to put it into loops, or functions but didn’t have the skills, or commands to do it. I revisited this code a few times over the next few months. I decided to crunch the code down and try the code on a new version of CircuitPython. The code still crashed, but it was not as deadly as it had been. I would just press the restart button and it would start running again. Yay!!
I managed to keep crashing the PyGamer. I decided to try to use lists (arrays) to handle the loops of the ‘green rain’. That worked well, and dropped the lines of repetitive code by a lot.
Since that worked out well I decided to add another animation on the screen. Even with all this happening on the device it was still crashing. I went back onto the Adafruit forums to see if someone was also having the same kind of trouble, or post my code to have it looked at. There was a newer version of CircuitPython and even NeoPixel.mpy. Now the code is running for hours. This morning I plugged it in and it was stopped in the middle of running after a little bit of time. That must have been a fluke. I plugged it into the wall usb and hung it up on a hook around 8 this morning. It was still running at 5 this evening.
# Write your code here :-)
# pygamer_dancing_fid_rev_1.py
# ** Cleaning up the code.
#
# I am now using Lists (arrays)
# for a few of the variables groups.
# **
# Press Button A to speed up the LEDs cycling.
# Press Button B to slow down the LEDs cycling.
# Press Start to change the color of the LEDs.
# Press Select to change the color of the name, fid.
#
# text_area3 through 5 now handles the name fid.
# Each letter is handled separately.
# You can change it in there.
#
import board
import neopixel
import digitalio
import displayio
import gamepadshift
import array
import math
import random
import audioio
from adafruit_display_text import label
from adafruit_bitmap_font import bitmap_font
from adafruit_display_shapes.rect import Rect

display = board.DISPLAY

FREQUENCY = 2093  # 440 Hz middle 'A'
SAMPLERATE = 2 * FREQUENCY  # 8000 samples/second, recommended!

# Generate one period of sine wav.
length = SAMPLERATE // FREQUENCY
sine_wave = array.array("H", [0] * length)
for irange in range(length):
    sine_wave[irange] = int(math.sin(math.pi * 2 * irange / 18) * (2 ** 15) + 2 ** 15)

# enable the speaker
speaker_enable = digitalio.DigitalInOut(board.SPEAKER_ENABLE)
speaker_enable.direction = digitalio.Direction.OUTPUT
speaker_enable.value = True

audio = audioio.AudioOut(board.A0)
sine_wave_sample = audioio.RawSample(sine_wave)

led = neopixel.NeoPixel(board.NEOPIXEL, 5)
i = 0
led_speed = 200
red = (5, 0, 0)
blue = (0, 0, 5)
yellow = (5, 5, 0)
green = (0, 5, 0)
white = (5, 5, 5)
purple = (5, 0, 5)
pushed = 0
the_color = [red, blue, yellow, green, white, purple]
fid_color = [0xFF0000, 0x0000FF, 0xFFFF00, 0x00FF00, 0xFFFFFF, 0xFF00FF, 0x000000]
myX = 0
myY = 0
ledCheck = 0
ledOn = 0
soundTimer = 0
ledDirection = 1
fid_sine = [0, 1, 3, 4, 4, 5, 4, 4, 3, 1, 0, -1, -3, -4, -4, -5, -4, -4, -3, -1]
fid_count = 0
f_sine_count = 10
i_sine_count = 5
d_sine_count = 0

font2 = bitmap_font.load_font("SourceSerifPro_25.bdf")
font4 = bitmap_font.load_font("SourceSerifPro_52.bdf")
text_area = label.Label(font2, text="Hello", color=0xFFFFFF)
text_area.x = 48
text_area.y = 10
text_area2 = label.Label(font2, text="I am", color=0xFFFF00)
text_area2.x = 53
text_area2.y = 30
text_area3 = label.Label(font4, text="f", color=0xFF0000)
text_area3.x = 45
text_area3.y = 80
text_area4 = label.Label(font4, text="i", color=0xFF0000)
text_area4.x = 70
text_area4.y = 80
text_area5= label.Label(font4, text="d", color=0xFF0000)
text_area5.x = 85
text_area5.y = 80
j = 0
k = 0
my_color = the_color[j]
speedCheck = 10

pad = gamepadshift.GamePadShift(digitalio.DigitalInOut(board.BUTTON_CLOCK),
                   digitalio.DigitalInOut(board.BUTTON_OUT),
				   digitalio.DigitalInOut(board.BUTTON_LATCH))

rect = [0] * 40
slow = [0] * 40

bitmap = displayio.Bitmap(display.width, display.height, 2)
palette = displayio.Palette(2)
palette[0] = 0x000000  # This is the background of the display
palette[1] = 0x8A2BE2  # This is the foreground, Purple

# TileGrid for the bitmap
bitmap_grid = displayio.TileGrid(bitmap, pixel_shader=palette)

rect_back = Rect(0, 0, 160, 128, fill=0x000000)
for irange in range(40):
    rect[irange] = Rect(irange * 4, random.randint(0, 120), 3, 3, fill=0x00FF00)

for irange in range(40):
    slow[irange] = (random.randint(0, 10) * 20) + speedCheck

speed = [0] * 40

# Create a Group to hold the TileGrid
group = displayio.Group(max_size=50)

# Add the TileGrid to the Group
group.append(rect_back)
group.append(text_area)
group.append(text_area2)
group.append(text_area3)
group.append(text_area4)
group.append(text_area5)
for irange in range(40):
    group.append(rect[irange])

# Add the Group to the Display
display.show(group)

while True:
    if ledCheck > led_speed:
        if ledOn == 0:
            led[i] = (my_color)
            ledOn = 1
        else:
            led[i] = (0, 0, 0)
            ledOn = 0
            i += ledDirection
            if i < 1 or i > 3:
                ledDirection *= -1
        ledCheck = 0
    ledCheck += 1

    if pushed == 1:
        soundTimer += 1
        if soundTimer == 300:
            audio.stop()
        pressed = pad.get_pressed()
        if pressed == 0:
            pushed = 0
            audio.stop()

    if pushed == 0:
        pressed = pad.get_pressed()
        if pressed == 0x01:
            led_speed += .05
        if pressed == 0x02:
            led_speed -= .05
        if led_speed > 500:
            led_speed = 500
        if led_speed < 10:
            led_speed = 10
        if pressed == 0x04:
            j += 1
            if j > len(the_color) - 1:
                j = 0
            my_color = the_color[j]
            pushed = 1
            soundTimer = 0
            audio.play(sine_wave_sample, loop=True)
        if pressed == 0x08:
            pushed = 1
            k += 1
            if k > len(fid_color) - 1:
                k = 0
            text_area3.color = fid_color[k]
            text_area4.color = fid_color[k]
            text_area5.color = fid_color[k]
    for irange in range(40):
        speed[irange] += 1

    for irange in range(40):
        if speed[irange] > slow[irange]:
            speed[irange] = 0
            slow[irange] = (random.randint(0, 10) * 20) + speedCheck
            rect[irange].y += 4
            if rect[irange].y > 126:
                rect[irange].y = 0

    fid_count += 1
    if fid_count > 15:
        fid_count = 0
        f_sine_count += 1
        if f_sine_count == len(fid_sine):
            f_sine_count = 0
        text_area3.y = 80 + fid_sine[f_sine_count] * 3
        i_sine_count += 1
        if i_sine_count == len(fid_sine):
            i_sine_count = 0
        text_area4.y = 80 + fid_sine[i_sine_count] * 3
        d_sine_count += 1
        if d_sine_count == len(fid_sine):
            d_sine_count = 0
        text_area5.y = 80 + fid_sine[d_sine_count] * 3
I have cleaned it up a little more and took out unused includes. I also added some comments inside the code. It went from 592 lines of code down to 209. I can probably crunch it down some more and add some stuff.
Perhaps the ‘green rain’ could be changed to sprites to make them fall faster.
BTW, if you know of a better way for me to list the code, especially long code, please let me know. SyntaxHighlighter can make the code into a clickable line to open, but I would rather have a set size box that is scrollable.
The repo contains both the old file and the newer crunched file.
