All posts by gbushta

Conway’s Game Of Life

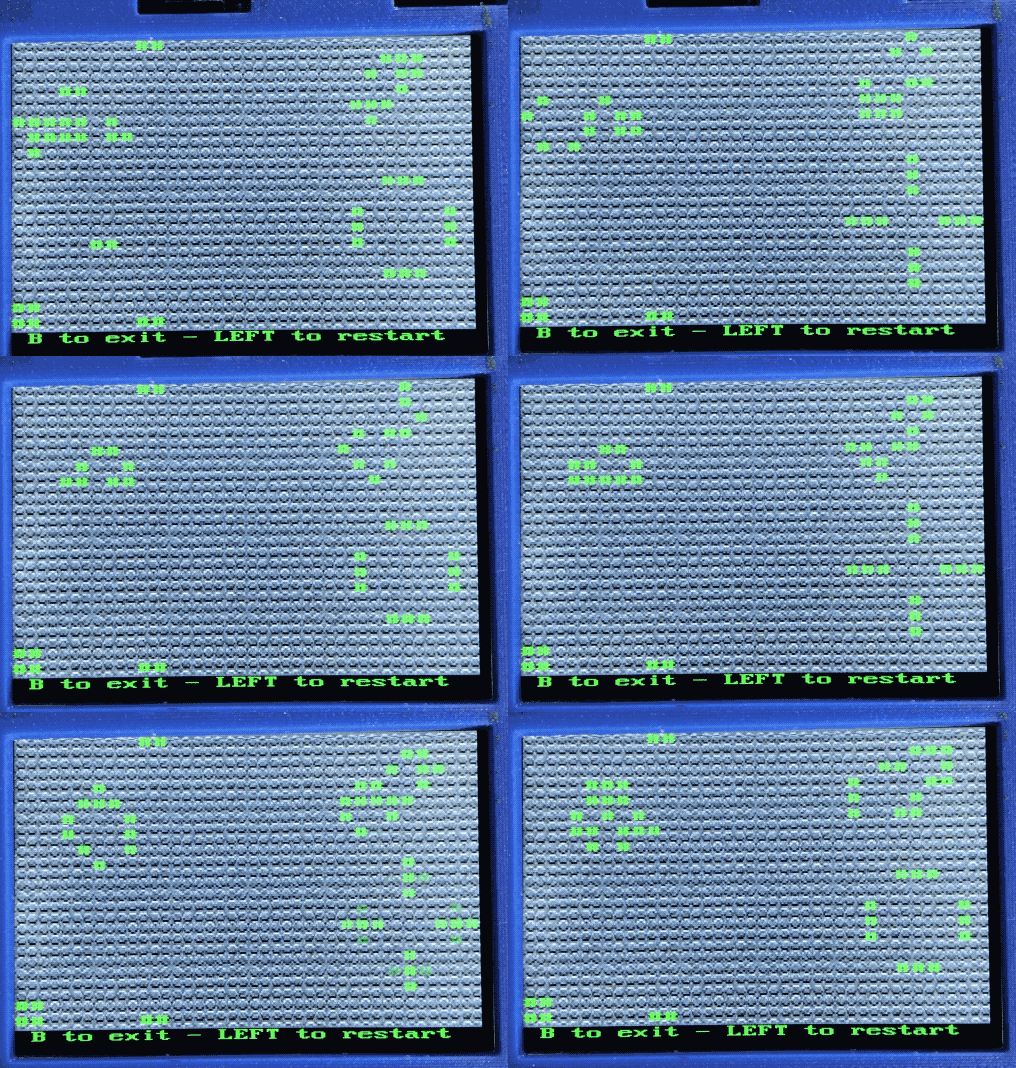
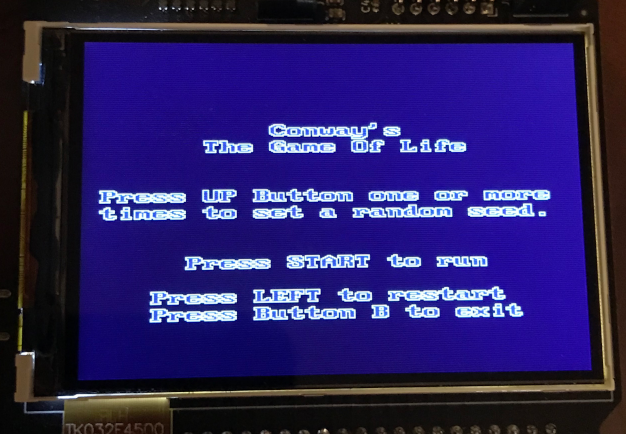
As a project for me to work on I decided to try coding in C Conway’s Game Of Life on the SuperCon Badge. What a hoot and adventure. Every time I thought I was about finished I would think of adding something else and end up breaking something different.

Well, it wasn’t that bad. I really hadn’t programmed in a variant of C like this in a while. ANDs and ORs were not cooperating so I separated them out into their own IF statements. The code began to look ugly, but it worked.

I thought I was finally done and I decided to add a restart button. I ended up writing a little demo program to make sure I had the coding of the buttons correct. All of the examples for checking on button presses included this little bit of code that could cause a delay. Whomever came up with the default code examples for the badge included the “inefficient” delay. Hey, it got the job done.

Once I had the buttons example running I decided to try to get rid of the “inefficient” delay. To get the program running at about the desired speed I had the little section in the MAIN loop running once every 50,000 times. This is a fast little chip on the badge.

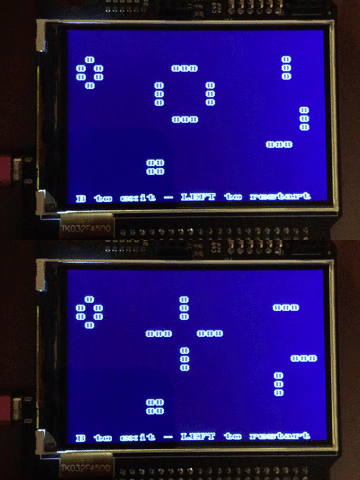
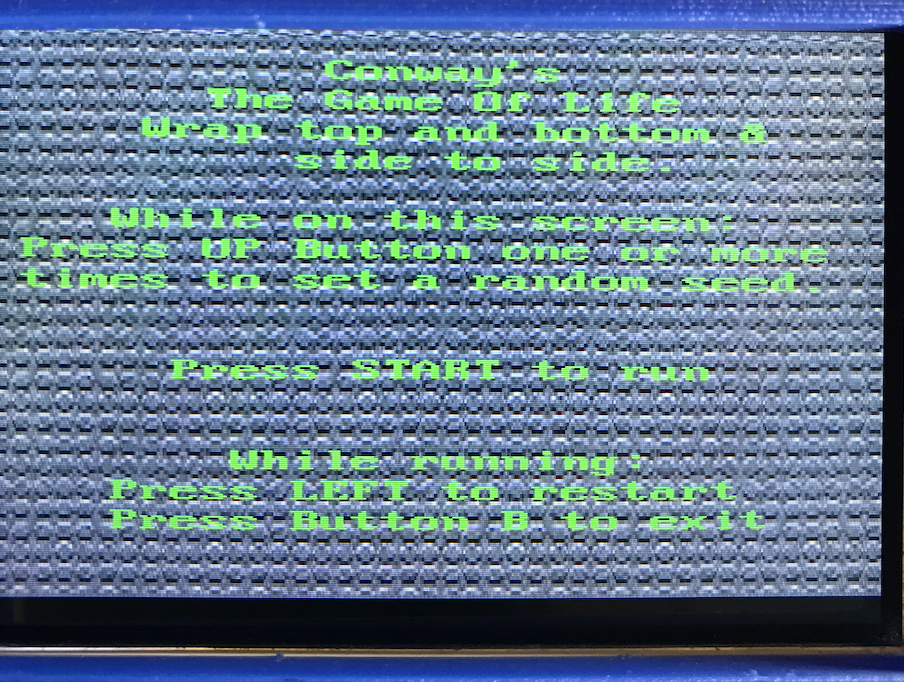
I haven’t taken out the “inefficient” delay loop out of the Game Of Life program, yet, but I am ready to document the story so far. After I got those pictures loaded into the computer and looked at the screen shot of the badge I see a change I’d like to make. I think I need to add a line above the bottom two lines that should say, “While running press:”. This way the person will know that B to exit and LEFT to reset will only happen once the program is running.

There are lots of web pages describing Conway’s Game of Life. Some just give the premise and others offer code snippets. As I understand it, for every space on the screen, if there is already a dot in place in that space then you would look at the eight adjoining, or touching, spaces around the space in question. Add up all of the dots around the space in question. If there are two or three dots the dot in that original space will continue to be a dot. If there are zero or one dots in all the surrounding spaces then the original dot will cease to be a dot and will become an empty space due to starvation. Like wise, if there are four or more dots in total around the original space with a dot that original dot will also cease to exist due to overcrowding. The original spaces that you would check that are in a corner or on the edge of the playing field are at a disadvantage due to less number of spaces surrounding them. You check every space within the playing field before you refresh the screen. I used a second array to hold the results and then sent that to the display.

A second thing to consider is if the space you are checking starts out empty it can become populated with a dot if there are three, and only three, spaces around that original space with a dot in them.

(I just thought that I could have the screen wrap around from bottom to top and left to right. Programming for another day.)

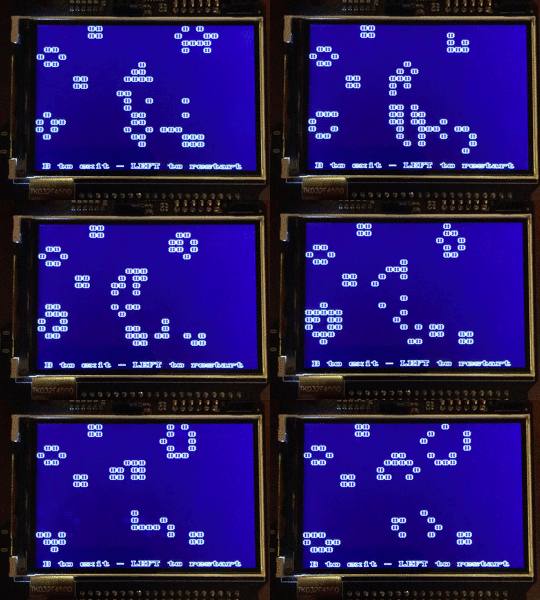
The ‘game’ runs until the screen is empty or certain patterns end up on the screen. A 2×2 block of dots will just sit there, for example. A vertical straight line of three will switch to a horizontal straight line of three and back again.

At one point I thought I was done with the game. It was really boring because it always had the same result. I decided to put in a way to give a random seed into the mix. That shook things up a bit.

At another point when I was checking how other programs were running on the badge I noticed Badgetris turned off those annoying LEDs. They are quite bright and bounce off of my glasses when I am looking at the screen. I included that line from the Badgetris code into my program.

Should I be including code snippets as I go along? Perhaps…

I am going to have to go through the code and add comments so you will know what I am doing.

There was one part that particularly did not work as I was coding. I could not figure out why it would not work. I thought I should be able to use

if (playArea[29][18] == 1 && (holder == 2 || holder ==3)) {
newPlayArea[29][18] = 1;
} else { newPlayArea[29][18] = 0; }
// now check holder status
if (playArea[29][18] == 0) {
if (holder == 3) {
newPlayArea[29][18] = 1;
} else { newPlayArea[29][18] = 0; }
}

The top part with the AND and OR never went into that area. The screen cleared quickly and the game was over shortly. Splitting the AND and Ors up really helped. But, I think it shouldn’t.

if (playArea[29][18] == 1) {
if (holder == 2) {
newPlayArea[29][18] = 1;
} else if (holder == 3) {
newPlayArea[29][18] = 1;
} else {
newPlayArea[29][18] = 0; } }
// now check holder status
if (playArea[29][18] == 0) {
if (holder == 3) {
newPlayArea[29][18] = 1;
} else { newPlayArea[29][18] = 0; }
}

In actuality I think I had the OR before the AND.

I also had noticed the error in “if(playArea[29][19] = 0;}}”. The error is the 19 should be should be 18.

if ((holder == 2 || holder ==3) && playArea[29][18] == 1){

In my pea little brain, this should work, but it didn’t. Perhaps I should try the type of

if ((playArea[29][18] == 1) && ((holder == 2) || (holder ==3)))

That just might work with all those extra parantheses. And the OR part is second instead of being checked first as in my original attempt. I’ll go try it and come back with results.

I tried many variations of having three comparisons inside the IF statement. Perhaps I am doing it wrong.

if (((holder == 2) || (holder == 3)) && (playArea[xx][yy] == 1)) {

if ((playArea[xx][yy] == 1) && ((holder == 2) || (holder == 3))) {

and even

if ((playArea[xx][yy] == 1) && (holder == 2 || holder == 3)) {

None of the checking three booleans inline worked so I am breaking them all out. It is not that it matters, but smaller code will run a bit quicker.

While I was testing the code I still find that I don’t like the difficult readability of the default text on the screen. I also thought putting a background on the play area would be fun. This could become a never ending project. I don’t want that. 😀

–++–

I have tossed in a background picture. Now it is harder to see the game. I’ll have to create a different character in a tile map and use that as the character. The default blue character with a white outline is blurry looking anyway. I am looking at it with eyes that have over six decades of use.

I changed the tileset so that I can change the color of the font. That was pretty easy to do not that I know that the graphic files should only have 16 colors. In GIMP it is easy to set the colors to indexed and 16 colors. Then you can play with the index so you have the color you want.

I guess I better change the pictures so they match what the screen looks like now.

—+++—

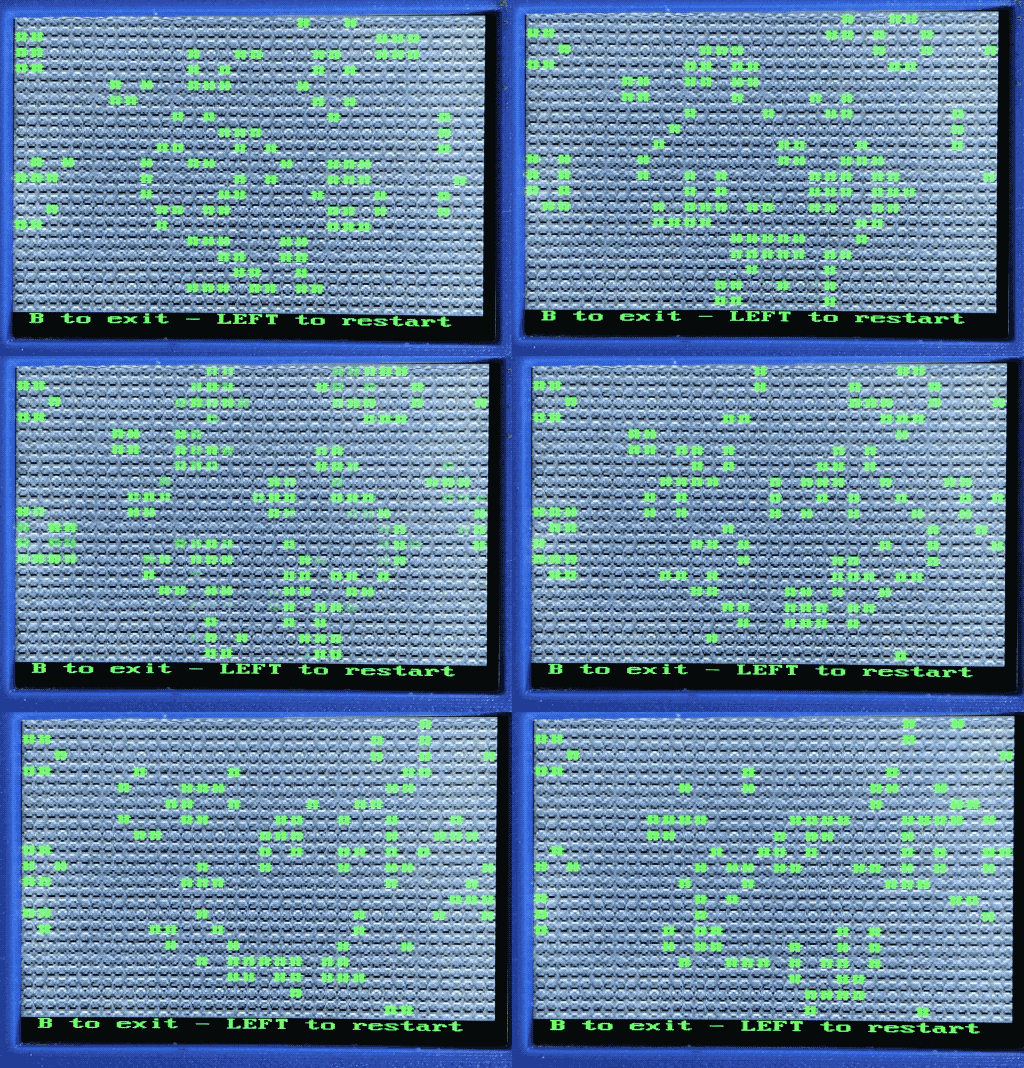
Well, riding in the car back from San Diego while my wife was driving I decided to work on a version of GOL that uses wrapping on the screen. There is now a version that wraps between the top and bottom as well as side to side. The results are different. It was easy to add the code.

I wonder if I can add the code as an option on the main screen. Bet I can, if I want to do that. You can do anything if you put your mind to it.

I still need to post pictures of the game running with a background and green hash characters.

—+++—

I have uploaded files to GitHub for both versions the Game Of Life. There is the version that does not wrap around the screen edges and one that does.

https://github.com/gbushta/GameOfLife

https://github.com/gbushta/Game-Of-Life-2

The first link is the one that wraps around the screen. It creates an .elf file that is GOL4. The .elf file is also available so you don’t have to compile the program before copying it to your Hackaday Supercon Badge. There is also a .elf file for GOL2, which is the one that does not wrap around the edges.

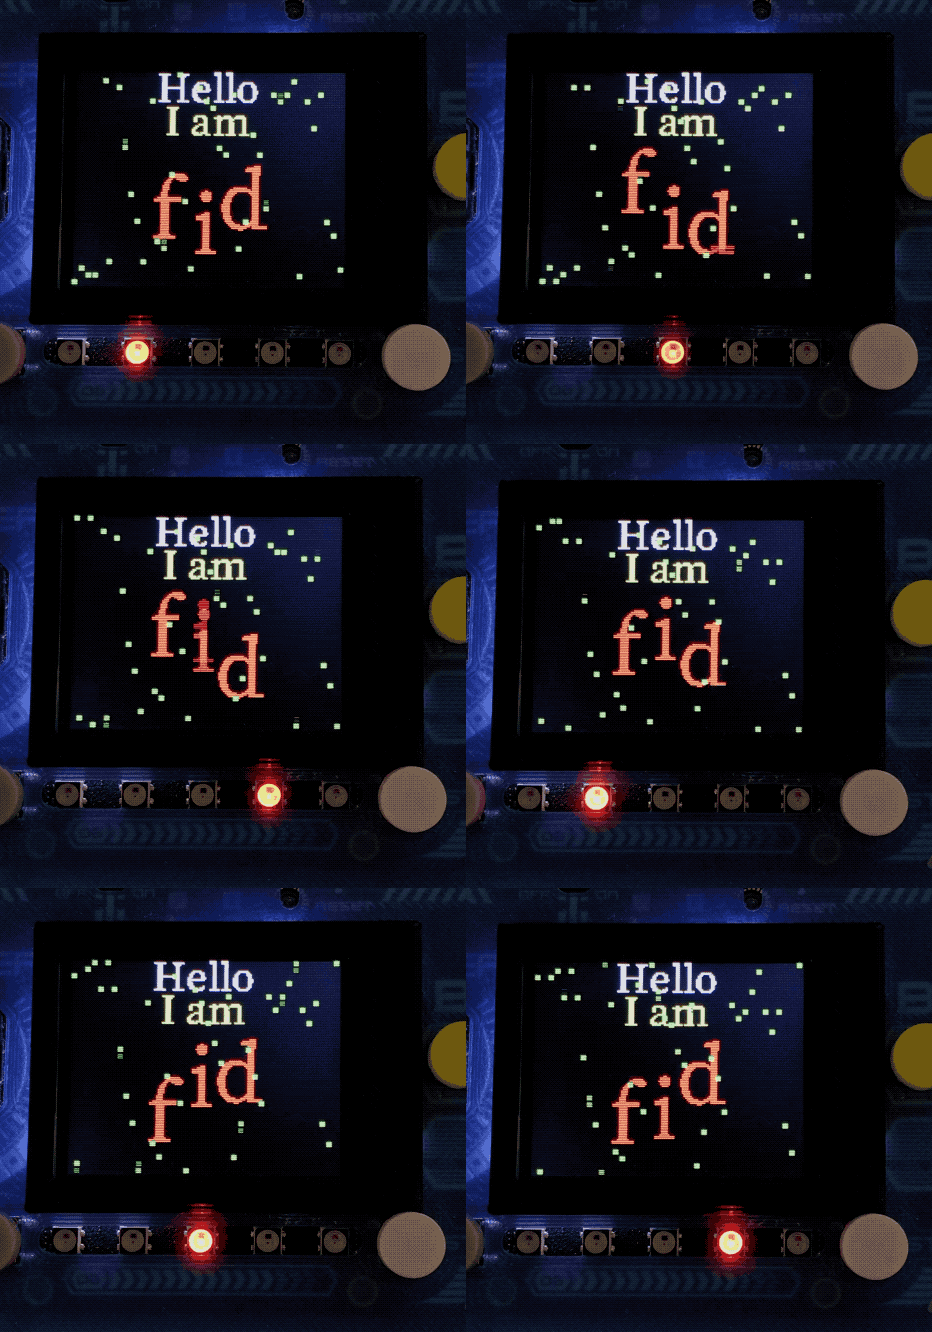
PyGamer – Hello my name is

I am gif file

Quite a while back, October 2019, I was trying to see what I could make the Adafruit PyGamer badge do. I kept adding things to the code until I caused it to crash. It would crash in about 10 seconds sometimes. Others it would take a few hours. I was putting it through the paces.

While I was at Hackaday Supercon I showed the badge to some acquaintances. Later that day they said Scott Shawcroft, the maintainer of CircuitPython, wanted to check out the code. Scott stopped by the tables where we were soldering and coding. We were introduced and Scott asked to check out the PyGamer. He watched it crash in about five minutes and asked to check out the code on my laptop.

Back then, when the program would crash on the PyGamer, I would have to reinstall CircuitPython on to the device. Scott thought there might be a leak overwriting into CircuitPython. I zipped the files on the PyGamer and emailed them to Scott as we talked.

The attendees of Supercon received a new device from Adafruit while at the con. It was the EdgeBadge. I put my program onto the new device and it ran with no changes. It also crashed in a few minutes. After about an hour messing with the code on my new toy, the EdgeBadge died. I was wondering if the code was too much for the device.

Here is a copy of the code that would cause the PyGamer to crash with the older version of CircuitPython. I am trying to find a suitable plugin for listing long sections of code. Something to display long sets of code in a scrollable box.

# Write your code here :-)
# GreenRain.py
import board
import neopixel
import digitalio
import displayio
import gamepadshift
import time
import terminalio
import array
import math
import random
import audioio
from adafruit_display_text import label
from adafruit_bitmap_font import bitmap_font
from adafruit_display_shapes.rect import Rect

display = board.DISPLAY

FREQUENCY = 2093  # 440 Hz middle 'A'
SAMPLERATE = 2 * FREQUENCY  # 8000 samples/second, recommended!

# Generate one period of sine wav.
length = SAMPLERATE // FREQUENCY
sine_wave = array.array("H", [0] * length)
for i in range(length):
    sine_wave[i] = int(math.sin(math.pi * 2 * i / 18) * (2 ** 15) + 2 ** 15)

# enable the speaker
speaker_enable = digitalio.DigitalInOut(board.SPEAKER_ENABLE)
speaker_enable.direction = digitalio.Direction.OUTPUT
speaker_enable.value = True

audio = audioio.AudioOut(board.A0)
sine_wave_sample = audioio.RawSample(sine_wave)

led = neopixel.NeoPixel(board.NEOPIXEL, 5)
i = 0
led_speed = 200
red = (50, 0, 0)
blue = (0, 0, 50)
yellow = (50, 50, 0)
green = (0, 50, 0)
white = (50, 50, 50)
purple = (50, 0, 50)
pushed = 0
the_color = [red, blue, yellow, green, white, purple]
fid_color = [0xFF0000, 0x0000FF, 0xFFFF00, 0x00FF00, 0xFFFFFF, 0xFF00FF, 0x000000]
myX = 0
myY = 0
ledCheck = 0
ledOn = 0
soundTimer = 0

font = terminalio.FONT
# font = bitmap_font.load_font("fonts/Checkbook-25.bdf")
font2 = bitmap_font.load_font("SourceSerifPro_25.bdf")
font3 = bitmap_font.load_font("SourceSerifPro_12.bdf")
font4 = bitmap_font.load_font("SourceSerifPro_52.bdf")
text_area = label.Label(font2, text="Hello", color=0xFFFFFF)
text_area.x = 48
text_area.y = 10
text_area2 = label.Label(font3, text="My Name Is", color=0xFFFFFF)
text_area2.x = 45
text_area2.y = 30
text_area3 = label.Label(font4, text="fid", color=0xFF0000)
text_area3.x = 45
text_area3.y = 80
j = 0
k = 0
my_color = the_color[j]
speedCheck = 10

pad = gamepadshift.GamePadShift(digitalio.DigitalInOut(board.BUTTON_CLOCK),
                   digitalio.DigitalInOut(board.BUTTON_OUT),
				   digitalio.DigitalInOut(board.BUTTON_LATCH))

                   # Open the file
with open("/purple.bmp", "rb") as bitmap_file:

    # Setup the file as the bitmap data source
    bitmap = displayio.OnDiskBitmap(bitmap_file)

    # Create a TileGrid to hold the bitmap
    tile_grid = displayio.TileGrid(bitmap, pixel_shader=displayio.ColorConverter())

    rect_back = Rect(0, 0, 160, 128, fill=0x000000)
    rect_red = Rect(35, 0, 85, 40, fill=0xff0000)
    rect_white = Rect(17, 50, 120, 55, fill=0xAAAAAA)
    rect0 = Rect(0, 0, 3, 3, fill=0x00FF00)
    rect1 = Rect(4, 0, 3, 3, fill=0x00FF00)
    rect2 = Rect(8, 0, 3, 3, fill=0x00FF00)
    rect3 = Rect(12, 0, 3, 3, fill=0x00FF00)
    rect4 = Rect(16, 0, 3, 3, fill=0x00FF00)
    rect5 = Rect(20, 0, 3, 3, fill=0x00FF00)
    rect6 = Rect(24, 0, 3, 3, fill=0x00FF00)
    rect7 = Rect(28, 0, 3, 3, fill=0x00FF00)
    rect8 = Rect(32, 0, 3, 3, fill=0x00FF00)
    rect9 = Rect(36, 0, 3, 3, fill=0x00FF00)
    rect10 = Rect(40, 0, 3, 3, fill=0x00FF00)
    rect11 = Rect(44, 0, 3, 3, fill=0x00FF00)
    rect12 = Rect(48, 0, 3, 3, fill=0x00FF00)
    rect13 = Rect(52, 0, 3, 3, fill=0x00FF00)
    rect14 = Rect(56, 0, 3, 3, fill=0x00FF00)
    rect15 = Rect(60, 0, 3, 3, fill=0x00FF00)
    rect16 = Rect(64, 0, 3, 3, fill=0x00FF00)
    rect17 = Rect(68, 0, 3, 3, fill=0x00FF00)
    rect18 = Rect(72, 0, 3, 3, fill=0x00FF00)
    rect19 = Rect(76, 0, 3, 3, fill=0x00FF00)
    rect20 = Rect(80, 0, 3, 3, fill=0x00FF00)
    rect21 = Rect(84, 0, 3, 3, fill=0x00FF00)
    rect22 = Rect(88, 0, 3, 3, fill=0x00FF00)
    rect23 = Rect(92, 0, 3, 3, fill=0x00FF00)
    rect24 = Rect(96, 0, 3, 3, fill=0x00FF00)
    rect25 = Rect(100, 0, 3, 3, fill=0x00FF00)
    rect26 = Rect(104, 0, 3, 3, fill=0x00FF00)
    rect27 = Rect(108, 0, 3, 3, fill=0x00FF00)
    rect28 = Rect(112, 0, 3, 3, fill=0x00FF00)
    rect29 = Rect(116, 0, 3, 3, fill=0x00FF00)
    rect30 = Rect(120, 0, 3, 3, fill=0x00FF00)
    rect31 = Rect(124, 0, 3, 3, fill=0x00FF00)
    rect32 = Rect(128, 0, 3, 3, fill=0x00FF00)
    rect33 = Rect(132, 0, 3, 3, fill=0x00FF00)
    rect34 = Rect(136, 0, 3, 3, fill=0x00FF00)
    rect35 = Rect(140, 0, 3, 3, fill=0x00FF00)
    rect36 = Rect(144, 0, 3, 3, fill=0x00FF00)
    rect37 = Rect(148, 0, 3, 3, fill=0x00FF00)
    rect38 = Rect(152, 0, 3, 3, fill=0x00FF00)
    rect39 = Rect(156, 0, 3, 3, fill=0x00FF00)
    slow0 = (random.randint(0, 10) * 20) + speedCheck
    slow1 = (random.randint(0, 10) * 20) + speedCheck
    slow2 = (random.randint(0, 10) * 20) + speedCheck
    slow3 = (random.randint(0, 10) * 20) + speedCheck
    slow4 = (random.randint(0, 10) * 20) + speedCheck
    slow5 = (random.randint(0, 10) * 20) + speedCheck
    slow6 = (random.randint(0, 10) * 20) + speedCheck
    slow7 = (random.randint(0, 10) * 20) + speedCheck
    slow8 = (random.randint(0, 10) * 20) + speedCheck
    slow9 = (random.randint(0, 10) * 20) + speedCheck
    slow10 = (random.randint(0, 10) * 20) + speedCheck
    slow11 = (random.randint(0, 10) * 20) + speedCheck
    slow12 = (random.randint(0, 10) * 20) + speedCheck
    slow13 = (random.randint(0, 10) * 20) + speedCheck
    slow14 = (random.randint(0, 10) * 20) + speedCheck
    slow15 = (random.randint(0, 10) * 20) + speedCheck
    slow16 = (random.randint(0, 10) * 20) + speedCheck
    slow17 = (random.randint(0, 10) * 20) + speedCheck
    slow18 = (random.randint(0, 10) * 20) + speedCheck
    slow19 = (random.randint(0, 10) * 20) + speedCheck
    slow20 = (random.randint(0, 10) * 20) + speedCheck
    slow21 = (random.randint(0, 10) * 20) + speedCheck
    slow22 = (random.randint(0, 10) * 20) + speedCheck
    slow23 = (random.randint(0, 10) * 20) + speedCheck
    slow24 = (random.randint(0, 10) * 20) + speedCheck
    slow25 = (random.randint(0, 10) * 20) + speedCheck
    slow26 = (random.randint(0, 10) * 20) + speedCheck
    slow27 = (random.randint(0, 10) * 20) + speedCheck
    slow28 = (random.randint(0, 10) * 20) + speedCheck
    slow29 = (random.randint(0, 10) * 20) + speedCheck
    slow30 = (random.randint(0, 10) * 20) + speedCheck
    slow31 = (random.randint(0, 10) * 20) + speedCheck
    slow32 = (random.randint(0, 10) * 20) + speedCheck
    slow33 = (random.randint(0, 10) * 20) + speedCheck
    slow34 = (random.randint(0, 10) * 20) + speedCheck
    slow35 = (random.randint(0, 10) * 20) + speedCheck
    slow36 = (random.randint(0, 10) * 20) + speedCheck
    slow37 = (random.randint(0, 10) * 20) + speedCheck
    slow38 = (random.randint(0, 10) * 20) + speedCheck
    slow39 = (random.randint(0, 10) * 20) + speedCheck
    speed0 = 0
    speed1 = 0
    speed2 = 0
    speed3 = 0
    speed4 = 0
    speed5 = 0
    speed6 = 0
    speed7 = 0
    speed8 = 0
    speed9 = 0
    speed10 = 0
    speed11 = 0
    speed12 = 0
    speed13 = 0
    speed14 = 0
    speed15 = 0
    speed16 = 0
    speed17 = 0
    speed18 = 0
    speed19 = 0
    speed20 = 0
    speed21 = 0
    speed22 = 0
    speed23 = 0
    speed24 = 0
    speed25 = 0
    speed26 = 0
    speed27 = 0
    speed28 = 0
    speed29 = 0
    speed30 = 0
    speed31 = 0
    speed32 = 0
    speed33 = 0
    speed34 = 0
    speed35 = 0
    speed36 = 0
    speed37 = 0
    speed38 = 0
    speed39 = 0

    # Create a Group to hold the TileGrid
    group = displayio.Group(max_size=50)

    # Add the TileGrid to the Group
    group.append(rect_back)
    # group.append(rect_red)
    # group.append(rect_white)
    group.append(text_area)
    group.append(text_area2)
    group.append(text_area3)
    group.append(rect0)
    group.append(rect1)
    group.append(rect2)
    group.append(rect3)
    group.append(rect4)
    group.append(rect5)
    group.append(rect6)
    group.append(rect7)
    group.append(rect8)
    group.append(rect9)
    group.append(rect10)
    group.append(rect11)
    group.append(rect12)
    group.append(rect13)
    group.append(rect14)
    group.append(rect15)
    group.append(rect16)
    group.append(rect17)
    group.append(rect18)
    group.append(rect19)
    group.append(rect20)
    group.append(rect21)
    group.append(rect22)
    group.append(rect23)
    group.append(rect24)
    group.append(rect25)
    group.append(rect26)
    group.append(rect27)
    group.append(rect28)
    group.append(rect29)
    group.append(rect30)
    group.append(rect31)
    group.append(rect32)
    group.append(rect33)
    group.append(rect34)
    group.append(rect35)
    group.append(rect36)
    group.append(rect37)
    group.append(rect38)
    group.append(rect39)

    # Add the Group to the Display
    display.show(group)

    while True:
        if ledCheck > led_speed:
            if ledOn == 0:
                led[i] = (my_color)
                ledOn = 1
            else:
                led[i] = (0, 0, 0)
                ledOn = 0
                i += 1
                if i == 5:
                    i = 0
            ledCheck = 0
        ledCheck += 1

        if pushed ==1:
            soundTimer += 1
            if soundTimer == 300:
                audio.stop()
            pressed = pad.get_pressed()
            if pressed == 0:
                pushed = 0
                audio.stop()

        if pushed == 0:
            pressed = pad.get_pressed()
            if pressed == 0x01:
                led_speed += .05
            if pressed == 0x02:
                led_speed -= .05
            if led_speed > 500:
                led_speed = 500
            if led_speed < 10:
                led_speed = 10
            if pressed == 0x04:
                j += 1
                if j > len(the_color) - 1:
                    j = 0
                my_color = the_color[j]
                pushed = 1
                soundTimer = 0
                audio.play(sine_wave_sample, loop=True)
            if pressed == 0x08:
                pushed = 1
                k += 1
                if k > len(fid_color) - 1:
                    k = 0
                text_area3.color = fid_color[k]
        speed0 += 1
        speed1 += 1
        speed2 += 1
        speed3 += 1
        speed4 += 1
        speed5 += 1
        speed6 += 1
        speed7 += 1
        speed8 += 1
        speed9 += 1
        speed10 += 1
        speed11 += 1
        speed12 += 1
        speed13 += 1
        speed14 += 1
        speed15 += 1
        speed16 += 1
        speed17 += 1
        speed18 += 1
        speed19 += 1
        speed20 += 1
        speed21 += 1
        speed22 += 1
        speed23 += 1
        speed24 += 1
        speed25 += 1
        speed26 += 1
        speed27 += 1
        speed28 += 1
        speed29 += 1
        speed30 += 1
        speed31 += 1
        speed32 += 1
        speed33 += 1
        speed34 += 1
        speed35 += 1
        speed36 += 1
        speed37 += 1
        speed38 += 1
        speed39 += 1

        if speed0 > slow0:
            speed0 = 0
            slow0 = (random.randint(0, 10) * 20) + speedCheck
            rect0.y += 4
            if rect0.y > 126:
                rect0.y = 0
        if speed1 > slow1:
            speed1 = 0
            slow1 = (random.randint(0, 10) * 20) + speedCheck
            rect1.y += 4
            if rect1.y > 126:
                rect1.y = 0
        if speed2 > slow2:
            speed2 = 0
            slow2 = (random.randint(0, 10) * 20) + speedCheck
            rect2.y += 4
            if rect2.y > 126:
                rect2.y = 0
        if speed3 > slow3:
            speed3 = 0
            slow3 = (random.randint(0, 10) * 20) + speedCheck
            rect3.y += 4
            if rect3.y > 126:
                rect3.y = 0
        if speed4 > slow4:
            speed4 = 0
            slow4 = (random.randint(0, 10) * 20) + speedCheck
            rect4.y += 4
            if rect4.y > 126:
                rect4.y = 0
        if speed5 > slow5:
            speed5 = 0
            slow5 = (random.randint(0, 10) * 20) + speedCheck
            rect5.y += 4
            if rect5.y > 126:
                rect5.y = 0
        if speed6 > slow6:
            speed6 = 0
            slow6 = (random.randint(0, 10) * 20) + speedCheck
            rect6.y += 4
            if rect6.y > 126:
                rect6.y = 0
        if speed7 > slow7:
            speed7 = 0
            slow7 = (random.randint(0, 10) * 20) + speedCheck
            rect7.y += 4
            if rect7.y > 126:
                rect7.y = 0
        if speed8 > slow8:
            speed8 = 0
            slow8 = (random.randint(0, 10) * 20) + speedCheck
            rect8.y += 4
            if rect8.y > 126:
                rect8.y = 0
        if speed9 > slow9:
            speed9 = 0
            slow9 = (random.randint(0, 10) * 20) + speedCheck
            rect9.y += 4
            if rect9.y > 126:
                rect9.y = 0
        if speed10 > slow10:
            speed10 = 0
            slow10 = (random.randint(0, 10) * 20) + speedCheck
            rect10.y += 4
            if rect10.y > 126:
                rect10.y = 0
        if speed11 > slow11:
            speed11 = 0
            slow11 = (random.randint(0, 10) * 20) + speedCheck
            rect11.y += 4
            if rect11.y > 126:
                rect11.y = 0
        if speed12 > slow12:
            speed12 = 0
            slow12 = (random.randint(0, 10) * 20) + speedCheck
            rect12.y += 4
            if rect12.y > 126:
                rect12.y = 0
        if speed13 > slow13:
            speed13 = 0
            slow13 = (random.randint(0, 10) * 20) + speedCheck
            rect13.y += 4
            if rect13.y > 126:
                rect13.y = 0
        if speed14 > slow14:
            speed14 = 0
            slow14 = (random.randint(0, 10) * 20) + speedCheck
            rect14.y += 4
            if rect14.y > 126:
                rect14.y = 0
        if speed15 > slow15:
            speed15 = 0
            slow15 = (random.randint(0, 10) * 20) + speedCheck
            rect15.y += 4
            if rect15.y > 126:
                rect15.y = 0
        if speed16 > slow16:
            speed16 = 0
            slow16 = (random.randint(0, 10) * 20) + speedCheck
            rect16.y += 4
            if rect16.y > 126:
                rect16.y = 0
        if speed17 > slow17:
            speed17 = 0
            slow17 = (random.randint(0, 10) * 20) + speedCheck
            rect17.y += 4
            if rect17.y > 126:
                rect17.y = 0
        if speed18 > slow18:
            speed18 = 0
            slow18 = (random.randint(0, 10) * 20) + speedCheck
            rect18.y += 4
            if rect18.y > 126:
                rect18.y = 0
        if speed19 > slow19:
            speed19 = 0
            slow19 = (random.randint(0, 10) * 20) + speedCheck
            rect19.y += 4
            if rect19.y > 126:
                rect19.y = 0
        if speed20 > slow20:
            speed20 = 0
            slow20 = (random.randint(0, 10) * 20) + speedCheck
            rect20.y += 4
            if rect20.y > 126:
                rect20.y = 0
        if speed21 > slow21:
            speed21 = 0
            slow21 = (random.randint(0, 10) * 20) + speedCheck
            rect21.y += 4
            if rect21.y > 126:
                rect21.y = 0
        if speed22 > slow22:
            speed22 = 0
            slow22 = (random.randint(0, 10) * 20) + speedCheck
            rect22.y += 4
            if rect22.y > 126:
                rect22.y = 0
        if speed23 > slow23:
            speed23 = 0
            slow23 = (random.randint(0, 10) * 20) + speedCheck
            rect23.y += 4
            if rect23.y > 126:
                rect23.y = 0
        if speed24 > slow24:
            speed24 = 0
            slow24 = (random.randint(0, 10) * 20) + speedCheck
            rect24.y += 4
            if rect24.y > 126:
                rect24.y = 0
        if speed25 > slow25:
            speed25 = 0
            slow25 = (random.randint(0, 10) * 20) + speedCheck
            rect25.y += 4
            if rect25.y > 126:
                rect25.y = 0
        if speed26 > slow26:
            speed26 = 0
            slow26 = (random.randint(0, 10) * 20) + speedCheck
            rect26.y += 4
            if rect26.y > 126:
                rect26.y = 0
        if speed27 > slow27:
            speed27 = 0
            slow27 = (random.randint(0, 10) * 20) + speedCheck
            rect27.y += 4
            if rect27.y > 126:
                rect27.y = 0
        if speed28 > slow28:
            speed28 = 0
            slow28 = (random.randint(0, 10) * 20) + speedCheck
            rect28.y += 4
            if rect28.y > 126:
                rect28.y = 0
        if speed29 > slow29:
            speed29 = 0
            slow29 = (random.randint(0, 10) * 20) + speedCheck
            rect29.y += 4
            if rect29.y > 126:
                rect29.y = 0
        if speed30 > slow30:
            speed30 = 0
            slow30 = (random.randint(0, 10) * 20) + speedCheck
            rect30.y += 4
            if rect30.y > 126:
                rect30.y = 0
        if speed31 > slow31:
            speed31 = 0
            slow31 = (random.randint(0, 10) * 20) + speedCheck
            rect31.y += 4
            if rect31.y > 126:
                rect31.y = 0
        if speed32 > slow32:
            speed32 = 0
            slow32 = (random.randint(0, 10) * 20) + speedCheck
            rect32.y += 4
            if rect32.y > 126:
                rect32.y = 0
        if speed33 > slow33:
            speed33 = 0
            slow33 = (random.randint(0, 10) * 20) + speedCheck
            rect33.y += 4
            if rect33.y > 126:
                rect33.y = 0
        if speed34 > slow34:
            speed34 = 0
            slow34 = (random.randint(0, 10) * 20) + speedCheck
            rect34.y += 4
            if rect34.y > 126:
                rect34.y = 0
        if speed35 > slow35:
            speed35 = 0
            slow35 = (random.randint(0, 10) * 20) + speedCheck
            rect35.y += 4
            if rect35.y > 126:
                rect35.y = 0
        if speed36 > slow36:
            speed36 = 0
            slow36 = (random.randint(0, 10) * 20) + speedCheck
            rect36.y += 4
            if rect36.y > 126:
                rect36.y = 0
        if speed37 > slow37:
            speed37 = 0
            slow37 = (random.randint(0, 10) * 20) + speedCheck
            rect37.y += 4
            if rect37.y > 126:
                rect37.y = 0
        if speed38 > slow38:
            speed38 = 0
            slow38 = (random.randint(0, 10) * 20) + speedCheck
            rect38.y += 4
            if rect38.y > 126:
                rect38.y = 0
        if speed39 > slow39:
            speed39 = 0
            slow39 = (random.randint(0, 10) * 20) + speedCheck
            rect39.y += 4
            if rect39.y > 126:
                rect39.y = 0

I messed with the repetitive code trying to put it into loops, or functions but didn’t have the skills, or commands to do it. I revisited this code a few times over the next few months. I decided to crunch the code down and try the code on a new version of CircuitPython. The code still crashed, but it was not as deadly as it had been. I would just press the restart button and it would start running again. Yay!!

I managed to keep crashing the PyGamer. I decided to try to use lists (arrays) to handle the loops of the ‘green rain’. That worked well, and dropped the lines of repetitive code by a lot.

Since that worked out well I decided to add another animation on the screen. Even with all this happening on the device it was still crashing. I went back onto the Adafruit forums to see if someone was also having the same kind of trouble, or post my code to have it looked at. There was a newer version of CircuitPython and even NeoPixel.mpy. Now the code is running for hours. This morning I plugged it in and it was stopped in the middle of running after a little bit of time. That must have been a fluke. I plugged it into the wall usb and hung it up on a hook around 8 this morning. It was still running at 5 this evening.

# Write your code here :-)
# pygamer_dancing_fid_rev_1.py
# ** Cleaning up the code.
#
# I am now using Lists (arrays)
# for a few of the variables groups.
# **
# Press Button A to speed up the LEDs cycling.
# Press Button B to slow down the LEDs cycling.
# Press Start to change the color of the LEDs.
# Press Select to change the color of the name, fid.
# 
# text_area3 through 5 now handles the name fid.
# Each letter is handled separately.
# You can change it in there.
#
import board
import neopixel
import digitalio
import displayio
import gamepadshift
import array
import math
import random
import audioio
from adafruit_display_text import label
from adafruit_bitmap_font import bitmap_font
from adafruit_display_shapes.rect import Rect

display = board.DISPLAY

FREQUENCY = 2093  # 440 Hz middle 'A'
SAMPLERATE = 2 * FREQUENCY  # 8000 samples/second, recommended!

# Generate one period of sine wav.
length = SAMPLERATE // FREQUENCY
sine_wave = array.array("H", [0] * length)
for irange in range(length):
    sine_wave[irange] = int(math.sin(math.pi * 2 * irange / 18) * (2 ** 15) + 2 ** 15)

# enable the speaker
speaker_enable = digitalio.DigitalInOut(board.SPEAKER_ENABLE)
speaker_enable.direction = digitalio.Direction.OUTPUT
speaker_enable.value = True

audio = audioio.AudioOut(board.A0)
sine_wave_sample = audioio.RawSample(sine_wave)

led = neopixel.NeoPixel(board.NEOPIXEL, 5)
i = 0
led_speed = 200
red = (5, 0, 0)
blue = (0, 0, 5)
yellow = (5, 5, 0)
green = (0, 5, 0)
white = (5, 5, 5)
purple = (5, 0, 5)
pushed = 0
the_color = [red, blue, yellow, green, white, purple]
fid_color = [0xFF0000, 0x0000FF, 0xFFFF00, 0x00FF00, 0xFFFFFF, 0xFF00FF, 0x000000]
myX = 0
myY = 0
ledCheck = 0
ledOn = 0
soundTimer = 0
ledDirection = 1
fid_sine = [0, 1, 3, 4, 4, 5, 4, 4, 3, 1, 0, -1, -3, -4, -4, -5, -4, -4, -3, -1]
fid_count = 0
f_sine_count = 10
i_sine_count = 5
d_sine_count = 0

font2 = bitmap_font.load_font("SourceSerifPro_25.bdf")
font4 = bitmap_font.load_font("SourceSerifPro_52.bdf")
text_area = label.Label(font2, text="Hello", color=0xFFFFFF)
text_area.x = 48
text_area.y = 10
text_area2 = label.Label(font2, text="I am", color=0xFFFF00)
text_area2.x = 53
text_area2.y = 30
text_area3 = label.Label(font4, text="f", color=0xFF0000)
text_area3.x = 45
text_area3.y = 80
text_area4 = label.Label(font4, text="i", color=0xFF0000)
text_area4.x = 70
text_area4.y = 80
text_area5= label.Label(font4, text="d", color=0xFF0000)
text_area5.x = 85
text_area5.y = 80
j = 0
k = 0
my_color = the_color[j]
speedCheck = 10

pad = gamepadshift.GamePadShift(digitalio.DigitalInOut(board.BUTTON_CLOCK),
                   digitalio.DigitalInOut(board.BUTTON_OUT),
				   digitalio.DigitalInOut(board.BUTTON_LATCH))

rect = [0] * 40
slow = [0] * 40

bitmap = displayio.Bitmap(display.width, display.height, 2)
palette = displayio.Palette(2)
palette[0] = 0x000000  # This is the background of the display
palette[1] = 0x8A2BE2  # This is the foreground, Purple

# TileGrid for the bitmap
bitmap_grid = displayio.TileGrid(bitmap, pixel_shader=palette)

rect_back = Rect(0, 0, 160, 128, fill=0x000000)
for irange in range(40):
    rect[irange] = Rect(irange * 4, random.randint(0, 120), 3, 3, fill=0x00FF00)

for irange in range(40):
    slow[irange] = (random.randint(0, 10) * 20) + speedCheck

speed = [0] * 40

# Create a Group to hold the TileGrid
group = displayio.Group(max_size=50)

# Add the TileGrid to the Group
group.append(rect_back)
group.append(text_area)
group.append(text_area2)
group.append(text_area3)
group.append(text_area4)
group.append(text_area5)
for irange in range(40):
    group.append(rect[irange])

# Add the Group to the Display
display.show(group)

while True:
    if ledCheck > led_speed:
        if ledOn == 0:
            led[i] = (my_color)
            ledOn = 1
        else:
            led[i] = (0, 0, 0)
            ledOn = 0
            i += ledDirection
            if i < 1 or i > 3:
                ledDirection *= -1
        ledCheck = 0
    ledCheck += 1

    if pushed == 1:
        soundTimer += 1
        if soundTimer == 300:
            audio.stop()
        pressed = pad.get_pressed()
        if pressed == 0:
            pushed = 0
            audio.stop()

    if pushed == 0:
        pressed = pad.get_pressed()
        if pressed == 0x01:
            led_speed += .05
        if pressed == 0x02:
            led_speed -= .05
        if led_speed > 500:
            led_speed = 500
        if led_speed < 10:
            led_speed = 10
        if pressed == 0x04:
            j += 1
            if j > len(the_color) - 1:
                j = 0
            my_color = the_color[j]
            pushed = 1
            soundTimer = 0
            audio.play(sine_wave_sample, loop=True)
        if pressed == 0x08:
            pushed = 1
            k += 1
            if k > len(fid_color) - 1:
                k = 0
            text_area3.color = fid_color[k]
            text_area4.color = fid_color[k]
            text_area5.color = fid_color[k]
    for irange in range(40):
        speed[irange] += 1

    for irange in range(40):
        if speed[irange] > slow[irange]:
            speed[irange] = 0
            slow[irange] = (random.randint(0, 10) * 20) + speedCheck
            rect[irange].y += 4
            if rect[irange].y > 126:
                rect[irange].y = 0
        
    fid_count += 1
    if fid_count > 15:
        fid_count = 0
        f_sine_count += 1
        if f_sine_count == len(fid_sine):
            f_sine_count = 0
        text_area3.y = 80 + fid_sine[f_sine_count] * 3
        i_sine_count += 1
        if i_sine_count == len(fid_sine):
            i_sine_count = 0
        text_area4.y = 80 + fid_sine[i_sine_count] * 3
        d_sine_count += 1
        if d_sine_count == len(fid_sine):
            d_sine_count = 0
        text_area5.y = 80 + fid_sine[d_sine_count] * 3

I have cleaned it up a little more and took out unused includes. I also added some comments inside the code. It went from 592 lines of code down to 209. I can probably crunch it down some more and add some stuff.

Perhaps the ‘green rain’ could be changed to sprites to make them fall faster.

BTW, if you know of a better way for me to list the code, especially long code, please let me know. SyntaxHighlighter can make the code into a clickable line to open, but I would rather have a set size box that is scrollable.

EDIT – I added the files to github

https://github.com/gbushta/Hello-I-am

The repo contains both the old file and the newer crunched file.
Foldable 3D prints

After seeing so many interesting prints onto fabric I wanted to try to print something that can fold. Earlier I had used a 3D pen to make candle holders, a unicorn horn on a headband, and a tiara. I drew them on a flat surface with the 3D pen and used a blow drier to heat the PLA so I could mold it into a curve. It was really easy.

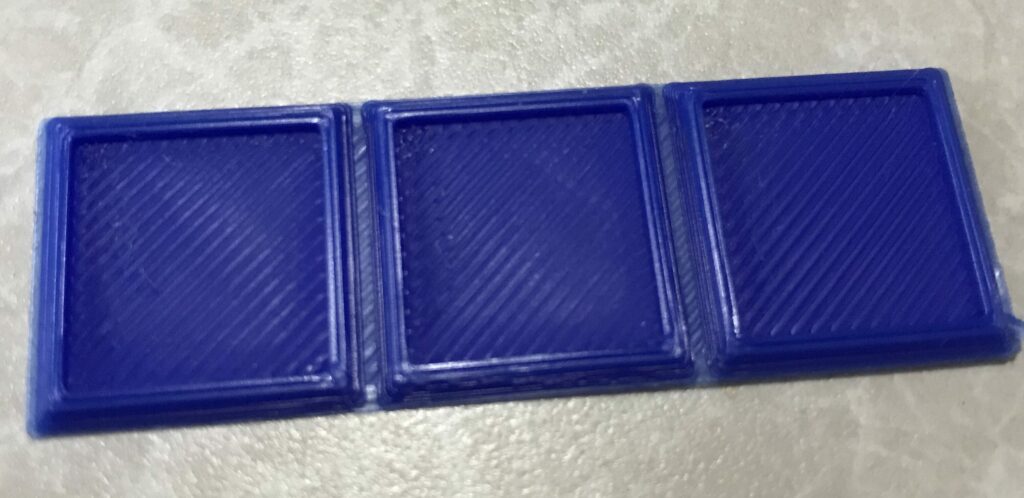
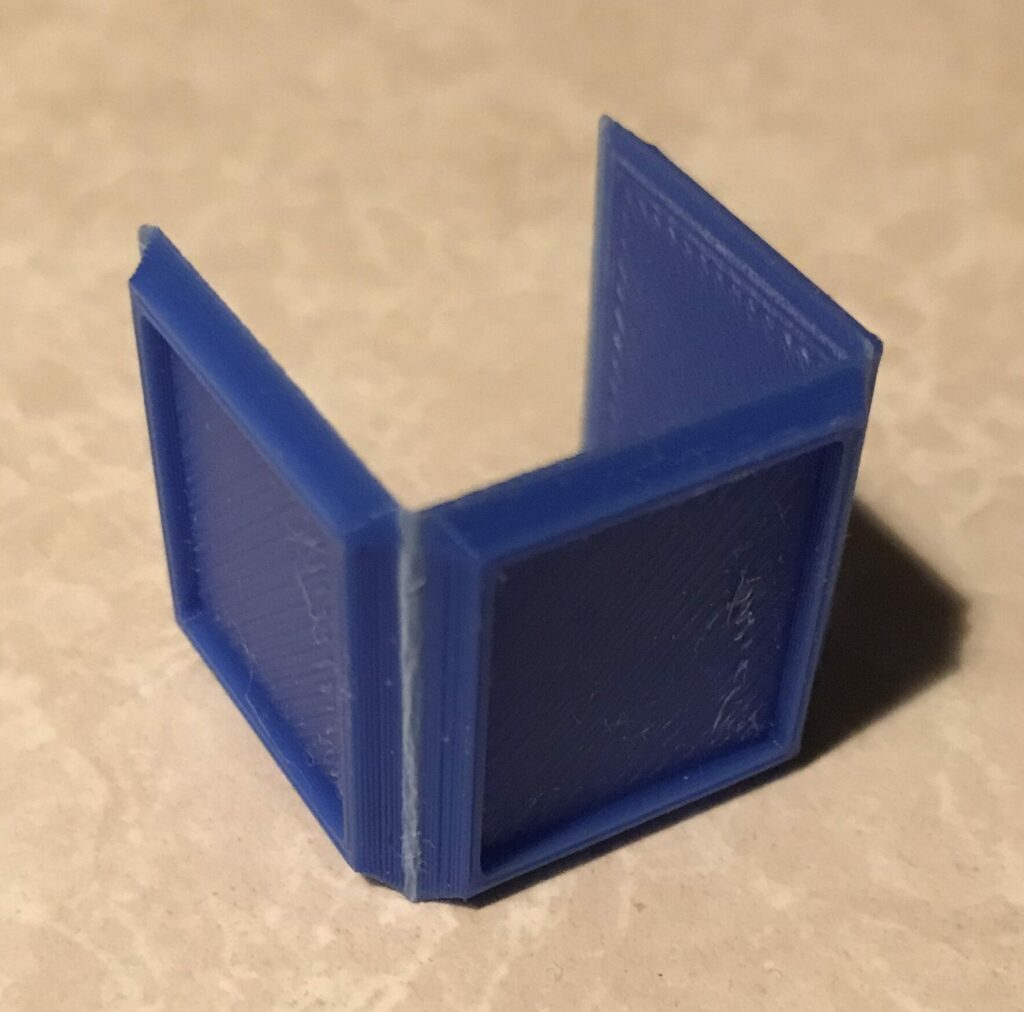
For a test I decided to use the 3D printer to print three squares that are joined linearly by a single layer of filament. The test print didn’t take very long and the result was what I had expected. I am happy with the result.

There has been an update to WordPress and I am having trouble seeing where to upload pictures so I can put them into this post.

Well, that was easy. And I saw editing options for the ‘Media.’

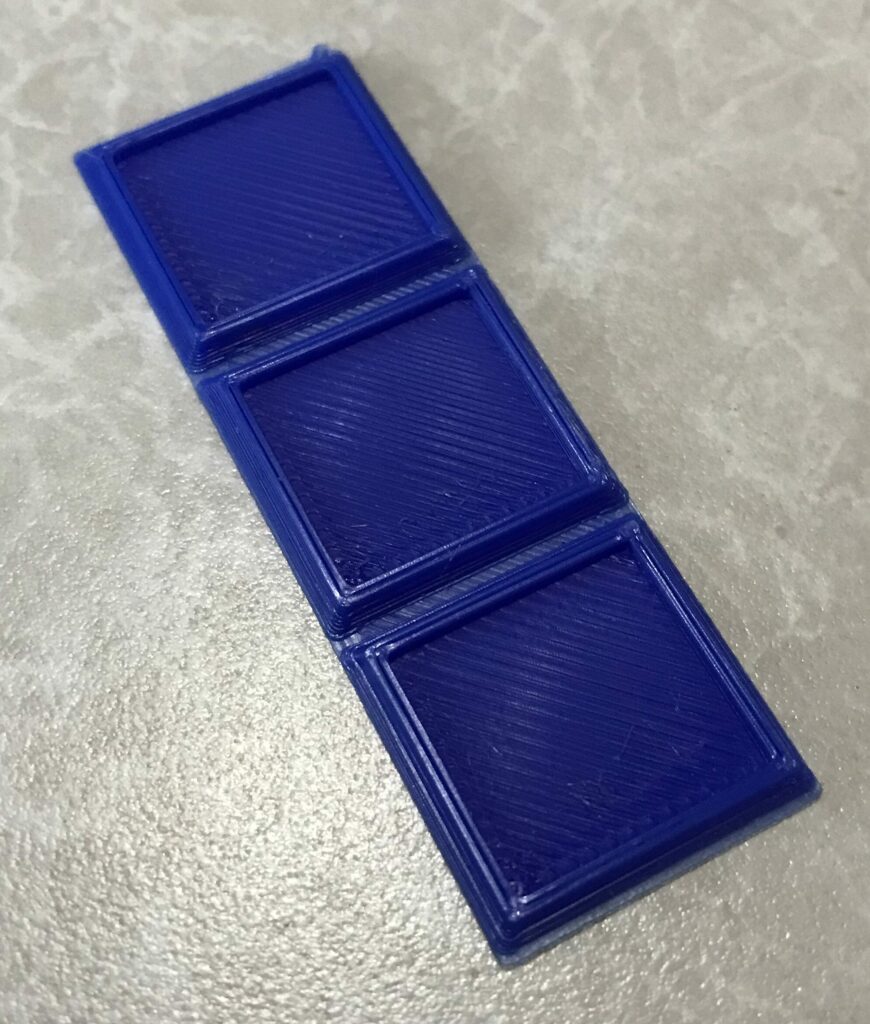
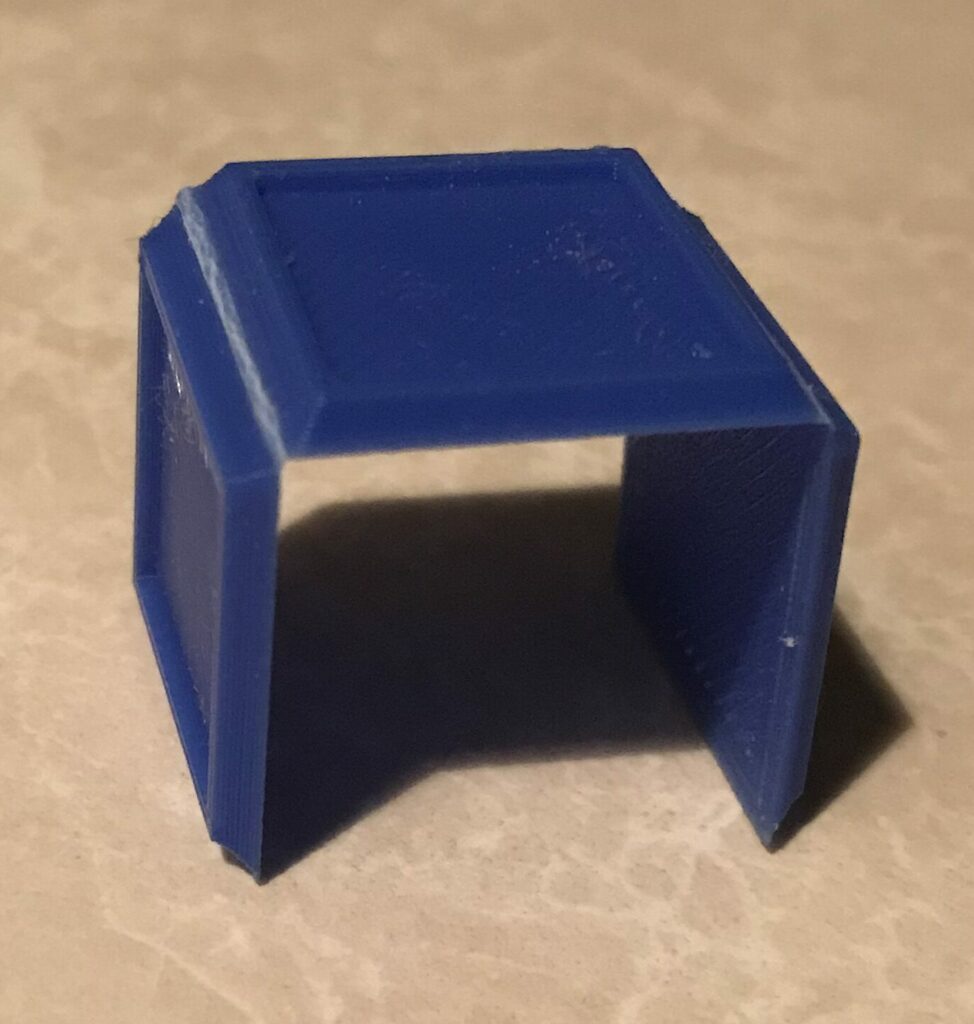
Here is a picture of the three squares that I printed. It is flat and ready to bend.

I really just did this as a test without printing it upon some mesh. I thought I would have to use some heat from a blow dryer or soldering iron to get it to bend, but bending is easy.

Once you get the designs down, you should be able to print foldable objects. I am thinking of little model houses, cubes, ornaments, and other decorations. After you get the pieces folded into the shape you want you can glue them together with the same filament using a 3D pen.

NeoPixel Purse

I finished the code for the purse I was working on. I included a push button on an Arduino Nano to cycle through the colors. There are 16 different choices. Eight of the choices are animations.

NeoPixel Purse

I believe I saw this design on Adafruit.com. I could not find it again on their site, nor could I find it by searching on Google.

I invented some code to go with this purse so Linda would be able to choose what she wanted it to look like at the time.

#include <Adafruit_NeoPixel.h>

#define PIN 9
#define BUTTON_PIN 2
#define number_of_pixels 34
// Parameter 1 = number of pixels in strip
// Parameter 2 = pin number (most are valid)
// Parameter 3 = pixel type flags, add together as needed:
Adafruit_NeoPixel strip = Adafruit_NeoPixel(number_of_pixels, PIN, NEO_GRB + NEO_KHZ800);

bool oldState = HIGH;
int showType = 0;
long time_counter = 0;
long increment = 25000;
int chase_position = 0;
int old_chase_position = 0;

void setup() {
  pinMode(BUTTON_PIN, INPUT_PULLUP);
  strip.begin();
  strip.setBrightness(15); // LOW brightness
  for (uint16_t i = 0; i < number_of_pixels; i++) {
       strip.setPixelColor(i, strip.Color(255,0,0));
      }
  strip.show();
}

void loop() {
    // Get current button state.
  bool newState = digitalRead(BUTTON_PIN);

  // Check if state changed from high to low (button press).
  if (newState == LOW && oldState == HIGH) {
    // Short delay to debounce button.
    delay(20);
    // Check if button is still low after debounce.
    newState = digitalRead(BUTTON_PIN);
    if (newState == LOW) {
      showType++;
      if (showType > 15)
        showType=0;
      startShow(showType);
    }
  }

  // Set the last button state to the old state.
  oldState = newState;

  if(time_counter == increment) {
    time_counter = 0;
    check_running(showType);
  }
  time_counter += 1;
}

// red purple blue white pink magenta green
// all theater chase
// rainbow cycle all at a time.
// rainbow chase like it already has but continuous

void startShow(int i) {
  switch(i){
    case 0: colorWipe(strip.Color(255, 0, 0));    // Red
            break;
    case 1: colorWipe(strip.Color(128, 0, 128));  // Purple
            break;
    case 2: colorWipe(strip.Color(0, 0, 255));  // Blue
            break;
    case 3: colorWipe(strip.Color(128, 128, 128));  // White
            break;
    case 4: colorWipe(strip.Color(255, 80, 80));  // Pink
            break;
    case 5: colorWipe(strip.Color(255, 0, 255));  // Magenta
            break;
    case 6: colorWipe(strip.Color(0, 128, 0));  // Green
            break;
    case 7: theaterChase2(strip.Color(255, 0, 0));    // Red
            break;
    case 8: theaterChase2(strip.Color(128, 0, 128));  // Purple
            break;
    case 9: theaterChase2(strip.Color(0, 0, 255));  // Blue
            break;
    case 10: theaterChase2(strip.Color(128, 128, 128)); // White
            break;
    case 11: theaterChase2(strip.Color(255, 128, 128));  // Pink
            break;
    case 12: theaterChase2(strip.Color(255, 0, 255));  // Magenta
            break;
    case 13: theaterChase2(strip.Color(0, 128, 0));  // Green
            break;
    case 14: rainbow1();
            break;
    case 15: rainbowCycle(1);
            break;
  }
}

void check_running(int i) {
  switch(i){
    case 0: break;
    case 1: break;
    case 2: break;
    case 3: break;
    case 4: break;
    case 5: break;
    case 6: break;
    case 7: theaterChase2(strip.Color(255, 0, 0));    // Red
            break;
    case 8: theaterChase2(strip.Color(128, 0, 128));  // Purple
            break;
    case 9: theaterChase2(strip.Color(0, 0, 255));  // Blue
            break;
    case 10: theaterChase2(strip.Color(128, 128, 128)); // White
            break;
    case 11: theaterChase2(strip.Color(255, 80, 80));  // Pink
            break;
    case 12: theaterChase2(strip.Color(255, 0, 255));  // Magenta
            break;
    case 13: theaterChase2(strip.Color(0, 128, 0));  // Green
            break;
    case 14: break;
    case 15: rainbowCycle(1);
            break;
  }
}

// Fill the LEDs with a color
void colorWipe(uint32_t c) {
  for(uint16_t i=0; i<strip.numPixels(); i++) {
    strip.setPixelColor(i, c);
    strip.show();
  }
}

void rainbow1() {
  for(uint16_t i=0; i< strip.numPixels(); i++) {
      strip.setPixelColor(i, Wheel((i * 256 / strip.numPixels()) & 255));
  }
    strip.show();
}

// Slightly different, this makes the rainbow equally distributed throughout
void rainbowCycle(uint8_t wait) {
  uint16_t i, j;
  j = 0;
  for(j=0; j<256*5; j++) { // 5 cycles of all colors on wheel
    for(i=0; i< strip.numPixels(); i++) {
      strip.setPixelColor(i, Wheel(((i * 256 / strip.numPixels()) + j) & 255));
    }
    strip.show();
    delay(wait);
  }
}

// Theater-style crawling lights -edited-
void theaterChase2(uint32_t c) {
  for (int i=0; i < strip.numPixels(); i=i+3) {
    strip.setPixelColor(i+old_chase_position, 0);
  }
  for (int i=0; i < strip.numPixels(); i=i+3) {
    strip.setPixelColor(i+chase_position, c);
  }
  strip.show();
  old_chase_position = chase_position;
  chase_position +=1;
  if (chase_position > 2) {
    chase_position = 0;
  }
}

// Input a value 0 to 255 to get a color value.
// The colours are a transition r - g - b - back to r.
uint32_t Wheel(byte WheelPos) {
  WheelPos = 255 - WheelPos;
  if(WheelPos < 85) {
    return strip.Color(255 - WheelPos * 3, 0, WheelPos * 3);
  }
  if(WheelPos < 170) {
    WheelPos -= 85;
    return strip.Color(0, WheelPos * 3, 255 - WheelPos * 3);
  }
  WheelPos -= 170;
  return strip.Color(WheelPos * 3, 255 - WheelPos * 3, 0);
}

I got the base code from the Arduino web site and changed it to do what I wanted. I didn’t like that the original code would cycle through animations and not allow you to select the next one until it was finished. I change that in the void loop() section by including a counter with an increment. When the counter meets the increment reset it to zero and go do the animation one more step. Mainly this is for the theater style crawling lights. If you want the lights to crawl faster make this number smaller. (I don’t mean in font size.)

ESP32 DeepSleep

I have been fighting all day with an ESP32 module. It has 38 pins. Yesterday I got it to be able to get out of deep_sleep using a touch pin using MicroPython. Prior to that I was toggling the onboard LED with a touch pin. Copy the code and use it as you wish.

import machine
from machine import Pin, TouchPad
import time
import esp32
wake = Pin(4, mode = Pin.IN, pull = Pin.PULL_DOWN)
esp32.wake_on_ext1(pins = [wake], level = Pin.WAKE_HIGH)

print('Entering Deep Sleep in 10 seconds.')
time.sleep(10)
print('Time is up.  Going to sleep')
machine.deepsleep()

I put in that time.sleep(10) so I could catch it while it was awake and be able to make changes to the code if needed.

TheMicroPython bin file I am using is esp32-20190113-v1.9.4-779-g5064df207.bin

I’ve decided to add some to the code.

The above code does not indicate when the ESP32 is awake unless you are reading the serial output. I decided to include an LED indicator for when the module is awake. The LED goes out when the module goes into sleep mode.

import machine
from machine import Pin, TouchPad
import time
import esp32
wake = Pin(4, mode = Pin.IN, pull = Pin.PULL_DOWN)
esp32.wake_on_ext1(pins = [wake], level = Pin.WAKE_HIGH)
led = Pin(2, Pin.OUT)

print('Entering Deep Sleep in 10 seconds.')
print('When the blue LED is on I am awake.')
led.value(1)
time.sleep(10)
print('Time is up.  Going to sleep')
machine.deepsleep()

Pixel Strip Boom

LED Strip Boom

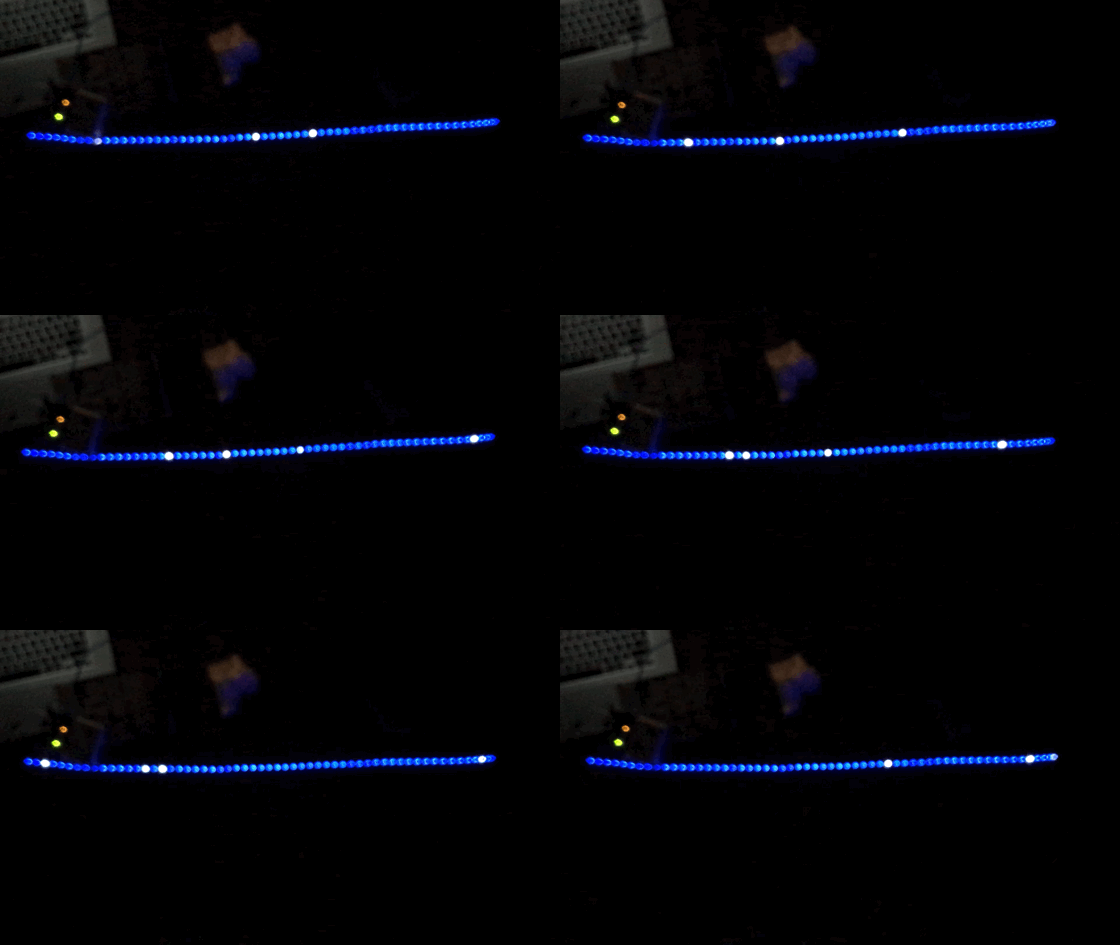
Here’s another LED Strip animation.

I wanted to have the LEDs appear to come from the center of the strip in sets of different colors. The color sets also needed to move from the center at different velocities. I got the code running and then lost it in my list of sketches. I found it again today.

I chose Purple, Red, Yellow and Blue as the colors for this animation. There are other ways to get this sketch to run, but I used the type that checks the clock and compares a previously saved time to see if enough time has passed to move that particular color.

Here’s the full code. Then I’ll give an explanation.

<code>#include <adafruit_neopixel.h>
 
#define PIN 9
#define numberOfPixels 60
int out_interval = 20;
int boom_interval = 10;
int red_interval = 8;
int purple_interval = 75;
int out_count = 0;
int boom_count = 0;
int red_count = 0;
int purple_count = 0;
long outPreviousMillis = 0;
long boomPreviousMillis = 0;
long redPreviousMillis = 0;
long purplePreviousMillis = 0;
unsigned long currentMillis;
Adafruit_NeoPixel strip = Adafruit_NeoPixel(numberOfPixels, PIN, NEO_GRB + NEO_KHZ800);
 
void setup() {
  strip.begin();
  strip.setBrightness(5); // LOW brightness
  allOff();
  strip.show(); // Initialize all pixels to 'off'
}
 
 
void loop() {
  currentMillis = millis();
    tracerout();
    boom();
    redBoom();
    purpleBoom();
    strip.show();
}
 
void boom() {
  if(currentMillis - boomPreviousMillis > boom_interval) {
    boomPreviousMillis = currentMillis;
  if(boom_count>numberOfPixels/2+1) {
    boom_count=0;
  }else{
    boom_count++;
  }
  }
  strip.setPixelColor(numberOfPixels/2+boom_count-1, strip.Color(0,0,0));
  strip.setPixelColor(numberOfPixels/2-boom_count+1, strip.Color(0,0,0));
  strip.setPixelColor(numberOfPixels/2+boom_count, strip.Color(255,255,0));
  strip.setPixelColor(numberOfPixels/2-boom_count, strip.Color(255,255,0));
 
}
 
void redBoom() {
  if(currentMillis - redPreviousMillis > red_interval) {
    redPreviousMillis = currentMillis;
  if(red_count>numberOfPixels/2+1) {
    red_count=0;
  }else{
    red_count++;
  }
  }
  strip.setPixelColor(numberOfPixels/2+red_count-1, strip.Color(0,0,0));
  strip.setPixelColor(numberOfPixels/2-red_count+1, strip.Color(0,0,0));
  strip.setPixelColor(numberOfPixels/2+red_count, strip.Color(255,0,0));
  strip.setPixelColor(numberOfPixels/2-red_count, strip.Color(255,0,0));
 
}
 
void purpleBoom() {
  if(currentMillis - purplePreviousMillis > purple_interval) {
    purplePreviousMillis = currentMillis;
  if(purple_count>numberOfPixels/2+1) {
    purple_count=0;
  }else{
    purple_count++;
  }
  }
  strip.setPixelColor(numberOfPixels/2+purple_count-1, strip.Color(0,0,0));
  strip.setPixelColor(numberOfPixels/2-purple_count+1, strip.Color(0,0,0));
  strip.setPixelColor(numberOfPixels/2+purple_count, strip.Color(255,0,255));
  strip.setPixelColor(numberOfPixels/2-purple_count, strip.Color(255,0,255));
 
}
 
void allOff() {
  for(int i=0; i<numberofpixels; i++)="" {="" strip.setpixelcolor(i,="" strip.color(0,0,0));="" }="" void="" tracerout()="" if(currentmillis="" -="" outpreviousmillis=""> out_interval) {
    outPreviousMillis = currentMillis;
  if(out_count>numberOfPixels/2+3) {
    out_count=0;
  }else{
    out_count++;
  }
  }
    strip.setPixelColor(numberOfPixels/2+out_count, strip.Color(0,0,255));
    strip.setPixelColor(numberOfPixels/2-out_count, strip.Color(0,0,255));
    if(out_count>2) {
      strip.setPixelColor(numberOfPixels/2-out_count+1, strip.Color(0,0,96));
      strip.setPixelColor(numberOfPixels/2-out_count+2, strip.Color(0,0,50));
      strip.setPixelColor(numberOfPixels/2-out_count+3, strip.Color(0,0,0));
      strip.setPixelColor(numberOfPixels/2+out_count-1, strip.Color(0,0,96));
      strip.setPixelColor(numberOfPixels/2+out_count-2, strip.Color(0,0,50));
      strip.setPixelColor(numberOfPixels/2+out_count-3, strip.Color(0,0,0));
    }
    else if(out_count<2) {
      strip.setPixelColor(numberOfPixels/2, strip.Color(0,0,96));
    }
    else
    {
      strip.setPixelColor(numberOfPixels/2, strip.Color(0,0,50));
      strip.setPixelColor(numberOfPixels/2+1, strip.Color(0,0,96));
      strip.setPixelColor(numberOfPixels/2-1, strip.Color(0,0,96));
    }
}
</numberofpixels;></adafruit_neopixel.h></code>


Per my usual way of doing things with RGB LED Strips, I am using Adafruit’s Adafruit_NeoPixel.h library and an Arduino UNO. I have set the brightness to 5 (very low) and am using pin 9. I am using an RGB LED Strip with 60 pixels.

I started coding for only one color to see if I could get the animation to spread our of the center of the strip toward both ends. The color is blue and there are three brightnesses of blue. This is called with tracerout();. The variables for the blue colors are prefixed with ‘out’. They are out_interval, out_count and outPreviousMillis.

Inside tracerout(), first the clock is checked. If the current time, in milliseconds, minus the previous time that was saved is a smaller number than how often I want the code to run (out_interval) then don’t run the code inside this function. I have out_interval set to 20 meaning unless twenty milliseconds have passed don’t run this part of the sketch which makes the blue lights appear to move.

What runs inside the tracerout() function is to check if the blue pixels have gone off the ends of the strip. If so, start them back at the center. If not, increase the counter that moves the blue lights toward the ends of the strip. Then display the blue lights.

There are three brightnesses of Blue and a blank, or zero, brightness of blue. They look like bright blue, medium blue, dim blue and off. The off erases a previous lighted pixel so you don’t have to blank the strip and then draw the new positions of blues.

There are three more similar functions to handle different colors at different speeds. boom() handles the Yellow color at a speed of 10, or twice the speed of Blue. redBoom() handles the Red color at a speed of 8. purpleBoom() handles Purple color at the slowest speed of 75.

They all check on the current time and compare it to the previous recorded time for their color. If enough time has passed then the position of the colors is updated with the new color. When a color position has changed turn off the pixel in the former position and light up the next pixel. This gives the illusion of motion.

My kids, and my wife, say to keep the brightness low. When it is higher it is not easy to look at.

Sparkle LED Strip

Sparkle LED Strip
Here is a nice short sketch for an LED Strip animation with a sparkle added to it. This is the code: However the animated GIF does not have the random delay that is at the end of the sketch.

#include <Adafruit_NeoPixel.h>
 
#define PIN 9
#define numberOfPixels 60
int myRandom = 0;
Adafruit_NeoPixel strip = Adafruit_NeoPixel(numberOfPixels, PIN, NEO_GRB + NEO_KHZ800);
 
void setup() {
  strip.begin();
  strip.setBrightness(5); // LOW brightness
  allBlue();
  strip.show(); // Initialize all pixels to 'off'
}
 
void loop() {
  // put your main code here, to run repeatedly:
myRandom= random(numberOfPixels);
strip.setPixelColor(myRandom, strip.Color(255,255,255));
strip.show();
delay(5);
strip.setPixelColor(myRandom, strip.Color(0,0,50));
strip.show();
delay(random(25,75));
}
 
void allBlue() {
  for(uint16_t i=0; i<strip.numPixels(); i++) {
      strip.setPixelColor(i, strip.Color(0, 0, 50));
      strip.show();
  }
}


It is not very long at all. I like short code examples that give us something to look at.

It uses pin number 9 on an Arduino and Adafruit’s Adafruit_NeoPixel library.

#include <Adafruit_NeoPixel.h>
 
#define PIN 9
#define numberOfPixels 60

There is a random number and the brightness is very low. It is set to 5. You can increase the brightness as you wish. Brightness goes all the way up to 255. I find 255 way too bright. In fact, a brightness of 100 is still quite bright.

int myRandom = 0;
strip.setBrightness(5); // LOW brightness

In setup() the pixels are all set to a dark blue: strip.Color(0,0,50). This is called with allBlue();. While the code runs the default background is set to this dark blue. You can change it to any color you like.

void allBlue() {
  for(uint16_t i=0; i<strip.numPixels(); i++) {
      strip.setPixelColor(i, strip.Color(0, 0, 50));
      strip.show();
  }
}

myRandom is a random number representing each of the pixels on the strip of pixels. Since there are 60 pixels the random number is 0 to 59.

myRandom= random(numberOfPixels);

Once the myRandom number is chosen the pixel associated with that number is set to white for a tiny bit of time. You can see this time in the delay(5); command. After that, the pixel is set back to the blue color. Then there is a random time until the code repeats. Upon repeating the next random pixel is chosen to turn white for a short amount of time. And on it goes.

The random time that is chosen before the code repeats is set by the following line of code. It is setting a delay length of time from 25 through 74.

delay(random(25,75));

RGB LED Strips

I love the individually programmable NeoPixel strips and the animations that you can come up with when using an Arduino or other microcontroller. Adafruit taught me the basics and I took off from there.

My favorite animation from Adafruit is the “rainbowCycle” animation. It is included in the Adafruit_NeoPixel.h library examples inside the strandtest sketch. I took that example out of the sketch by deleting everything I didn’t need and renaming the sketch.
I didn’t like the direction that the animation flows from the far end of the strip to the end near the Arduino, so I figured a way to alter that.

Here is the edited version of the sketch.

#include <Adafruit_NeoPixel.h>
 
#define PIN 9
#define numberOfPixels 60
Adafruit_NeoPixel strip = Adafruit_NeoPixel(numberOfPixels, PIN, NEO_GRB + NEO_KHZ800);
 
void setup() {
  strip.begin();
  strip.setBrightness(5); // LOW brightness
  allOff();
  strip.show(); // Initialize all pixels to 'off'
}
 
void loop() {
rainbowCycle(0);
}
 
void allOff() {
  for(uint16_t i=0; i<strip.numPixels(); i++) {
      strip.setPixelColor(i, strip.Color(0, 0, 0));
      strip.show();
  }
}
 
// Slightly different, this makes the rainbow equally distributed throughout
// I divided the number of pixels by three and got 20. I set up that
// there are three equally distributed rainbows.
void rainbowCycle(uint8_t wait) {
  uint16_t i, j;
 
  for(j=0; j<256*5; j++) { // 5 cycles of all colors on wheel
    for(i=0; i< 20; i++) {
      strip.setPixelColor(19-i, Wheel(((i * 256 / 20) + j) & 255));
      strip.setPixelColor(19-i+20, Wheel(((i * 256 / 20) + j) & 255));
      strip.setPixelColor(19-i+40, Wheel(((i * 256 / 20) + j) & 255));
    }
    strip.show();
    delay(wait);
  }
}
 
// Input a value 0 to 255 to get a color value.
// The colours are a transition r - g - b - back to r.
uint32_t Wheel(byte WheelPos) {
  if(WheelPos < 85) {
   return strip.Color(WheelPos * 3, 255 - WheelPos * 3, 0);
  } else if(WheelPos < 170) {
   WheelPos -= 85;
   return strip.Color(255 - WheelPos * 3, 0, WheelPos * 3);
  } else {
   WheelPos -= 170;
   return strip.Color(0, WheelPos * 3, 255 - WheelPos * 3);
  }
}


The original section in the sketch looks like this:

void rainbowCycle(uint8_t wait) {
uint16_t i, j;
 
for(j=0; j<256*5; j++) { // 5 cycles of all colors on wheel
for(i=0; i< strip.numPixels(); i++) {
strip.setPixelColor(i, Wheel(((i * 256 / strip.numPixels()) + j) & 255));
}
strip.show();
delay(wait);
}
}


The original code has the rainbow colors spread evenly over the length of the LED strip and cycles the colors from the far end toward the Arduino.

The strip has 60 pixels and I wanted to have the animation appear to flow from the Arduino toward the far end. I also wanted the rainbow to be spread evenly three times over the length of the LED strip.

All of the changes I needed to make are in this section of code:

for(i=0; i< strip.numPixels(); i++) {
strip.setPixelColor(i, Wheel(((i * 256 / strip.numPixels()) + j) & 255));
}


First of all, to make the animation run in the opposite direction I just put “59-” in front of the “i” where it says “strip.setPixelColor(i, Wheel…”. It looks like:

for(i=0; i< strip.numPixels(); i++) {
strip.setPixelColor(59-i, Wheel(((i * 256 / strip.numPixels()) + j) & 255));
}

Yes, I could have had the for loop count down, but adding three characters was much easier. Also, “for(i=strip.numPixels()-1; i > -1; i–)” doesn’t seem to work and trouble shooting it would take longer than just adding three characters.

Instead of 59 I could have used strip.numPixels()-1. I was just making it easier for me with the strip I have.

To get three evenly distributed rainbows across the 60 NeoPixels I had to divide the total number (60) by three. So, I have three sets of twenty.

The three sets are separated out by i, i+20 and i+40. The count goes from 0 to 19, which is twenty numbers. To make the animation run backwards I had to put “19-” in front of the “i”. The section of code looks like:

for(i=0; i< 20; i++) {
strip.setPixelColor(19-i, Wheel(((i * 256 / 20) + j) & 255));
strip.setPixelColor(19-i+20, Wheel(((i * 256 / 20) + j) & 255));
strip.setPixelColor(19-i+40, Wheel(((i * 256 / 20) + j) & 255));
}

In the void loop() I called rainbowCycle(0);. The zero means no delay. I wanted it to run as quickly as possible on the Arduino UNO.

Here, again, is the final sketch.

#include <Adafruit_NeoPixel.h>
 
#define PIN 9
#define numberOfPixels 60
Adafruit_NeoPixel strip = Adafruit_NeoPixel(numberOfPixels, PIN, NEO_GRB + NEO_KHZ800);
 
void setup() {
  strip.begin();
  strip.setBrightness(5); // LOW brightness
  allOff();
  strip.show(); // Initialize all pixels to 'off'
}
 
void loop() {
rainbowCycle(0);
}
 
void allOff() {
  for(uint16_t i=0; i<strip.numPixels(); i++) {
      strip.setPixelColor(i, strip.Color(0, 0, 0));
      strip.show();
  }
}
 
// Slightly different, this makes the rainbow equally distributed throughout
// I divided the number of pixels by three and got 20. I set up that
// there are three equally distributed rainbows.
void rainbowCycle(uint8_t wait) {
  uint16_t i, j;
 
  for(j=0; j<256*5; j++) { // 5 cycles of all colors on wheel
    for(i=0; i< 20; i++) {
      strip.setPixelColor(19-i, Wheel(((i * 256 / 20) + j) & 255));
      strip.setPixelColor(19-i+20, Wheel(((i * 256 / 20) + j) & 255));
      strip.setPixelColor(19-i+40, Wheel(((i * 256 / 20) + j) & 255));
    }
    strip.show();
    delay(wait);
  }
}
 
// Input a value 0 to 255 to get a color value.
// The colours are a transition r - g - b - back to r.
uint32_t Wheel(byte WheelPos) {
  if(WheelPos < 85) {
   return strip.Color(WheelPos * 3, 255 - WheelPos * 3, 0);
  } else if(WheelPos < 170) {
   WheelPos -= 85;
   return strip.Color(255 - WheelPos * 3, 0, WheelPos * 3);
  } else {
   WheelPos -= 170;
   return strip.Color(0, WheelPos * 3, 255 - WheelPos * 3);
  }
}

Using an FTDI to program an ESP8266-01

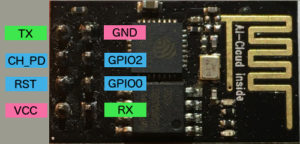
ESP8266-01 Pin Labels
It took me days to figure out how to program an ESP8266 with an FTDI connector. I finally got it figured out last night. I remember using an Arduino Uno to program them a little over a year ago. I’ll have to try that again sometime soon.
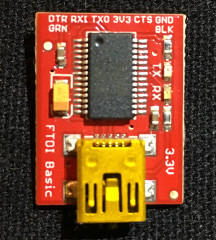
The two FTDI boards(? cards? devices?) that I have look different but, essentially, are the same. I have one 3.3v from Sparkfun.
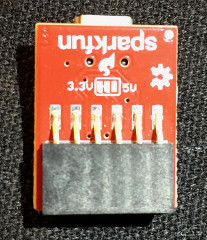
Sparkfun FTDI FrontSparkfun FTDI Back

On the back side it looks like you’d be able to solder a jumper wire across the little pads to make it either 3.3v or 5v. I am not sure and don’t feel like burning it up just to see.

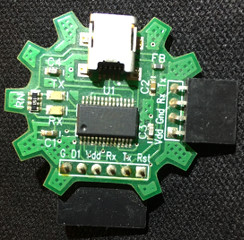
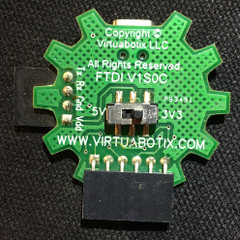
The second one is from Virtuabotix. It has a switch on the back side so you can choose either 3.3v or 5v. There are also two connectors that you can use, four pins or six pins.
Virtuabotix FTDI FrontVirtuabotix FTDI Back

You actually only have to use four of the pins on the FTDI to program the ESP8266-01, voltage out (VDD or 3.3v), GND, RX, and TX.

I found it much easier to use a little homemade breadboard header while programming or just messing around with the ESP8266-01. The
ESP8266-01 by itself is not breadboard friendly. I ended up taking a row of header pins and cut them into 4 pin lengths. I then glued them together to make a 2×4 header row that I could plug the ESP8266-01 into. I bent the rows of the pins outward, away from the opposite side, and then back vertical so they would fit into a breadboard across that little trough that separates the two sides of the breadboard. You have to keep messing with the angles of the wires to get the pins into the correct position. It doesn’t take too awful much time to get it correct.

There are eight pins on the ESP8266-01. You only need to hook up six of the pins on the ESP8266-01 to four of the FTDI pins.

If you look closely you will notice on the Sparkfun FTDI the six pins are labeled GND, CTS, 3v3, TX0, RX1, and DTR. On the Virtuabotix FTDI the six pins are labeled G, D1, Vdd, Rx, Tx, and Rst. The second set of four pins on the Virtuabotix are labeled Vdd, Gnd, Rx, and Tx. We are going to use only four of the pins on the FTDI. The four pin connection on the Virtuabotix FTDI already has the only ones we need. The ones on the six pin connectors that we will use are ground (G or GND), voltage (3v3, or Vdd), receive (Rx or RX1) and transmit (Tx or TX0). You may have a board that has different pin labeling, but they should be the same and in the same order. That is, if the company followed the same building convention as these two companies.

Since you will need to use six of the pins on the ESP8266-01 and only four of the FTDI pins it is easier to use a breadboard. The pin wiring will be:
FTDI -> ESP8266-01
GND -> GND and GPIO0 (this is ground)
3v3 -> VCC and CH_PD (this is voltage)
RX -> RX
TX -> TX

Both the ground and voltage pins of the FTDI go to two pins on the ESP8266-01.

Once you have the two devices hooked together you can plug in the FTDI to your computer and upload a program to the ESP8266-01.

I used the Arduino IDE to program the ESP8266-01. I am familiar with the Arduino IDE so I use it.

Once you have the USB cable hooked up to your computer, in the Arduino IDE select Tools from the top menu. Select “Generic ESP8266 Module” for the Board. On version 1.6.5 of the Arduino IDE more options will show up under Tools. I have them set as the following:
Flash Mode: “DIO”
Flash Frequency: “40MHz”
Upload Using: “Serial”
CPU Frequency: “80MHz”
Flash Size: “512K (64K SPIFFS)”
Upload Speed; “115200”

For the Port you will need to select the port that your FTDI is using.

I modified the basic BLINK sketch to blink an LED for 1/10 of a second twice and half a second repeatedly. After you have the ESP8266-01 programmed you will need to disconnect the wiring for the FTDI. Then you will need to wire up the ESP8266-01 with battery + to VCC, and battery – to ground. I used two AA batteries for power. Also put a resistor from GPIO2 to an LED and the other leg of the LED to ground. There should also be a jumper between CH_PD and VCC so they both get power from the battery.

Here is a copy of the sketch that I modified slightly (you may use it and modify it):

/*
Blink
Turns on an LED on for one tenth of a second
then off for one tenth of a second
then on for one tenth of a second
then off for one tenth of a second
then on for half a second
then off for half of a second
repeatedly.

This example code is in the public domain.
*/

// Pin 13 has an LED connected on most Arduino boards.
// Pin 11 has the LED on Teensy 2.0
// Pin 6 has the LED on Teensy++ 2.0
// Pin 13 has the LED on Teensy 3.0
// Pin 2 for the ESP8266-01 and I put the LED on the breadboard
// for this device with a resistor to not burn out the LED.
// give it a name:
int led = 2;

// the setup routine runs once when you press reset:
void setup() {
// initialize the digital pin as an output.
pinMode(led, OUTPUT);
}

// the loop routine runs over and over again forever:
void loop() {
digitalWrite(led, HIGH); // turn the LED on (HIGH is the voltage level)
delay(100); // wait for a 1/4 second
digitalWrite(led, LOW); // turn the LED off by making the voltage LOW
delay(300); // wait for a 1/4 second
digitalWrite(led, HIGH);
delay(100);
digitalWrite(led, LOW);
delay(300);
digitalWrite(led, HIGH);
delay(500);
digitalWrite(led, LOW);
delay(500);
}

That’s about it for using an FTDI to program an ESP8266-01 using the Arduino software.

Re-learning, since I didn’t document.

I messed with ESP8266 devices a lot just over a year ago. Man, did I have fun. I got to where I could get one to log into my local network (LAN), or log in and get out on the internet. I set one up and logged onto it with my laptop, or my iPhone, to access the HTML page. I set two others up to create their own LAN. One broadcast an SSID and waited to display a web page. The other connected to the LAN, accessed the web page and turned on, or off, an LED. I really understood these little devices.

I recently opened up a little box and found the devices inside. I thought I should revisit them. Uh, I had programmed them with the FTDI device with one of my Raspberry Pis. I had updated the Raspbian and didn’t save the old personal files. Bonkers!

I am going to have to learn all over again. I don’t know of a way to use the Arduino IDE to pull the program back out of a chip into a sketch. (It might be possible, I haven’t checked.)

I got out the Sparkfun Thing and the Adafruit Huzzah that used to talk between each other and found the Sketches I had written. Some of the wires were missing so I had to rebuild. The Huzzah is put onto a mini breadboard and has an on/off button and a tactile switch. The Thing has an LED and a resistor. When you turn on the Thing and then the Huzzah, the Huzzah connects to the Thing. You can tell by looking at the Serial window on the Arduino IDE, or by looking at the little blue LED. The little blue LED will flash after the first initialization flash. When you press the button on the Huzzah, the LED on the Thing will light up. Press the Huzzah’s button and the Things’ LED will will go out. I know it is not much, but it was a learning experience for me.

While I was cleaning up things last year I put these things into a box. Uh Oh! They got forgotten. Luckily I was able to find the old Sketches to prick my memory. They are working fine for now.

Where was the documentation? I had written something about them on one of these pages. I didn’t cover much about them. That was my fault. Had I documented them and saved the sketches online I could have helped others learn and helped me from forgetting what I did at the time.

Super Awesome Sylvia reminded me the other day that you should document for sharing and teaching. Now, while it is still fresh in my mind, I have to document and post the code (sketch), what it means, and pictures of the devices and perhaps a schematic.

That is for tomorrow. I still have cleaning up to do. Liverpool FC is playing tonight at 10pm Pacific Coast time. That’s in an hour.

PEACE