Category Archives: Make

Oscilloscope repair

I am still working on the FPGA and WS2812b project and working on the blog post. I watched a video about getting them to work with a PIC and C code. To show the timing of his circuit he used an oscilloscope. Ian gave me one of the pocket sized ones for Christmas a couple of years ago. I got it out to test my FPGA code.

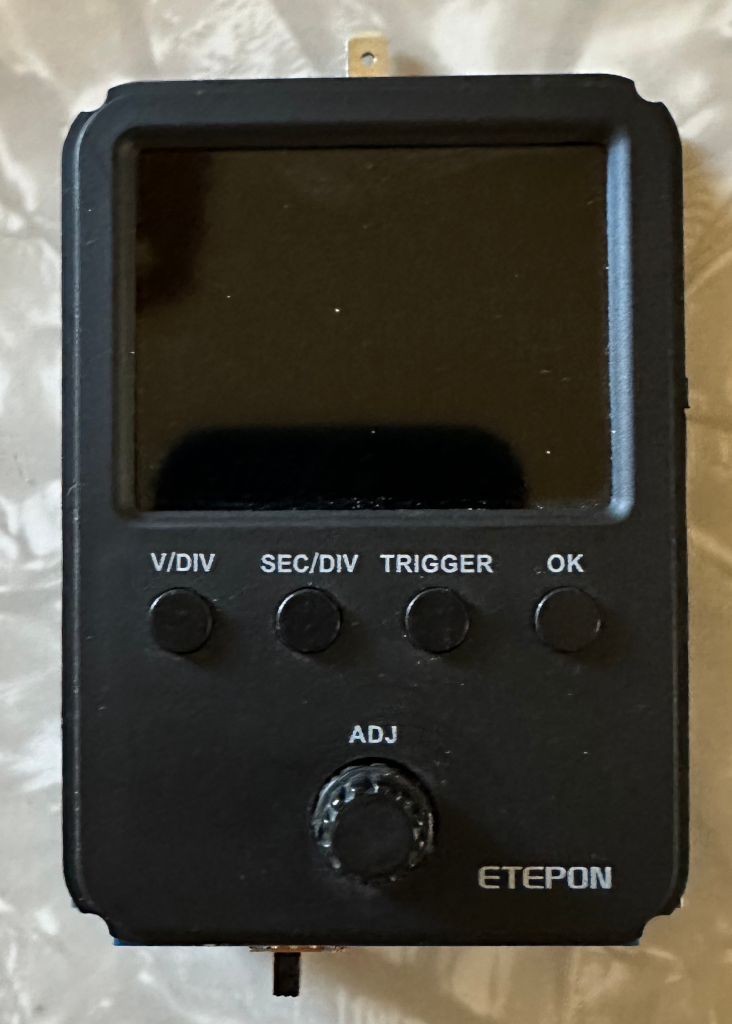
The oscilloscope didn’t work. It is an ETEPON pocket sized oscilloscope that runs on 9v. I decided to open it up and see what is wrong.

ETEPON Oscilloscope not working.
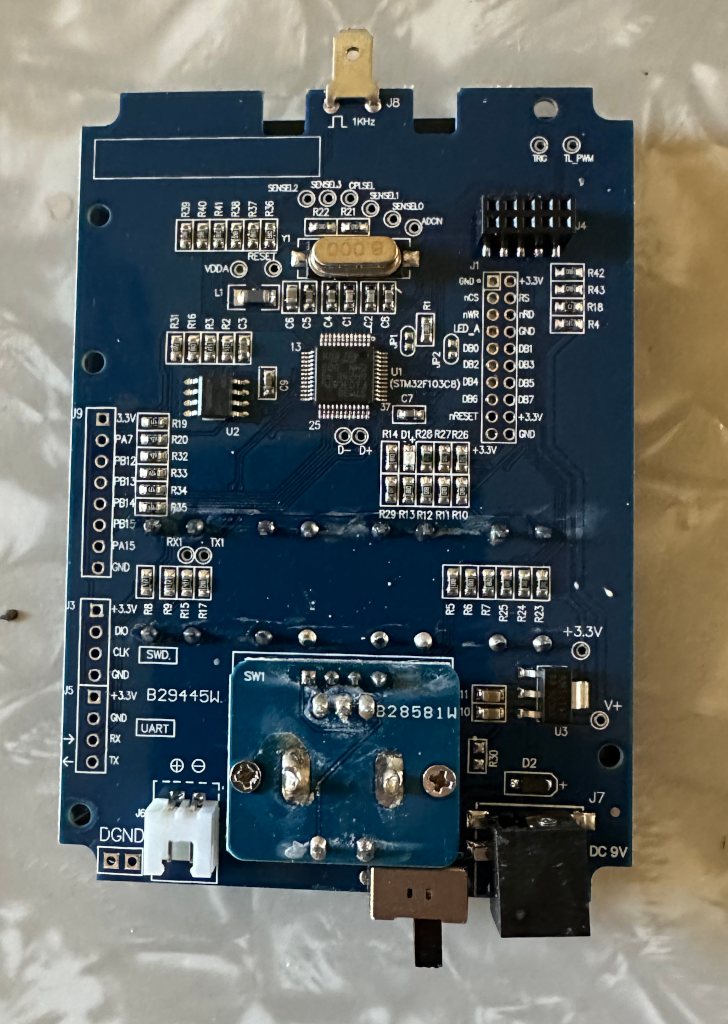
The main board of ETEPON Oscilloscope
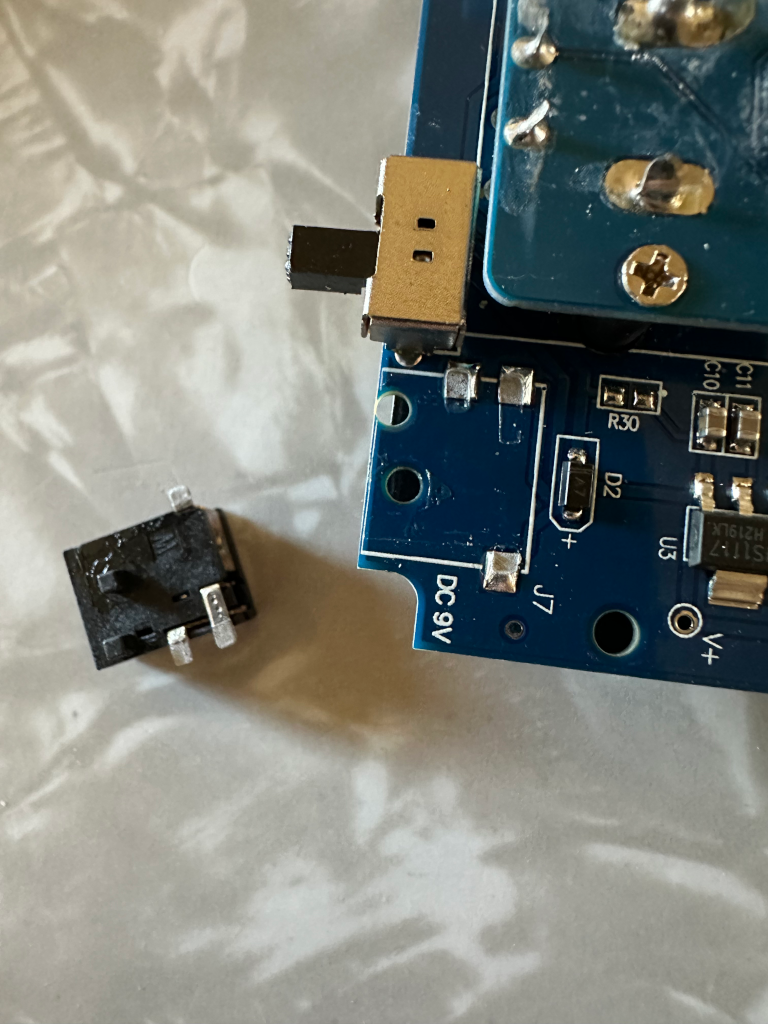
Power jack and main board. Notice the cold solder joint failure.

The power jack had come loose. Notice that the solder joints were cold joints. The tabs of the jack look powdery. It was an easy job to solder it back on.

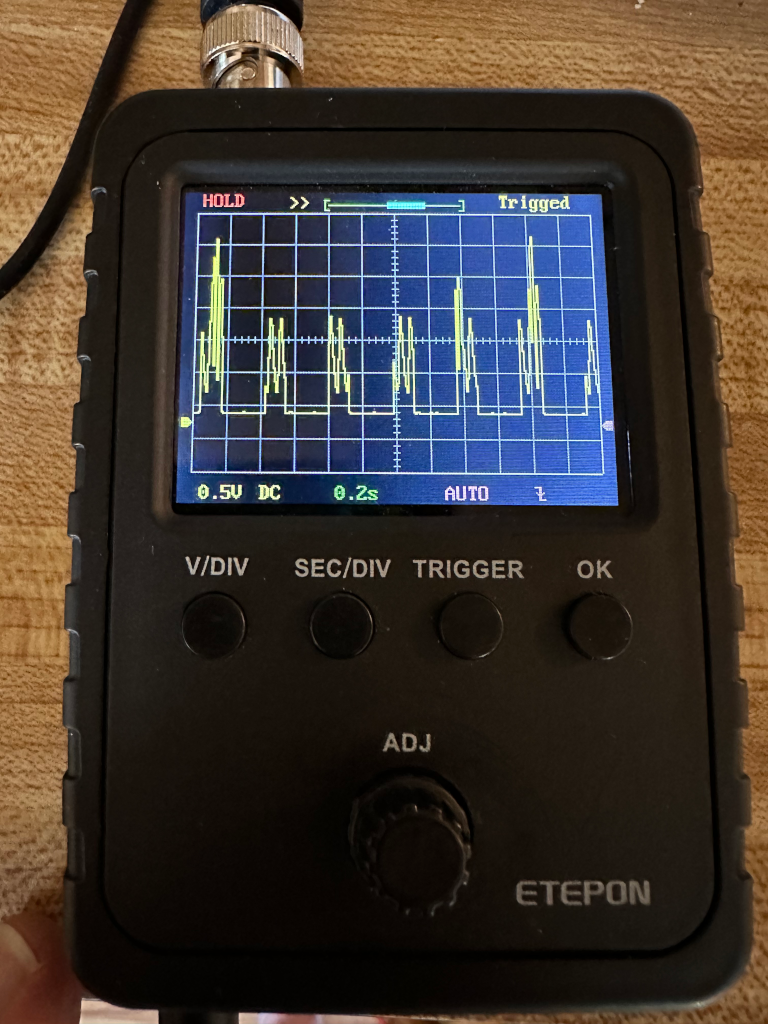
Working again!

Here it is working again. I am having to re-learn it, but fortunately that is not going to be difficult. There are only 5 buttons.

NeoPixel Purse

I finished the code for the purse I was working on. I included a push button on an Arduino Nano to cycle through the colors. There are 16 different choices. Eight of the choices are animations.

NeoPixel Purse

I believe I saw this design on Adafruit.com. I could not find it again on their site, nor could I find it by searching on Google.

I invented some code to go with this purse so Linda would be able to choose what she wanted it to look like at the time.

#include <Adafruit_NeoPixel.h>

#define PIN 9
#define BUTTON_PIN 2
#define number_of_pixels 34
// Parameter 1 = number of pixels in strip
// Parameter 2 = pin number (most are valid)
// Parameter 3 = pixel type flags, add together as needed:
Adafruit_NeoPixel strip = Adafruit_NeoPixel(number_of_pixels, PIN, NEO_GRB + NEO_KHZ800);

bool oldState = HIGH;
int showType = 0;
long time_counter = 0;
long increment = 25000;
int chase_position = 0;
int old_chase_position = 0;

void setup() {
  pinMode(BUTTON_PIN, INPUT_PULLUP);
  strip.begin();
  strip.setBrightness(15); // LOW brightness
  for (uint16_t i = 0; i < number_of_pixels; i++) {
       strip.setPixelColor(i, strip.Color(255,0,0));
      }
  strip.show();
}

void loop() {
    // Get current button state.
  bool newState = digitalRead(BUTTON_PIN);

  // Check if state changed from high to low (button press).
  if (newState == LOW && oldState == HIGH) {
    // Short delay to debounce button.
    delay(20);
    // Check if button is still low after debounce.
    newState = digitalRead(BUTTON_PIN);
    if (newState == LOW) {
      showType++;
      if (showType > 15)
        showType=0;
      startShow(showType);
    }
  }

  // Set the last button state to the old state.
  oldState = newState;

  if(time_counter == increment) {
    time_counter = 0;
    check_running(showType);
  }
  time_counter += 1;
}

// red purple blue white pink magenta green
// all theater chase
// rainbow cycle all at a time.
// rainbow chase like it already has but continuous

void startShow(int i) {
  switch(i){
    case 0: colorWipe(strip.Color(255, 0, 0));    // Red
            break;
    case 1: colorWipe(strip.Color(128, 0, 128));  // Purple
            break;
    case 2: colorWipe(strip.Color(0, 0, 255));  // Blue
            break;
    case 3: colorWipe(strip.Color(128, 128, 128));  // White
            break;
    case 4: colorWipe(strip.Color(255, 80, 80));  // Pink
            break;
    case 5: colorWipe(strip.Color(255, 0, 255));  // Magenta
            break;
    case 6: colorWipe(strip.Color(0, 128, 0));  // Green
            break;
    case 7: theaterChase2(strip.Color(255, 0, 0));    // Red
            break;
    case 8: theaterChase2(strip.Color(128, 0, 128));  // Purple
            break;
    case 9: theaterChase2(strip.Color(0, 0, 255));  // Blue
            break;
    case 10: theaterChase2(strip.Color(128, 128, 128)); // White
            break;
    case 11: theaterChase2(strip.Color(255, 128, 128));  // Pink
            break;
    case 12: theaterChase2(strip.Color(255, 0, 255));  // Magenta
            break;
    case 13: theaterChase2(strip.Color(0, 128, 0));  // Green
            break;
    case 14: rainbow1();
            break;
    case 15: rainbowCycle(1);
            break;
  }
}

void check_running(int i) {
  switch(i){
    case 0: break;
    case 1: break;
    case 2: break;
    case 3: break;
    case 4: break;
    case 5: break;
    case 6: break;
    case 7: theaterChase2(strip.Color(255, 0, 0));    // Red
            break;
    case 8: theaterChase2(strip.Color(128, 0, 128));  // Purple
            break;
    case 9: theaterChase2(strip.Color(0, 0, 255));  // Blue
            break;
    case 10: theaterChase2(strip.Color(128, 128, 128)); // White
            break;
    case 11: theaterChase2(strip.Color(255, 80, 80));  // Pink
            break;
    case 12: theaterChase2(strip.Color(255, 0, 255));  // Magenta
            break;
    case 13: theaterChase2(strip.Color(0, 128, 0));  // Green
            break;
    case 14: break;
    case 15: rainbowCycle(1);
            break;
  }
}

// Fill the LEDs with a color
void colorWipe(uint32_t c) {
  for(uint16_t i=0; i<strip.numPixels(); i++) {
    strip.setPixelColor(i, c);
    strip.show();
  }
}

void rainbow1() {
  for(uint16_t i=0; i< strip.numPixels(); i++) {
      strip.setPixelColor(i, Wheel((i * 256 / strip.numPixels()) & 255));
  }
    strip.show();
}

// Slightly different, this makes the rainbow equally distributed throughout
void rainbowCycle(uint8_t wait) {
  uint16_t i, j;
  j = 0;
  for(j=0; j<256*5; j++) { // 5 cycles of all colors on wheel
    for(i=0; i< strip.numPixels(); i++) {
      strip.setPixelColor(i, Wheel(((i * 256 / strip.numPixels()) + j) & 255));
    }
    strip.show();
    delay(wait);
  }
}

// Theater-style crawling lights -edited-
void theaterChase2(uint32_t c) {
  for (int i=0; i < strip.numPixels(); i=i+3) {
    strip.setPixelColor(i+old_chase_position, 0);
  }
  for (int i=0; i < strip.numPixels(); i=i+3) {
    strip.setPixelColor(i+chase_position, c);
  }
  strip.show();
  old_chase_position = chase_position;
  chase_position +=1;
  if (chase_position > 2) {
    chase_position = 0;
  }
}

// Input a value 0 to 255 to get a color value.
// The colours are a transition r - g - b - back to r.
uint32_t Wheel(byte WheelPos) {
  WheelPos = 255 - WheelPos;
  if(WheelPos < 85) {
    return strip.Color(255 - WheelPos * 3, 0, WheelPos * 3);
  }
  if(WheelPos < 170) {
    WheelPos -= 85;
    return strip.Color(0, WheelPos * 3, 255 - WheelPos * 3);
  }
  WheelPos -= 170;
  return strip.Color(WheelPos * 3, 255 - WheelPos * 3, 0);
}

I got the base code from the Arduino web site and changed it to do what I wanted. I didn’t like that the original code would cycle through animations and not allow you to select the next one until it was finished. I change that in the void loop() section by including a counter with an increment. When the counter meets the increment reset it to zero and go do the animation one more step. Mainly this is for the theater style crawling lights. If you want the lights to crawl faster make this number smaller. (I don’t mean in font size.)

Using an FTDI to program an ESP8266-01

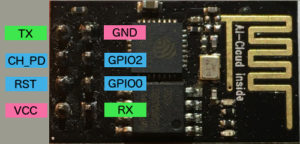
ESP8266-01 Pin Labels
It took me days to figure out how to program an ESP8266 with an FTDI connector. I finally got it figured out last night. I remember using an Arduino Uno to program them a little over a year ago. I’ll have to try that again sometime soon.
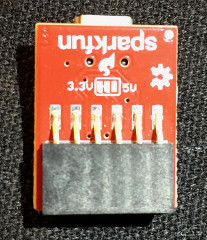
The two FTDI boards(? cards? devices?) that I have look different but, essentially, are the same. I have one 3.3v from Sparkfun.
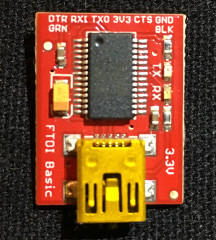
Sparkfun FTDI FrontSparkfun FTDI Back

On the back side it looks like you’d be able to solder a jumper wire across the little pads to make it either 3.3v or 5v. I am not sure and don’t feel like burning it up just to see.

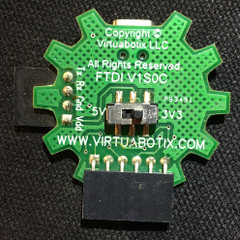
The second one is from Virtuabotix. It has a switch on the back side so you can choose either 3.3v or 5v. There are also two connectors that you can use, four pins or six pins.
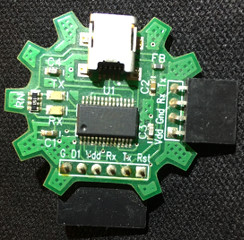
Virtuabotix FTDI FrontVirtuabotix FTDI Back

You actually only have to use four of the pins on the FTDI to program the ESP8266-01, voltage out (VDD or 3.3v), GND, RX, and TX.

I found it much easier to use a little homemade breadboard header while programming or just messing around with the ESP8266-01. The
ESP8266-01 by itself is not breadboard friendly. I ended up taking a row of header pins and cut them into 4 pin lengths. I then glued them together to make a 2×4 header row that I could plug the ESP8266-01 into. I bent the rows of the pins outward, away from the opposite side, and then back vertical so they would fit into a breadboard across that little trough that separates the two sides of the breadboard. You have to keep messing with the angles of the wires to get the pins into the correct position. It doesn’t take too awful much time to get it correct.

There are eight pins on the ESP8266-01. You only need to hook up six of the pins on the ESP8266-01 to four of the FTDI pins.

If you look closely you will notice on the Sparkfun FTDI the six pins are labeled GND, CTS, 3v3, TX0, RX1, and DTR. On the Virtuabotix FTDI the six pins are labeled G, D1, Vdd, Rx, Tx, and Rst. The second set of four pins on the Virtuabotix are labeled Vdd, Gnd, Rx, and Tx. We are going to use only four of the pins on the FTDI. The four pin connection on the Virtuabotix FTDI already has the only ones we need. The ones on the six pin connectors that we will use are ground (G or GND), voltage (3v3, or Vdd), receive (Rx or RX1) and transmit (Tx or TX0). You may have a board that has different pin labeling, but they should be the same and in the same order. That is, if the company followed the same building convention as these two companies.

Since you will need to use six of the pins on the ESP8266-01 and only four of the FTDI pins it is easier to use a breadboard. The pin wiring will be:
FTDI -> ESP8266-01
GND -> GND and GPIO0 (this is ground)
3v3 -> VCC and CH_PD (this is voltage)
RX -> RX
TX -> TX

Both the ground and voltage pins of the FTDI go to two pins on the ESP8266-01.

Once you have the two devices hooked together you can plug in the FTDI to your computer and upload a program to the ESP8266-01.

I used the Arduino IDE to program the ESP8266-01. I am familiar with the Arduino IDE so I use it.

Once you have the USB cable hooked up to your computer, in the Arduino IDE select Tools from the top menu. Select “Generic ESP8266 Module” for the Board. On version 1.6.5 of the Arduino IDE more options will show up under Tools. I have them set as the following:
Flash Mode: “DIO”
Flash Frequency: “40MHz”
Upload Using: “Serial”
CPU Frequency: “80MHz”
Flash Size: “512K (64K SPIFFS)”
Upload Speed; “115200”

For the Port you will need to select the port that your FTDI is using.

I modified the basic BLINK sketch to blink an LED for 1/10 of a second twice and half a second repeatedly. After you have the ESP8266-01 programmed you will need to disconnect the wiring for the FTDI. Then you will need to wire up the ESP8266-01 with battery + to VCC, and battery – to ground. I used two AA batteries for power. Also put a resistor from GPIO2 to an LED and the other leg of the LED to ground. There should also be a jumper between CH_PD and VCC so they both get power from the battery.

Here is a copy of the sketch that I modified slightly (you may use it and modify it):

/*
Blink
Turns on an LED on for one tenth of a second
then off for one tenth of a second
then on for one tenth of a second
then off for one tenth of a second
then on for half a second
then off for half of a second
repeatedly.

This example code is in the public domain.
*/

// Pin 13 has an LED connected on most Arduino boards.
// Pin 11 has the LED on Teensy 2.0
// Pin 6 has the LED on Teensy++ 2.0
// Pin 13 has the LED on Teensy 3.0
// Pin 2 for the ESP8266-01 and I put the LED on the breadboard
// for this device with a resistor to not burn out the LED.
// give it a name:
int led = 2;

// the setup routine runs once when you press reset:
void setup() {
// initialize the digital pin as an output.
pinMode(led, OUTPUT);
}

// the loop routine runs over and over again forever:
void loop() {
digitalWrite(led, HIGH); // turn the LED on (HIGH is the voltage level)
delay(100); // wait for a 1/4 second
digitalWrite(led, LOW); // turn the LED off by making the voltage LOW
delay(300); // wait for a 1/4 second
digitalWrite(led, HIGH);
delay(100);
digitalWrite(led, LOW);
delay(300);
digitalWrite(led, HIGH);
delay(500);
digitalWrite(led, LOW);
delay(500);
}

That’s about it for using an FTDI to program an ESP8266-01 using the Arduino software.

Re-learning, since I didn’t document.

I messed with ESP8266 devices a lot just over a year ago. Man, did I have fun. I got to where I could get one to log into my local network (LAN), or log in and get out on the internet. I set one up and logged onto it with my laptop, or my iPhone, to access the HTML page. I set two others up to create their own LAN. One broadcast an SSID and waited to display a web page. The other connected to the LAN, accessed the web page and turned on, or off, an LED. I really understood these little devices.

I recently opened up a little box and found the devices inside. I thought I should revisit them. Uh, I had programmed them with the FTDI device with one of my Raspberry Pis. I had updated the Raspbian and didn’t save the old personal files. Bonkers!

I am going to have to learn all over again. I don’t know of a way to use the Arduino IDE to pull the program back out of a chip into a sketch. (It might be possible, I haven’t checked.)

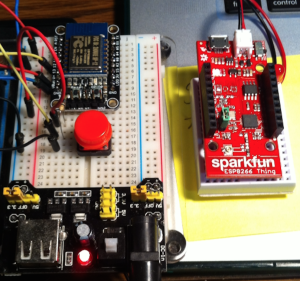
I got out the Sparkfun Thing and the Adafruit Huzzah that used to talk between each other and found the Sketches I had written. Some of the wires were missing so I had to rebuild. The Huzzah is put onto a mini breadboard and has an on/off button and a tactile switch. The Thing has an LED and a resistor. When you turn on the Thing and then the Huzzah, the Huzzah connects to the Thing. You can tell by looking at the Serial window on the Arduino IDE, or by looking at the little blue LED. The little blue LED will flash after the first initialization flash. When you press the button on the Huzzah, the LED on the Thing will light up. Press the Huzzah’s button and the Things’ LED will will go out. I know it is not much, but it was a learning experience for me.

While I was cleaning up things last year I put these things into a box. Uh Oh! They got forgotten. Luckily I was able to find the old Sketches to prick my memory. They are working fine for now.

Where was the documentation? I had written something about them on one of these pages. I didn’t cover much about them. That was my fault. Had I documented them and saved the sketches online I could have helped others learn and helped me from forgetting what I did at the time.

Super Awesome Sylvia reminded me the other day that you should document for sharing and teaching. Now, while it is still fresh in my mind, I have to document and post the code (sketch), what it means, and pictures of the devices and perhaps a schematic.

That is for tomorrow. I still have cleaning up to do. Liverpool FC is playing tonight at 10pm Pacific Coast time. That’s in an hour.

PEACE

Making More Things

I have many electronic projects in the works and desires right at the moment. I want to CharliePlex, or MultiPlex a Christmas tree with LEDs. That is the main project in my head at this time.
< < -XX-XX-XX- > >
LED Tree
On Orthodox Christmas night I finished the MultiPlex Christmas Tree. It works great. Over the next couple of days I changed the Arduino to a Pro Mini and put it into a tiny round cheese box. I put Christmas Wrap around it and cotton balls for snow.

The programming has six or so different patterns that the LEDs use. I cut a USB cable so I could use the type-A end for power and soldered the cut end onto the Pro Mini. I just might make some more to sell next Fall for Christmas. I still have to come up with a price. Parts are about $10. There is a lot of time put into it. The programming is all done, so I only have to copy it onto the Arduino.

The video I took of the LED patterns is over 100MB. I have to change the movie to about 64MB to use on this site. I cut a bit of frames out and got it to about 47 megs.
ChristmasTree

I have also been playing with a 3x3x3 cube and a cheap TFT Touch screen. It has been too much fun.

:-/ For some silly reason I cannot upload an .m4v file. GoDaddy has is forbidden and I haven’t figured out the fix, yet. I’ll post this and get back to it later.
I was able to SFTP the .m4v into the media directory. It should not be this difficult.
Here is a little video of a test sketch on a cheap TFT TouchScreen for Arduino.
TFT TouchScreen

ESP8266 devices from Adafruit and Sparkfun

Learning and playing with the ESP8266

I went to the HackaDay SuperConference in San Francisco on November 14th and 15th of 2015.  What a fun event. They were having workshops.  One of the workshops was working with the ESP8266 unit.  It is a WiFi device that is about the size of a Quarter.  The one provided in the workshop is actually a redesign by Sparkfun.  It is the ESP8266 Thing.  I fell in love with it.  It is tiny and powerful.

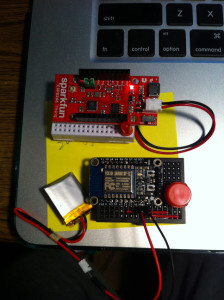
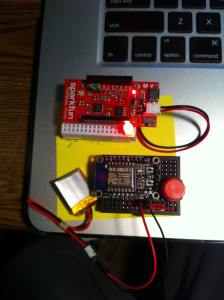
Two ESP8266 devices playing well together
Huzzah and the Thing

In the workshop we learned to make an LED blink and tested a button.  Then we set it up to connect to WiFi, next as an access point.  While it was connected to the internet we used a mobile device app called Blynk to control the Thing.  I started thinking, “what else can I do with it?”

Dark LED Lit LED

I took some more pictures after I put the little Huzzah onto a small breadboard and powered it with a LiPo battery.  It works perfectly.

While there is still a lot for me to learn, I was able to complete the workshop Arduino sketches again at home.  I asked for help from one of the guys on hackaday.io who also took the workshop.  I was missing a pull down resistor.  When I put the resistor on the Thing I was back in business.

(I certainly wish my MacBook Pro would stop autocorrecting hackaday into lackaday.)

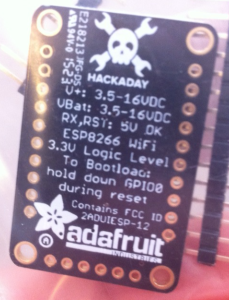
Right before the SuperConference I went online to the Hackaday store (haha, I selected Learn Spelling.  That should take care of it.) and saw that they sell an ESP8266 breakout board with the Hackaday logo printed on the bottom.  I was so excited that I ordered two.  I didn’t notice that there was also an Adafruit logo also on the bottom of the board.  Adafruit makes quality stuff and has great tutorials.

Hackaday Huzzah by Adafruit
Huzzah

Going further with the ESP8266

I decided that I wanted to be able to set up one board as an access point with its own LAN and not connected to the internet.  The second board would be set up as a client that would connect to the first one.  As a test I decided having an LED on the first (server) board, and the second would have a push button to turn on the light of the first board.  I know, it is not very spectacular, but it is a start to getting things connected and talking to each other.

Right now, after many failed attempts and finally success, the two boards will connect to each other.  The button on the client board will turn on the LED of the server board.  I even tried it from 60 feet away.  I was in the house and it is raining outside.  I don’t know how far apart these two things can be, but I will see in the near future.

What can I see that these two little guys are capable of?  Perhaps controlling an ATTiny85 chip with a speaker like that in the Hackaday instruction that causes it to cuss, or operating a servo remotely to control a camera or a robot, or even having it remotely control an electronic lock.

So far, I am able to get one to issue the commands and the other to respond.  That was my beginning goal.  Have one set up as an access point and no connection to the internet, and a second one that would connect to the first to be able to issue commands, such as turning on an LED with the push of a button.  I am easily impressed.

One trouble I was having with Adafruit’s Huzzah was that I was getting errors.  I did a bit of reading trying to get the lookup terms correct.  One of the sites ended up saying for the guy to contact Adafruit and they would set up a replacement because the board was probably bad.  I thought I might have toasted it when I was soldering on the pins.  Further reading on a different site said that the guy found out that the FTDI cable through USB wasn’t providing enough juice to run the board all the way.  So, getting it to work properly required external power.  I used power on a breadboard and had no more trouble.  I was going to power the Huzzah with a LiPoly battery anyway, so now I am set.

The thread that told me about the USB cable with FTDI maybe not providing enough power is here.  The person posting the query and the answer is Hapax Legemenon.  I was very happy to see this post and had success when trying it out with a separate power source.  No more errors.  The main error I was having was that the Huzzah kept rebooting every so many seconds.  Even though it didn’t cost very much, I didn’t want to have a broken toy.

In conclusion

I am having a lot of fun with these devices and the programming part.  I’ll be coming up with some ideas to include them in a mounted project that I can control from afar.

If there is interest I’ll post code when I get in here to edit this.  This is a long post for me and has been a long day.  And I want to test the connection again and make that LED turn on and off remotely before bed.

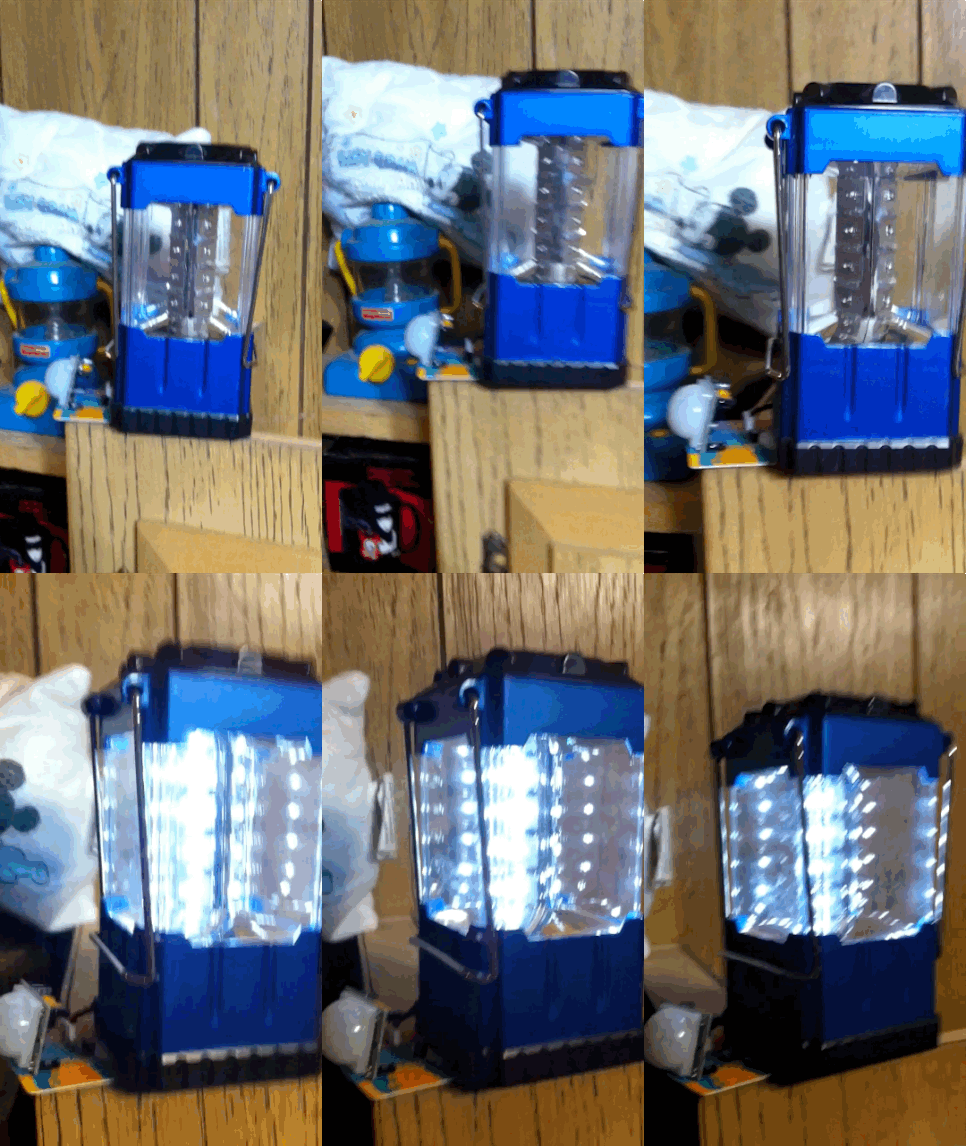
PIR and electric lantern

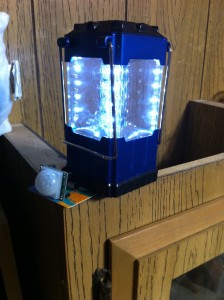
PIR and Lantern

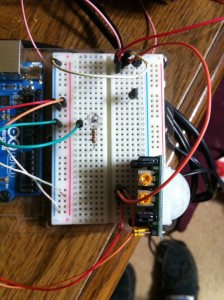
I wanted to be able to have an electric lantern turn on as I entered the room. I decided to use a PIR sensor (Pyroelectric (“passive”) InfraRed sensor) as the detector. First I had to use a breadboard and the parts to get it worked out.
IMG_6057 (1)
There is a second transistor on the breadboard as well as an LED and resistor. I didn’t use these in the project. They were left over from an Arduino project.

I am powering the PIR with 5v from a USB phone charger.  The three AAA batteries inside the lantern will light up the lantern’s LEDs.

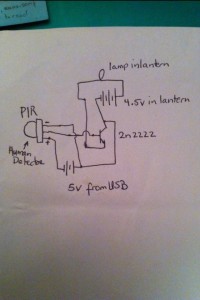
A PIR has three pins.  DC+ in, Output, and Ground (-).  I connected the Output pin to the Base of the transistor.  At first I used a 2n3904 transistor.  This worked will when I as just using an LED on the breadboard as the light.  When I hooked up the lantern there was too much power and it bled through.

I put a guitar pick between one of the batteries on the positive side and put wires from the battery and the post where it was to touch.  It was like adding a switch.  The 2n3904 didn’t stop the electricity from flowing.  I had a 2n2222 on hand and ready that it can handle about three times as much and the 2n3904.

The schematic ends up looking something like this picture.PIR project schematic

Perhaps I should be using a resistor between the PIR and the Base of the transistor.  So far the transistor doesn’t seem to get hot or mind.

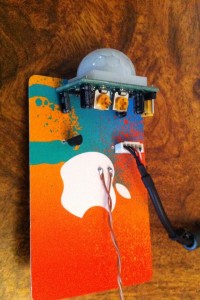
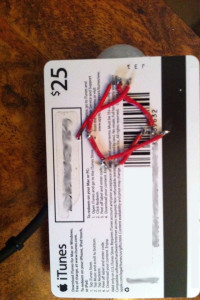
Once I had the design working I had to solder everything together. I could not find an electronics board with all the holes pre-drilled. I knew I have one somewhere. I decided to use an old iTunes gift card as the circuit board. I drilled holes in it for the PIR’s pins, as well as for the transistor. I used short jumper wires to create the wiring I wanted. To connect the DC + and – pins of the PIR I soldered short wires to them and poked the other ends up through holes drilled in the card. I used a USB cable taken from a broken mouse and plugged it in onto the exposed pins I just created. For the fires running to the lantern I soldered two wires to the collector and emitter of the transistor and poked the other ends up through the card. I then soldered longer wires to those newly created pins.

Gift card circuit board topGift card circuit board bottom

Now came the tricky part. I took a small piece of an expired credit card and glued aluminum foil on both sides. After the super glue was dry I checked to see that the foil was not touching from one side to the other. I soldered the two long wires to the aluminum, one per side. Now I had a separator that I would be able to use inside the battery case of the lantern. I removed one of the batteries from the lantern and put this little piece at the positive end of the battery while I reinserted the battery. I think using a copper clad circuit board would have been easier to work with. You know the kind I mean, copper on both sides so you can etch your own designs with some acid. I think the closest store that might have this in stock, on short notice, is about 45 miles away.

I read information about the PIR from Adafruit. (www.adafruit.com) I love the NeoPixel LEDs they sell.  They are easily programmed and are very bright.

PIR Lantern animated gif